
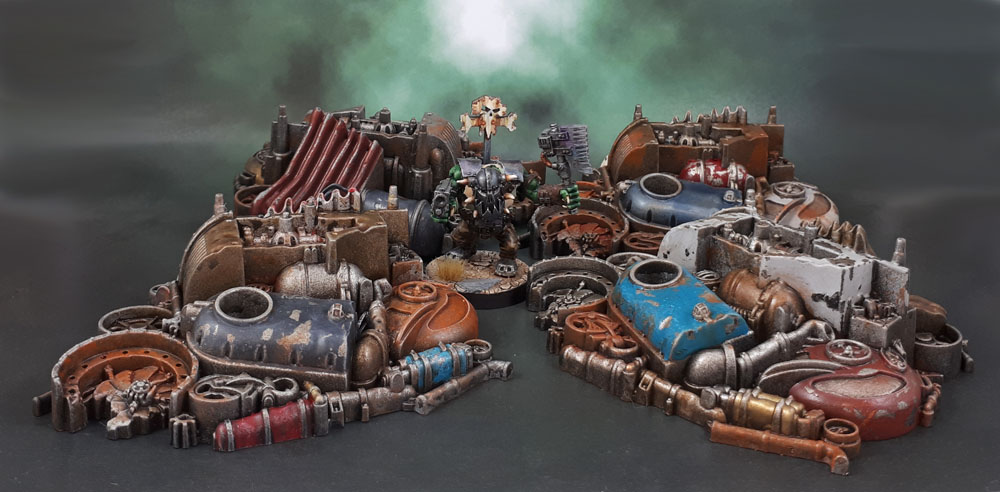
Today I have the next four sets of Scrap/Debris piles from the Speed Freeks/Mekboy Workshop sets. Same ethos as the ones I showed the other day – keep ’em interesting visually through use of colour and details – and most importantly – unique enough so that they can share a tabletop without looking like stamped clones.


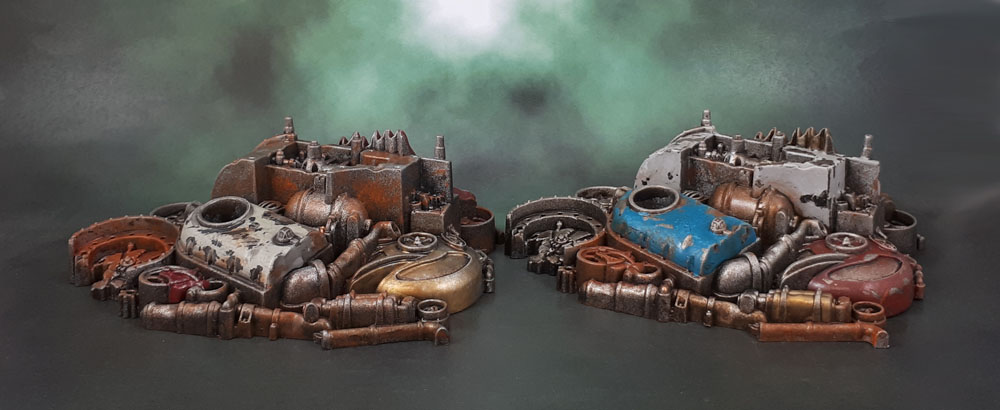
Both sides of this pair.
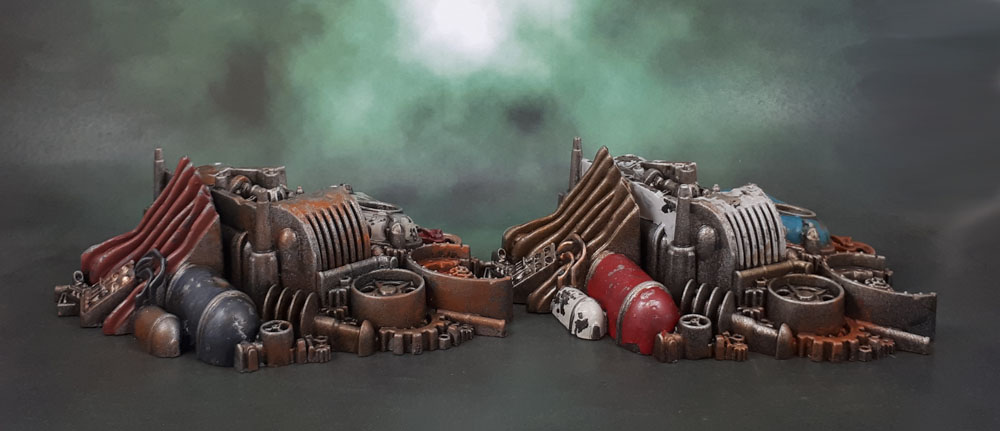
…and both sides of this pair.

Faust was asking about the paint chipping in the comments of the other post, and while it’s too late to do a proper tutorial on these (maybe on the walls in the future) I can still explain what I did to get the effect on these pieces.
- Spray Black
- Spray Dark Metallic
- Spray in an “iron” colour. Like silver, but not overly bright. I didn’t use Leadbelcher spray, but it would work perfectly for this.
- Drybrush the metal bits you’ll want to be extra shiny, post-chipping with silver.
- Heavy gloss varnish spray
- OPTIONAL: Paint over the bits you want to chip with PVA for more fragmented/crackled paint – I did this on some pieces but not on others.
- Mix Crackle Paint Medium with your chosen colour. It’s gloopy and thick and horrible. I used Greenstuff World’s medium. It’s probably the same with Vallejo or Jo Sonja or whoever else.
- Apply carefully over your chosen coloured area. Let Dry.
- Repeat 7-8 for all the colours you’re going to use on that piece, it just makes life easier later on.
- Shade and highlight those colours.
- Now the fun begins! Find something that’s not too sharp (I used a sculpting tool) and use some of the cracks to chip away at the paint. The extra-thick bits are also good. Pay extra attention to edges and dents in the sculpt, as places like that are more likely to have paint wear and chipping. Try not to gouge into the plastic, but even if you do it can be touched up. When you’re happy, stop.
- Weather, add rust (powders).
- Heavy gloss spray
- Matte Spray.
The first of the heavy gloss sprays is to protect the black and silver base from the fact that you’ll be gouging away on top shortly. The last one is because it’s scenery, and so is likely to be more roughly handled than your normal, nice models.
Hope this is useful! Since I’ve done most of the work writing it up, I’m sure I’ll be able to recycle the text with a photographically-illustrated tutorial down the line!

Good method–looks pretty realistic for flaked paint. Well done!
LikeLiked by 2 people
The secret is that is IS flaked paint! 😉
LikeLiked by 2 people
Yes I suppose so 😂
LikeLiked by 1 person
Cool, and thanks for the technique walk-through as well – looks great mate!
LikeLiked by 2 people
No probs Alex. I’ll do it up as a photo walkthrough later down the line, but I’m sure that description would be easy for someone as experienced as you if you wanted to try it.
LikeLiked by 1 person
Another fantastic looking set of four, the tutorial is very useful as well
LikeLiked by 1 person
Thank you Dave, and welcome!
LikeLike
Great job at differentiating the identical terrain pieces. The weathering is excellent too.
LikeLiked by 1 person
Cheers Thomas. Once I have the final four photographed, I’ll clean up the table again and lay them all out for a “proper” look at them in tabletop situation.
LikeLiked by 1 person
That’s some excellent work on the scrap piles: Kudos on not making things easy and just going for drybrushed silver all over — but then, I would have expected nothing less from you 😉
That’s also a pretty cool – and original – approach to chipped paint, and one that I would like to try myself on a future piece! Cheers for that!
I think the greatest part about these, as well as the Mekk workshop, is how they really work beyond Ork armies and scenarios and would fit every underhive/INQ28 table as well, as you’ve pointed out yourself — in fact, I have been eyeing that workshop kit for my own INQ28/Necromunda “Road Crew” project for a while now…
LikeLiked by 2 people
Thanks KS – yeah I thought they’d work really nicely across a lot of games. Sure, the tyres are a bit auto-oriented, but even sections of the Underhive would have heavy trucks, the odd cobbled-together cars and delivery vehicles of a sort. Battleships have forklifts on board, after all!
I’m looking forward to what you do with the chipped paint, not to mention the Mek Workshop kit!
LikeLiked by 1 person
Yeah, I hink there’s more than enough precedent for what are basically present-day cars in 40k, so the tyres aren’t a problem at all.
LikeLiked by 1 person
Yeah, the Design studio seems to have a bit of an obsession with tracked vehicles for everything. The Taurox being one of the worst offenders at looking incongruous with those silly track-sets – looking like a British Army armoured truck from the 1980s (a specific one, but I don’t know the name) crossed with a snow cat – but not in a good way!
LikeLike
Thankfully Forge World haven’t been nearly as bad! 🙂
LikeLike
The last lot were great but these really are impressive, maybe not surprising considering what you have to go through to get that worn/flaky paint look!
LikeLiked by 1 person
Thanks John. Hopefully you like the next set just as much!
LikeLiked by 1 person
Looking great, thanks for the instructions 👍
LikeLiked by 1 person
Welcome mate – let me know if you use them on something. 🙂
LikeLike
Another nice lot there! I’ve fiddled around a bit with trying to use crackle paints for chipping, but I think I always did it on spots that were too small. I’ll maybe give it another go at some point here.
LikeLiked by 1 person
From my (admittedly limited) experience, it’s also important to put the stuff on WAY thicker than you would think is sensible in any normal situation. Having the layer of PVA underneath also makes a big difference, though the gloss also works (not to mention both gloss and PVA). Either way you definitely need something clear and protective between the “under-paint” and the stuff you want to chip off.
LikeLiked by 1 person
Great work- thanks for the step by step too.
Cheers,
Pete.
LikeLiked by 1 person
Most welcome, Pete!
LikeLiked by 1 person
Thanks for the step-by-steps on this – they’re invaluable! I’ve got some crackle medium on order right now based on your work here.
LikeLiked by 1 person
Well, that’s certainly a big compliment. I can’t wait to see what you do with it!
LikeLike
Another great looking pile of garbage! Funny how cool stuff like this is to mini-wargamers. I was working on terrain the other night and the toddler comes in, and I had to explain WHY I’m painting something, and then making it ugly. She just giggled, but anyone else would remain stuck in the WHY phase.
Thanks for the tutorial too. I haven’t seen a really good tutorial for rusted out terrain, Apoc/Necromunda style. I’ve certainly seen some great example pics. I’m sure it’s out there, but so far not much luck finding something on my end. I’m not saying you need to make one, as you have tons on your plate.
LikeLiked by 1 person
Heh, I don’t even think about it (why we make stuff look worn and ugly). I guess an easy go-to answer would be “to make it look realistic”!
Rusted out terrain of a couple of different types is something on my list to do. If you’ve got any example pics, I can certainly give you my best guesses on how I’d try to achieve the same sort of thing?
LikeLiked by 1 person
Thanks man, tried finding a good example, but my googlefu failed. I’ll let you know if I do find something. Or if I get some terrain finished and posted this month, you can feel free to offer some advice! 😉
LikeLiked by 1 person
No probs at all!
LikeLiked by 1 person
Loving the weathering on these, and a nice write up to boot.
LikeLiked by 1 person
Thank you, Mark!
LikeLiked by 1 person