

Today I have the third and final set of four scrap piles from the Speed Freeks/Mek Workshop set. I’ve still got the walls (four sets of three) as well as the Mek Workshop itself to do, but the walls vary between sprayed metallic across to still needing to be cleaned up, and nobody ain’t got time for that shit right now. I’ll do it when I go back to work to make lunchtimes and meetings more bearable. Same deal with the Ryza Ruins which will soon be bolstered with that new Kill Team stuff.
The techniques are identical to the previous two sets, posted recently. I’d hoped to get these posted up yesterday, but by the time I got the table cleared of the class of 2018, it was 9pm, I hadn’t eaten a meal since breakfast, and I was generally not in the right mood to photograph, photo edit or write a post. So you get ’em today, instead!
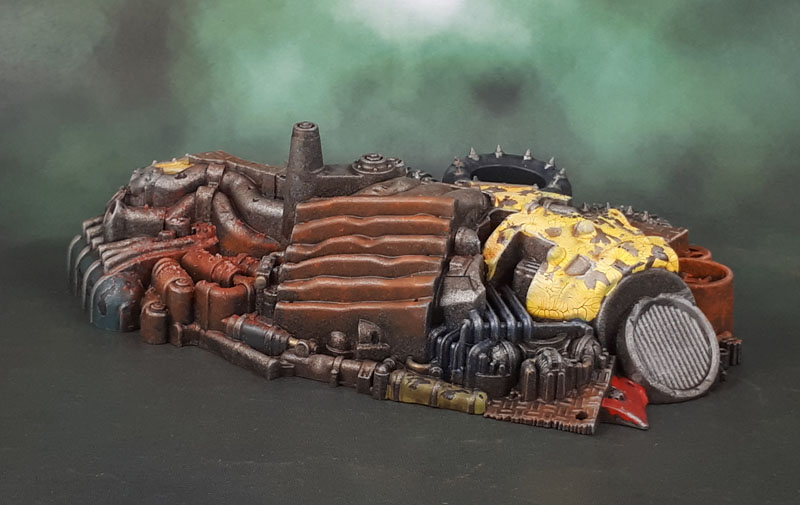
Unlike the other two sizes of debris piles, these ones are too large to fit two of them into my light box – hence all of the single pics.
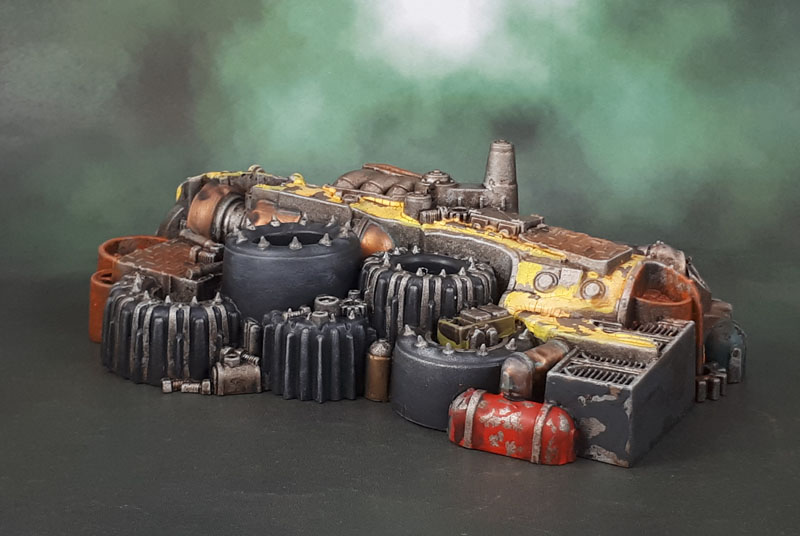
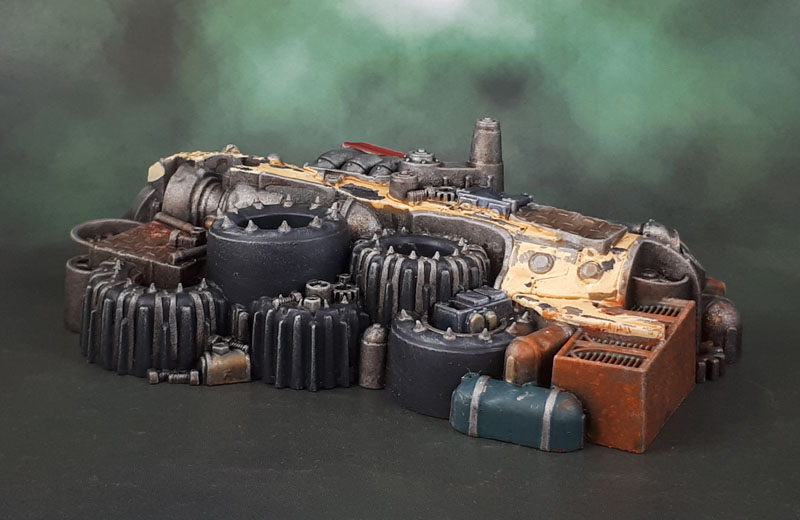
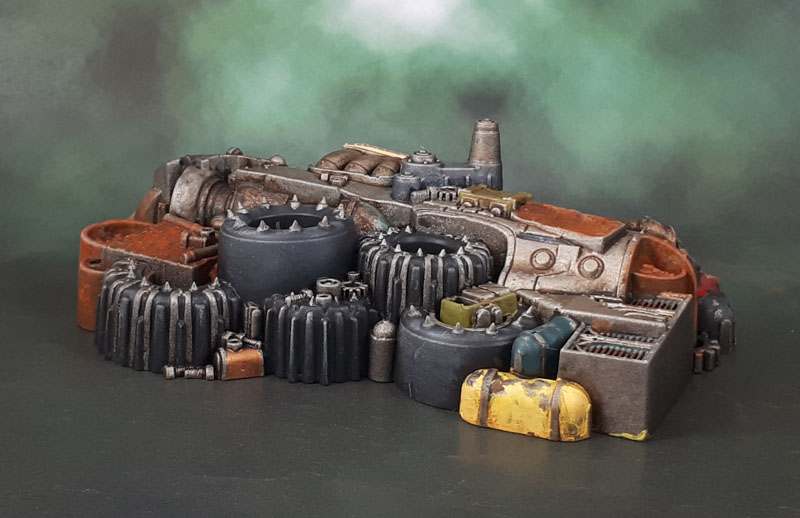
Those piles of tyres get a bit repetitive, don’t they? This shot is really a great example of the drawbacks of GW’s plastic moulding tech and the lack of undercuts. It also really illustrates how these pieces are designed to be viewed from above – that “looking down on the models” or “God’s-Eye” perspective that we have as players.
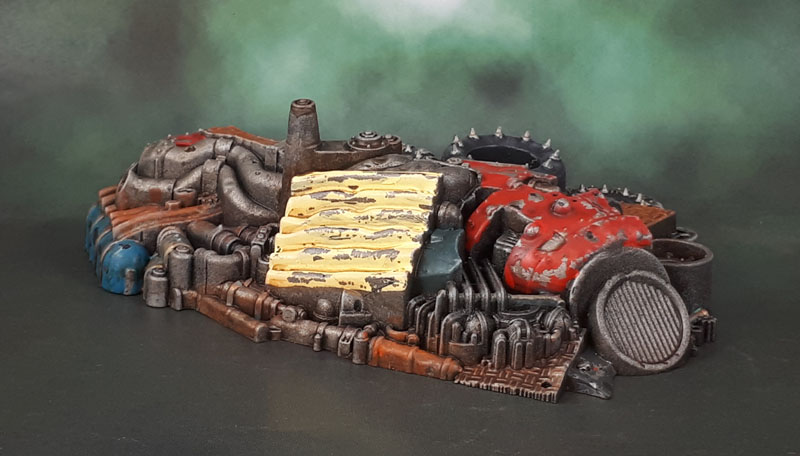
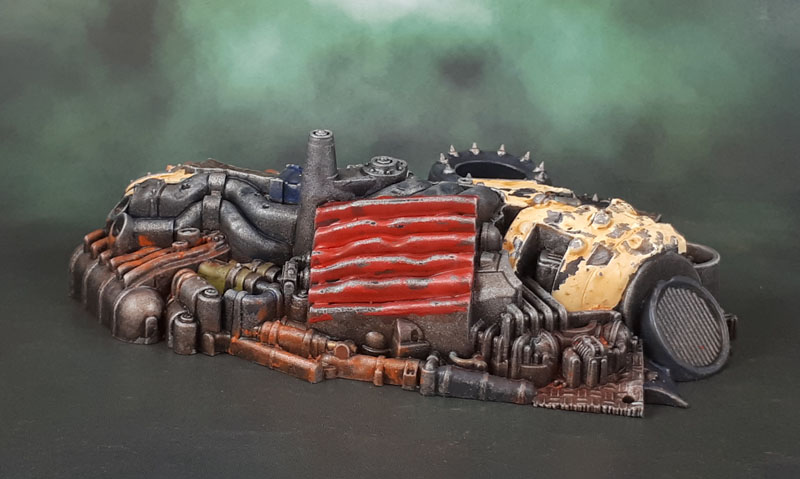
Here’s another chipped paint close-up to go with the header pic.

It ain’t so pretty close up. Which I guess is kinda the point, so it’s all good.
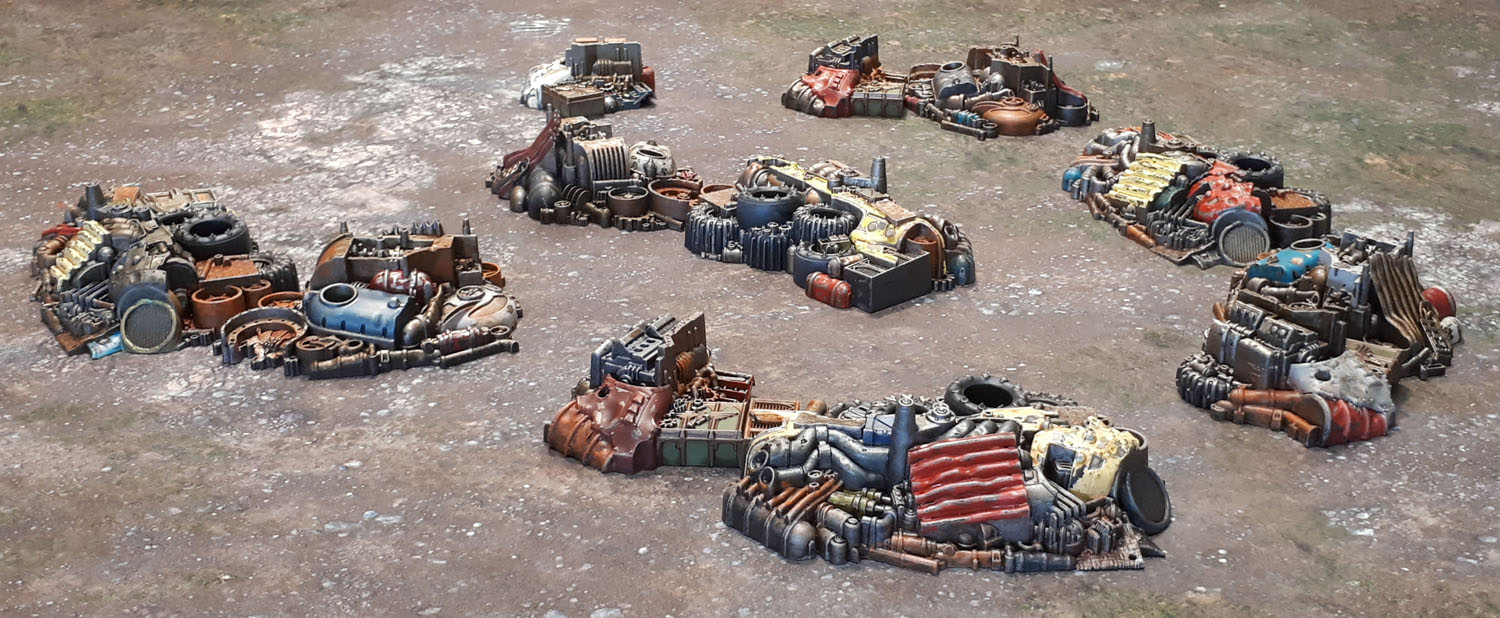
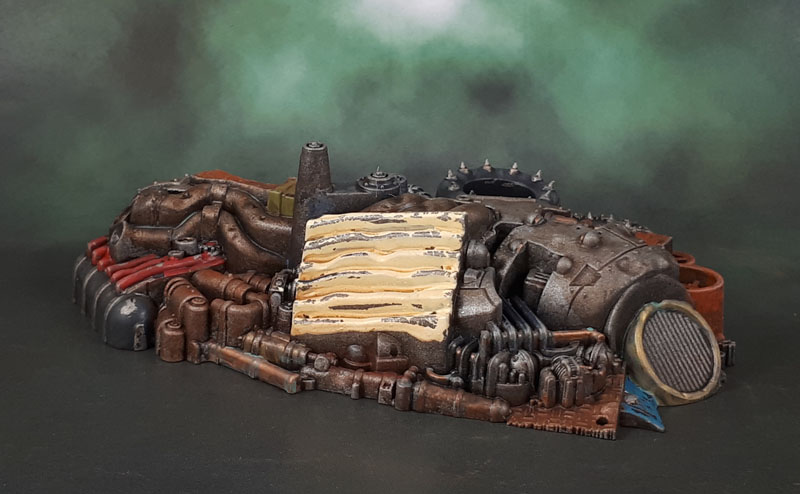
Here they are all laid out on a section of a wargame table.I’m happy with how they look – not too repetitive at all, considering we have only three sculpts of debris there. The orientation and paint disguise the repetitiveness rather nicely, I think.
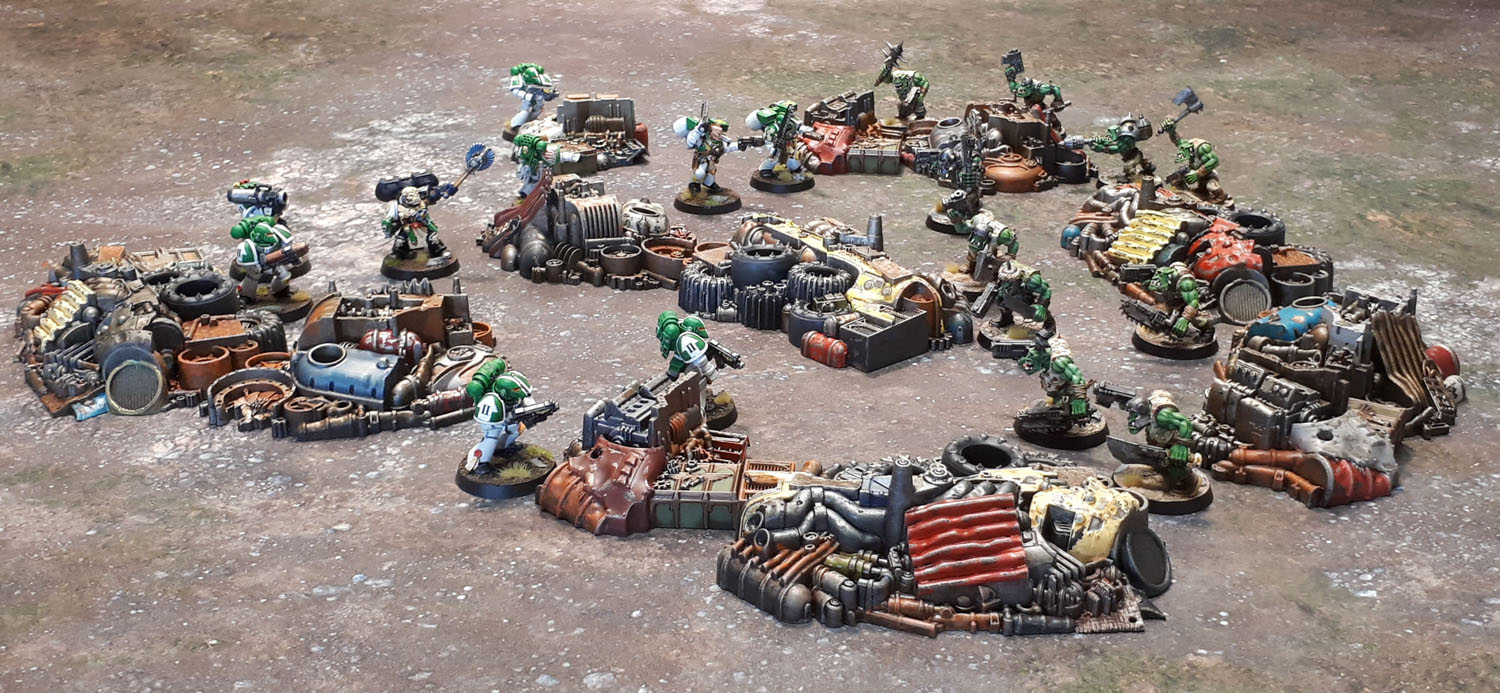
And with a simulated battle between two Kill-Teams, fighting over the important tech located amongst the scrapheaps. When combined with other terrain on a real table, I think this stuff will look pretty bloody good, if I don’t say so myself!
That’s it for now for these. I’ll get onto the walls and the actual Mek Workshop in a month or two. No time for cleaning the mould lines off that crap right now, and way too much still to do!

Now that’s a job well done mate – nice one dude!
LikeLiked by 1 person
Thanks Alex. Onto Part 2 of those kits (a bit later).
LikeLiked by 1 person
Brilliant! I am only going to get the opportunity to say this once about anything you have painted, but it all looks complete and utter scrap! In this context that is a compliment, definitely – I can’t even paint me proper stuff that well!
LikeLiked by 1 person
Not to worry, John – there’s still the walls, and I’ve got another two dumpsters as well, so you’ll be able to get back to it soon enough. And the amount of damaged walls! Hoo-boy!
LikeLiked by 1 person
Crikey, you’ve banged them out. Great work!
LikeLiked by 1 person
Thanks mate!
LikeLike
More fantastic work on the terrain pieces! I love how the finished piles basically make half a table or more of skirmish terrain! Plus I now feel like an INQ28 game set in a scrapyard on some backwater planet would be rather cool. Just add some verticality (a couple of freight containers linked by walkways, an industrial crane,…), and you’re there!
LikeLiked by 1 person
Walkways, you say…?
Ahem. Yeah, they combine really nicely for a decent amount of table space – much like the Shardwrack Spines did once I got a couple of kits – and much like those, they’ll really come into their own when combined with a few other, theme-appropriate kits.
LikeLike
Oh crap! This is just rubbish. Like a big ol’ pile of junk.
Great job, mate. Especially at making each terrain piece unique.
LikeLiked by 2 people
Thanks mate – the way I see it is if you don’t look at it and immediately see a bunch of cloned terrain, then I’ve achieved what I set out to do.
LikeLiked by 2 people
Splendid- the ‘game’ shot definately looks the part.
Cheers,
Pete.
LikeLiked by 1 person
Thanks Pete. I should make *that* one of my 2019 Hobby Goals!
LikeLiked by 2 people
Looking good. As has been mentioned, good job mixing them up. This seems like the hardest lot to do that with, since there are only so many ways to paint tires (especially since Orks aren’t really the type to go in for whitewalls), and that stack of them really dominates that one side of the pile.
And yeah, I’ve noticed (and been annoyed by) the way that some GW stuff only really looks right from one angle, and from others, it’s all distorted because of the way it needed to work for the mold.
LikeLiked by 2 people
Yeah, I’m noticing it more and more on the newer bits of terrain. That skully-statue-thing from the Shadespire terrain is another example. It could just be that it’s more obvious now because GW is turning out more terrain kits than ever before now. Still, the new ones at least lack the “huge hole to nowhere” that some of their older terrain did…
LikeLiked by 1 person
The other place I really see it a lot is on Models with slung weapons. So often, there’s a big chunk in-between the strap and the body of the Model that’s a real pain to disguise with paint.
LikeLiked by 2 people
Ah ok, now I think I understand what Azazel was talking about. Basically when they extend parts of a model to make up for the depth. Which I don’t if what I just typed makes any sense. It looks like that central tire might be a good example, where it is much taller than it should be.
LikeLiked by 1 person
Yep. You can also see it on the pipes and (I think) shock absorbers on the left of the top two pics. They look fine in the one from above, but from the side, they’re clearly not cylinders.
LikeLiked by 1 person
I haven’t come across that all that much (yet) of the sling weapons & straps-type issue, but I’ve still been painting a lot of metals and such lately, so I know I’ve got something else to look forward(!) to when I get solidly into more of the plastics.
LikeLike
Yeah, exactly that sort of thing with the tyres and other parts. The tyres being the most obvious example of this practise.
LikeLike
Very nice work! I’d never considered these things as potential Kill Team scenery before, but of course it works really well. If 90s TV taught me anything, it’s that a scrapyard is an excellent location for shady alien murders/daemon summoning.
LikeLiked by 1 person
Yeah – you would obviously need more scenery and some variety. As KS suggested, a crane would look great, though I’d also love to find me a source of crushed cars to stack up…
LikeLiked by 1 person
Crushed cars? Just about any parent with a boy toddler should have a surplus of those! 😉
LikeLiked by 1 person
Haha, it’s just a matter of getting the scale right! And then the right type of cars – bloody excess of toy sports cars!
LikeLiked by 1 person
The Galvanic Servo-Haulers set would work really nicely as part of that.
LikeLiked by 1 person
Yeah, that’s one crane sorted pretty easily right there.
LikeLike
Fantastic work on these scrap piles, they all look great and you’ve disguised the lack of undercuts really well
LikeLiked by 1 person
Thanks Dave – they make a nice set, all together like that.
LikeLike
Well, some more great work from you there. They certainly look really good all spread out across the game mat like that, and it’s no easy feat making cloned chunks look different. I guess if someone really wanted to, they could throw in a few strips of plasticard. But you’re a talented enough painter that you’re able to pull it off with just the stock models.
LikeLiked by 1 person
Cheers Faust – you’re right of course on the “best” way to disguise their cloned-ness and lack of undercuts.
I guess I just consider that to be too much time/work/effort for me on this sort of piece (especially with this many of them to try and knock out) – so I try the middle ground of differentiating them with paint rather than just doing metal with rust but not the whole hog of adding additional plasticard details like you might see from someone like Krautscientist.
LikeLiked by 1 person
Very nice!
LikeLiked by 1 person
Thank you, mate!
LikeLike
so cool – would be great for any apocalyptic game.
LikeLiked by 1 person
That’s the plan! 👍
LikeLiked by 1 person
Tommy stole my joke 😡 haha. Great work Az-Man. The red really pops!
LikeLiked by 1 person
Cheers mate!
LikeLike