
As with the first piece of this Mechanicus Terrain, this piece served(serves?) as one of my initial tests – as does the one that will follow this, and the other three that are still WIP. I wasn’t so sure about this piece, so I decided to mount it on a base for extra stability – in this case, an old CD. I guess the drawback of the base is that the piece becomes that little bit less versatile, as it’s now a bit harder to stick on top of a larger piece. With my luck, it’d just get knocked off the table and end up shattering anyway!

The photos are a bit higher-contrast than IRL, as the base colour of the panels is a light, cream-toned off-white. I thought it’d look good with this as a base, and then given the whole “streaky grime” treatment with that Vallejo Wash, rather than going with the chipped paint look. This kind of “painted” look to the machinery and terrain obviously takes a lot longer than going with bare or rusted metal, so I’m not entirely sure how I will proceed in future once I get past the test pieces that have been started. I do like/prefer this kind of look, but the time investment is pretty huge by comparison. I’ve got one more piece done similarly to this one, with the “cracked/chipped paint” thing from the previous one happening as well, as well as another medium and two larger pieces still in the “metal” stage before I get to assembling any more of this stuff – so I guess I don’t have to worry about deciding too quickly now…

Looks great mate! I really like the ‘painted’ look – much more interesting than just treating it all as metal. Just out of interest, why did you feel it needed extra stability? I’m not familiar with the kit, but (maybe wrongly) assumed it was quite a robust thing?
LikeLiked by 2 people
Yeah, it probably didn’t need it, to be honest – but a combination of it being 4 segments glued together leaving a large hollow underside, and the fact that I was on a terrain basing kick at the time when I built it. I did the same with a couple of the other larger builds as well (and that resin ruined watchtower – and another AoS piece that I still haven’t completed)
LikeLiked by 1 person
I think that “painted” look works as well. Agree that it probably didn’t really need a base, but then again the base looks fine with it, and is a good use of an old CD.
LikeLiked by 1 person
Yeah, I think I’ll base some pieces and not base others. Especially if I want to start adding detritus and other junk to some of the bases.
LikeLiked by 1 person
I think that looks stunning, lovely worn finish to the piece, are these 28mm scale or “epic” by the way? Guess they would probably work in either.
Cheers Roger.
LikeLiked by 1 person
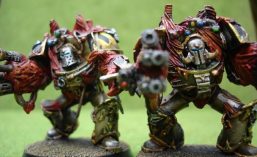
Thanks Roger. These are 28mm scale, but for these pieces without scale-identifying aspects like ladders, they could work across scales. I was thinking of the very same the other day when I realised that these could easily work in Gaslands.
LikeLike
Looks great- more ionteresting than plain metal (weathered or otherwise).
Cheers,
Pete.
LikeLiked by 1 person
Thanks Pete. I think I’ll end up doing quite a lot in the “painted” style.
LikeLiked by 1 person
I really like that stained paintwork look. Bummer that it takes so much more extra time and effort.
The CD base is unnecessary, by the way. I’ve got a couple of those, and I reckon it’d be easier to cut them apart then break them apart. It does make for a nice look, tho.
LikeLiked by 1 person
Thanks – hopefully the extra time will work out to be worthwhile once I get a few pieces in each of the colours I intend to use – and I’ll definitely need some in bare metal as well!
I reckon I’ll base some pieces and not base others. Probably just work by “feel” on that decision. The next two (large) pieces are already based, though!
LikeLike
Stunning work as I’ve come to expect on here. The cream colour weathering is especially good
LikeLiked by 1 person
Thanks Dave. I really liked the look of that scheme on GW’s showcase models, and it was easy enough to replicate as well, thankfully!
LikeLike
That looks really great, way better than plain metallic! Of course, it costs more time and effort, but thats always the case with nice things….
May I ask, how did you get that color?
Thanks in advance and keep up your great work (I sooooo envy your output… you’re the exact opposite of me….)
LikeLiked by 1 person
Thanks mate. The base coat was done with 72.098 Elfic Flesh from Vallejo Model Colour, then drybrushed with 72.101 Off White. Then varnished, then a overpaint of Vallejo Model Wash 73300 Sepia Shade, wipe off, then add streaks with the same.
LikeLike