
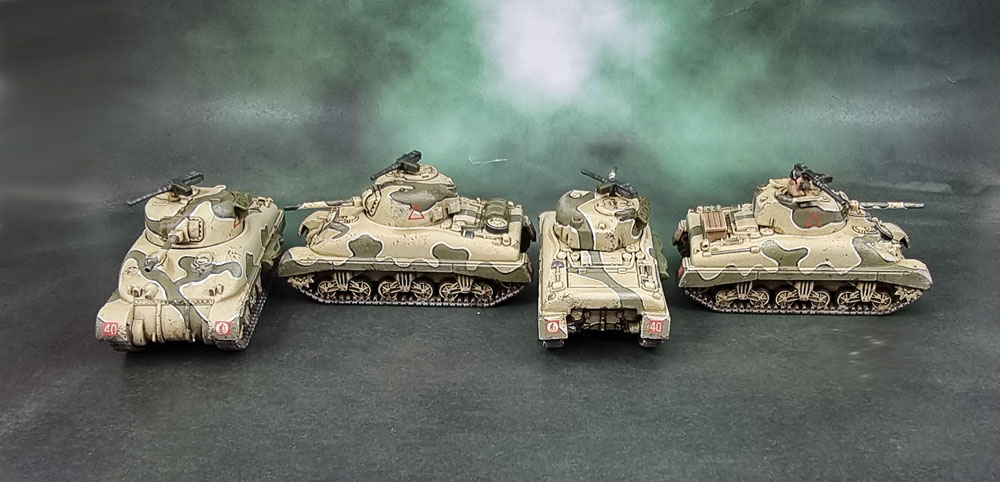
Well, at least September’s models were quick to get through – and now we’re doing October. So with a table-functional set of Panzers for my DAK force set up, my choices when planning to add those Panzers was to paint those models, then shove the whole lot back into a figure case and forget about them again for several years, or spend the time to build up an opposing force for the Afrika Korps to battle. As you can see, I went with the latter. The tanks I started with were two platoons (well, A Company HQ and one platoon) of the ubiquitous Sherman tanks that saw extensive use across many updates and variants with the Allies throughout the second half of the war.
I did a bit of a look around for how to paint these. As I’ve written before, as much as I like the look, going for a plain desert sand colour for my 8th Army force(s) isn’t the best option for models that will be facing off against a broadly similarly toned opposition with the Gelbbraun/Desert Yellow German forces.
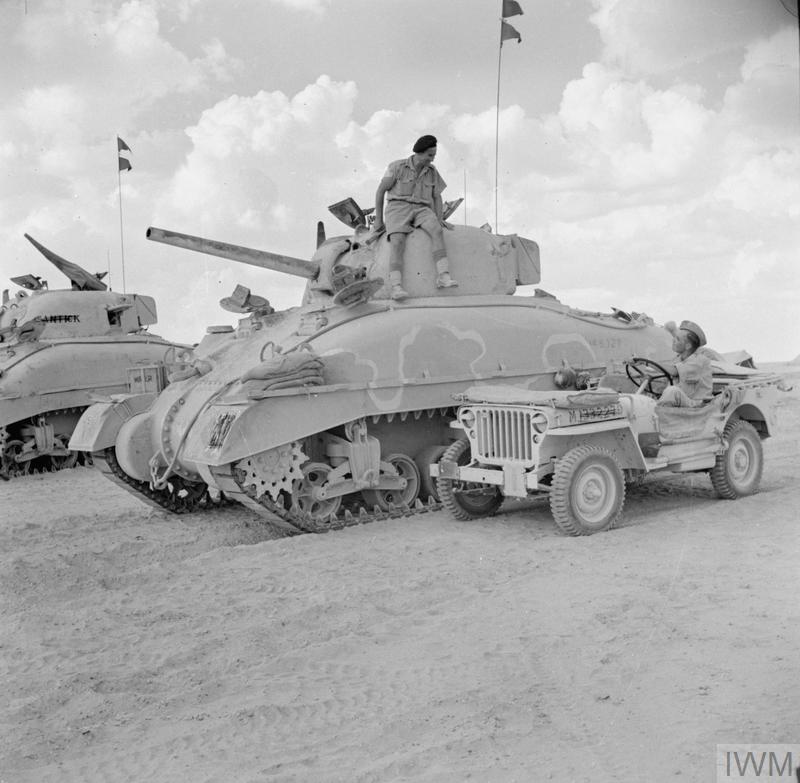
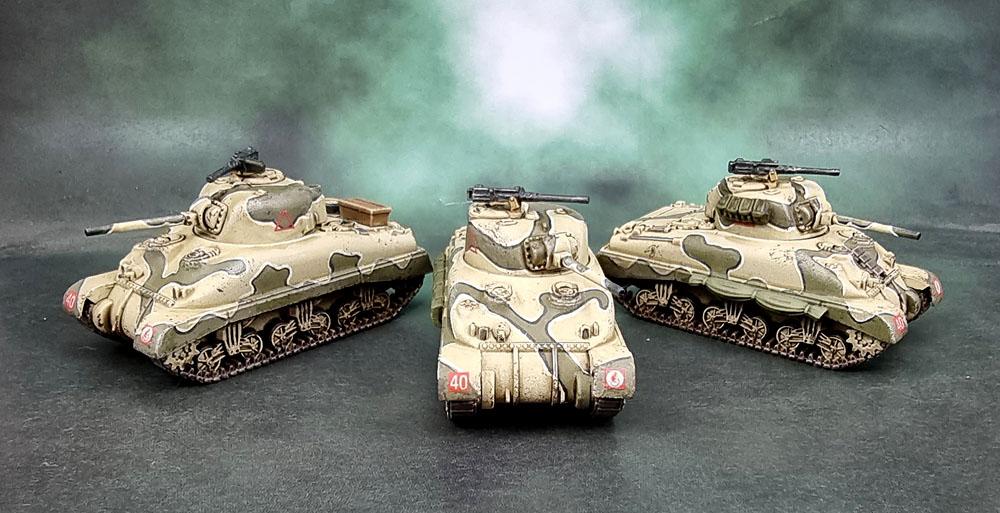
After quite a bit of looking at options and really being surprised at just how many different and varied camouflage schemes were used in The Desert War amongst different units and forces within the British and Commonwealth forces, I decided that I liked the look of this particular four-colour scheme. I wasn’t expecting how unpleasant the two-colour “lining” would be to actually paint over the course of a half-dozen tanks!
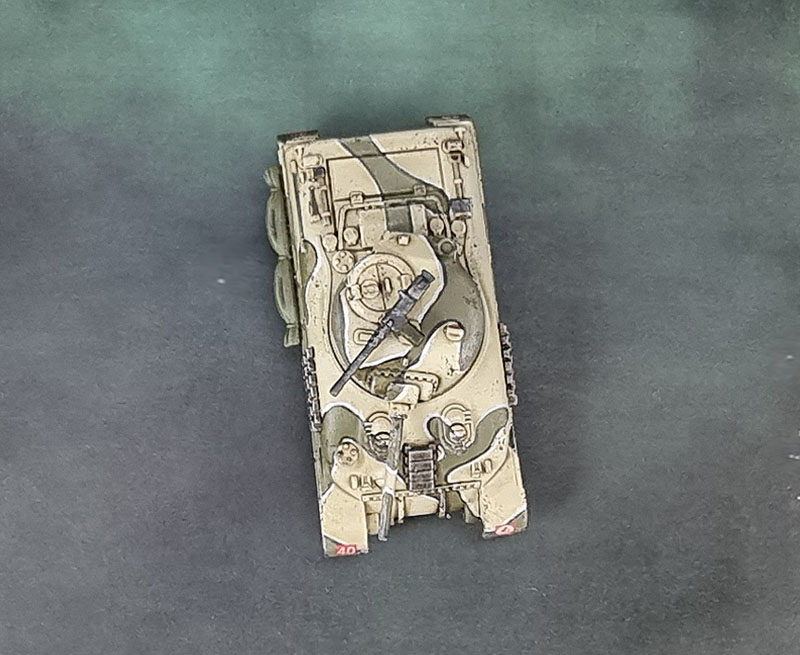
I thought it worth showing the different angles of the camouflage on the Shermans, including the overhead view.
Even though I’ve completed this batch of Shermans, I’ve now started building a third platoon to add on to these as opposed to my original plan of filling out the second platoon with a different type of tank. I now just need to complete adding the stowage and then I’ll be able to spray, and then start actually painting. So hopefully they’ll get painted in November?
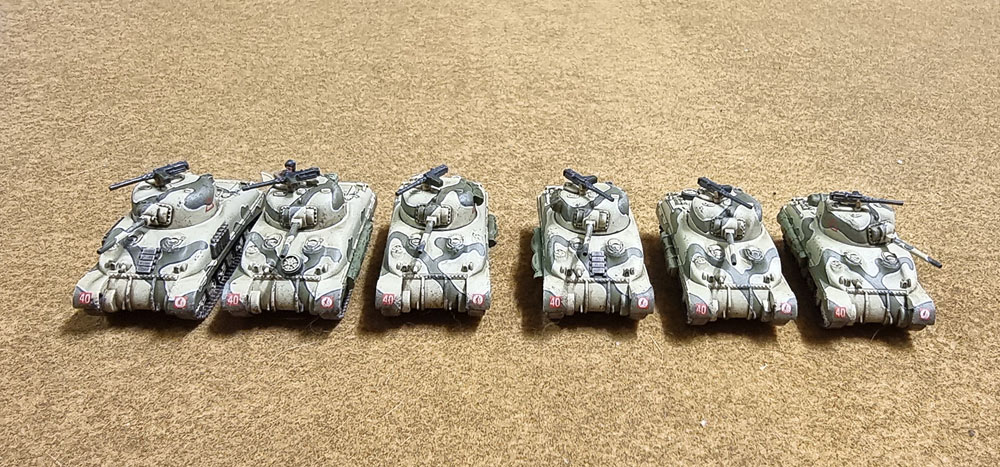
To finish – here’s the HQ and 1st platoon together – my first batch of completed British 8th Army forces. More to come! 😀

Excellent work on the shermans mate, quite a striking colour scheme, and rather you than me, with all the lining on the patterns.
LikeLiked by 4 people
Thanks Dave – yeah, the 8th army had some really weird and wild camo schemes. The Germans get all the love for vehicle camo, but really there’s a lot more out there that’s also visually interesting. 🙂
LikeLiked by 2 people
Well, these are just brilliant! 🙂 Really like ’em! M4A1s always look to me. Having painted WW2 French and Chinese tanks I can believe what you went through with lining the main colours in the scheme! Very nice!
LikeLiked by 4 people
Thanks John. I’m looking forward to getting the next three started and finished – just notsomuch the middle part between the two!
LikeLiked by 3 people
Excellent work mate, love this camo scheme!!
LikeLiked by 2 people
Thank you Alex!
LikeLiked by 3 people
Brilliant work, the Sherman’s look just like a colourized photo of the time would look. I’ve got 11 of my own to do for the same theatre, so I’m definitely taking notes!
LikeLiked by 4 people
Thanks mate! I’ve got a bit more to show (and more I’m still working on) for the Western Desert, so hopefully there will be something more to interest and/or inspire you. 🙂
LikeLiked by 4 people
Nice Az 👌🏽
LikeLiked by 2 people
Cheers, IRO!
LikeLiked by 1 person
Lovely work as always mate, the camo look great, I bottled out on mine years ago, and they are just “sand” 😀.
So kudos to you sir!
Cheers Roger.
LikeLiked by 4 people
Haha I don’t blame you at all, Roger – though honestly I think painting all these road wheels are even worse than the camoflague schemes. 😉
LikeLiked by 3 people
These are great, you’ve been turning out some cracking looking tanks lately.
LikeLiked by 4 people
Thanks Wudu – I appreciate it. A few more to come as well!
LikeLiked by 2 people
Great work on some more tanks, mate! The camo patterns really pop and make these stand out from some of the previous ones you’ve painted. You’re becoming a real pro at these things I would say 🙂
LikeLiked by 5 people
Thanks Kuribo! These British ones will be facing off against the (mostly) German ones I’ve been showing in most of the recent posts up until this post, so being able to tell them apart at a glance is a good thing! 🙂
LikeLiked by 2 people
Nice job indeed on the camouflage pattern. I can as you know relate to that challenge, and yes, road wheel painting is also less than enjoyable at times. Earlier war British Caunter scheme desert camo is really weird but fun to paint, but that is more appropriate for A9, A10, some Valentines and M3 Stuart tanks. The Crusaders had some weird schemes as well, so I’ve found that it also helped with tabletop ID. Of course, now you need some M3’s! Great work!
LikeLiked by 3 people
Thanks Mark. I’ve got the Honeys on the painting desk right now and did all of their road wheels this evening. 😡 I’m going for a post-Caunter time period with all of my models, and even though the Honeys would be one of the types of tank that could passably have “leftover” Caunter, I’m going for the much plainer look of the 4th NZ on them.
The Crusaders, on the other hand will be up in a couple of hours…
LikeLiked by 2 people
I think I tried on some models doing the road wheels prior to assembly – a lot easier, but not always possible. Of course, that part of the tank and the chassis underneath get the dirtiest, which I always took advantage of with pigments and mud. Looking forward to Crusaders – I, II, III? Always liked their look, but I wouldn’t want to be in one in combat vs. being in a Grant/Lee or Sherman.
LikeLiked by 2 people
That could be easier in some situations, but doing tanks in numbers I prefer to assemble then spray prime then go in rather than worry about sub-assemblies. I figure that the models represent working, deployed tanks so as long as they look alright, a bit of scuff or overpaint or extra wash just adds to them as long as no bare plastic/metal/resin is showing.
This batch of Crusaders are II, “CS” and III but I’m sure you’ve seen them by now. 🙂 We had a little game the other day – they’re fast and with a bit of luck they can actually take out a Panzer, but Marouda found out fairly quickly that their armour isn’t exactly up to scratch!
LikeLiked by 1 person
I love the camo effect on these. I’m no military expect but they look pretty sweet to me.
LikeLiked by 1 person
Thanks mate. I knew a reasonable amount about WWII but I’ve been certainly learning a lot more over the last few months!
LikeLiked by 1 person
Very nice- I really like how you’ve done the camo.
Cheers,
Pete.
LikeLiked by 1 person
Thanks Pete! Glad you like them, and hoping you also like the next ones…
LikeLike
As others have said, that’s a superb job on the camo! I can definitely see how you might not want to paint any more than six (!), but the effort has really paid off on these ones.
LikeLiked by 1 person
Thanks mate – I’ve almost fully assembled the three latecomers, but at least a batch of three shouldn’t be too horrible to paint.
Shouldn’t.
LikeLike
Excellent work on the cammo mate, I’m glad I didn’t have to paint all those lines!!
LikeLiked by 1 person
Thanks Pat – I now have three more of these on the desk I need to do to shore up the initial ones. If we get a cool weekend I may be able to steel myself to do those thin hull lines again!
LikeLiked by 1 person
Pingback: Battlefront 15mm M4A1 Sherman Armoured Squadron Reinforcements – British 8th Army Desert Rats for Flames of War | Azazel's Bitz Box.