
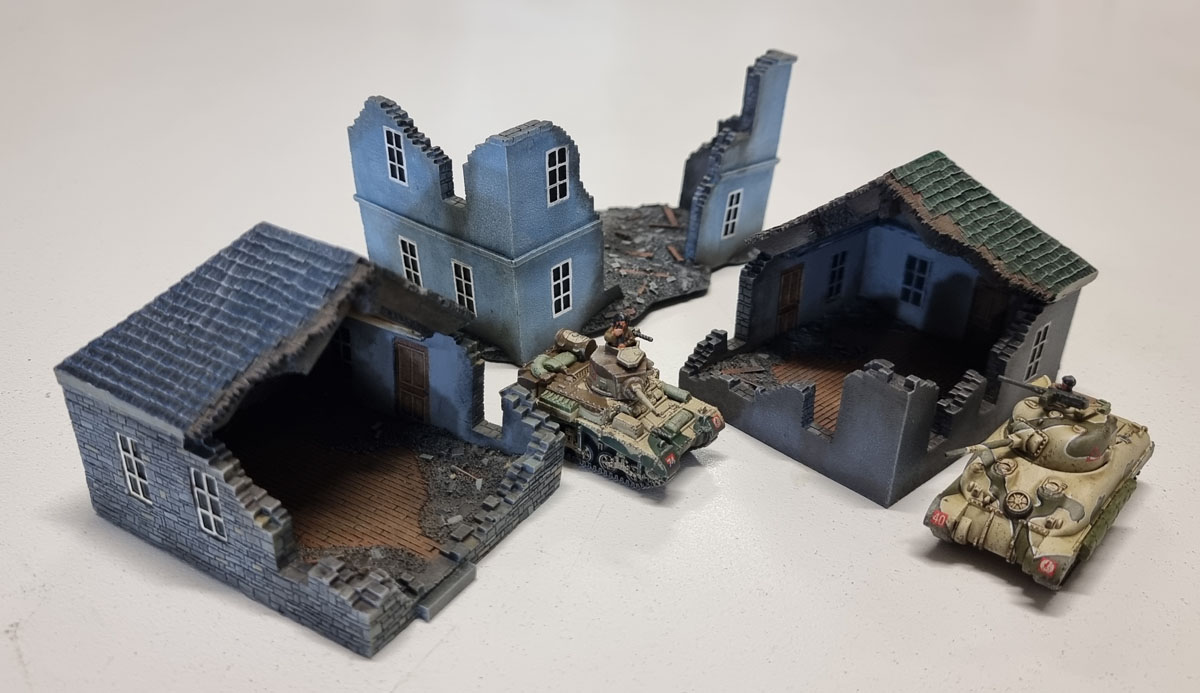
Nope, not a dupe, but you’d be forgiven if by the title you thought it was – I’ve simply finished the prettying-up of the second set of these things – as opposed to the full repaints in that previous post.
This time, I’ve mostly added weathering – a combination of dirt and grime as well as “scorch” marks (for want of a better term) to the Ruined Buildings rather than repainting – though there’s some of that here as well.

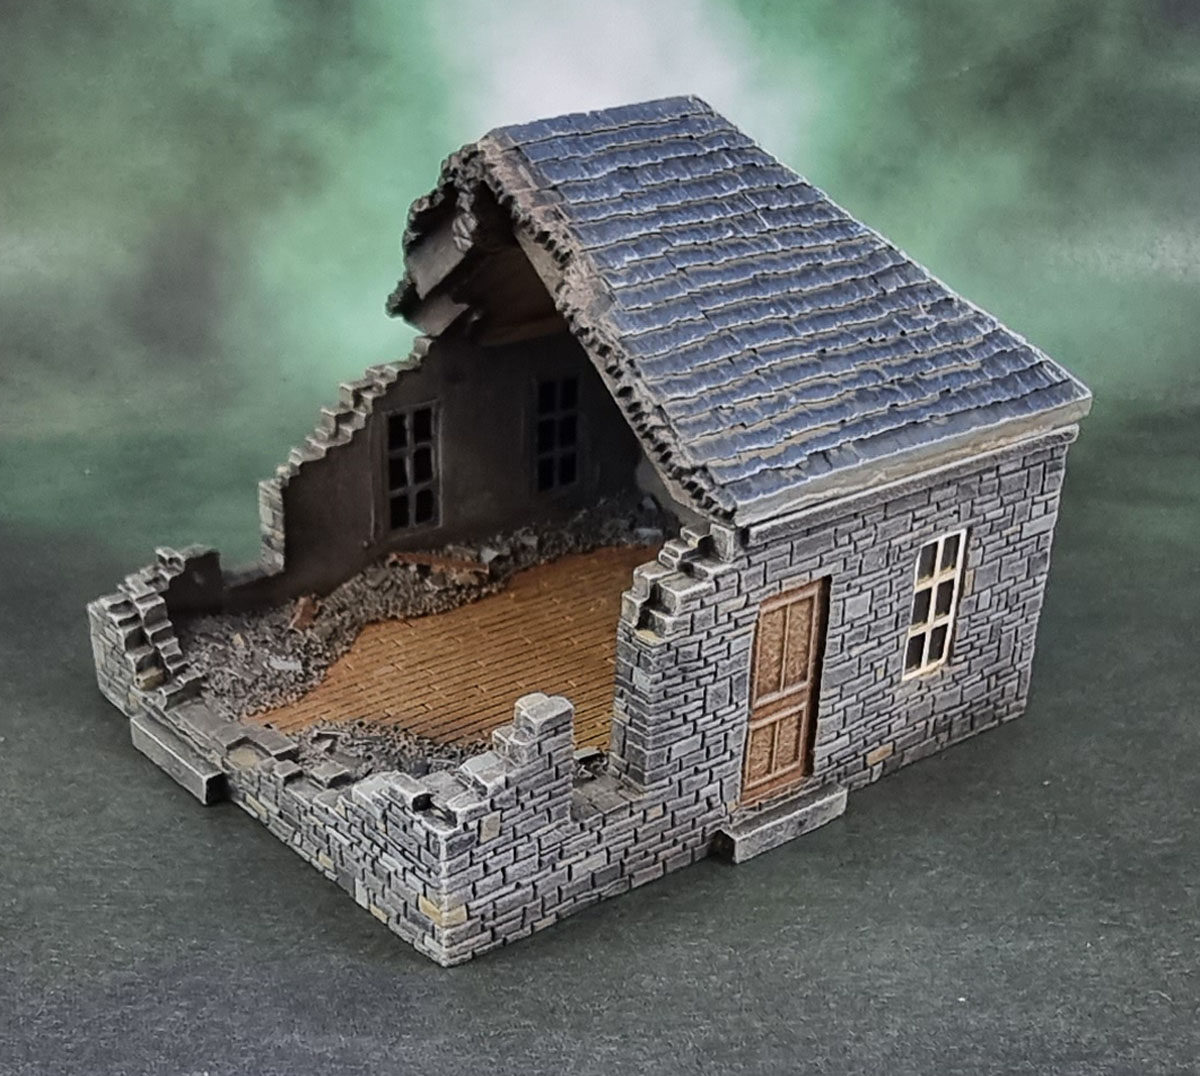
For example, I did repaint the doors on all of these as well as give them a wash & drybrush (and paint in the teeny widdle door handles!)
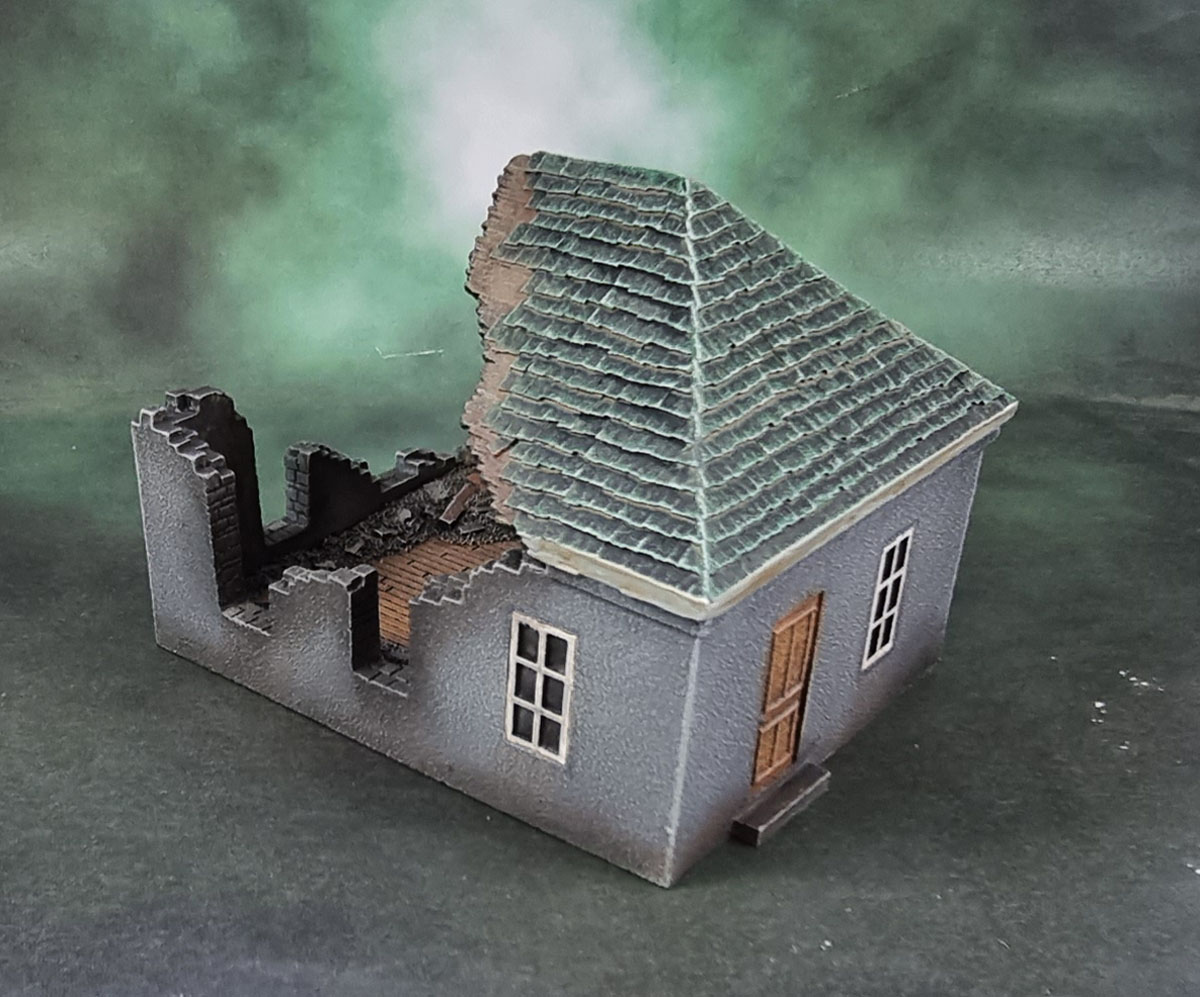
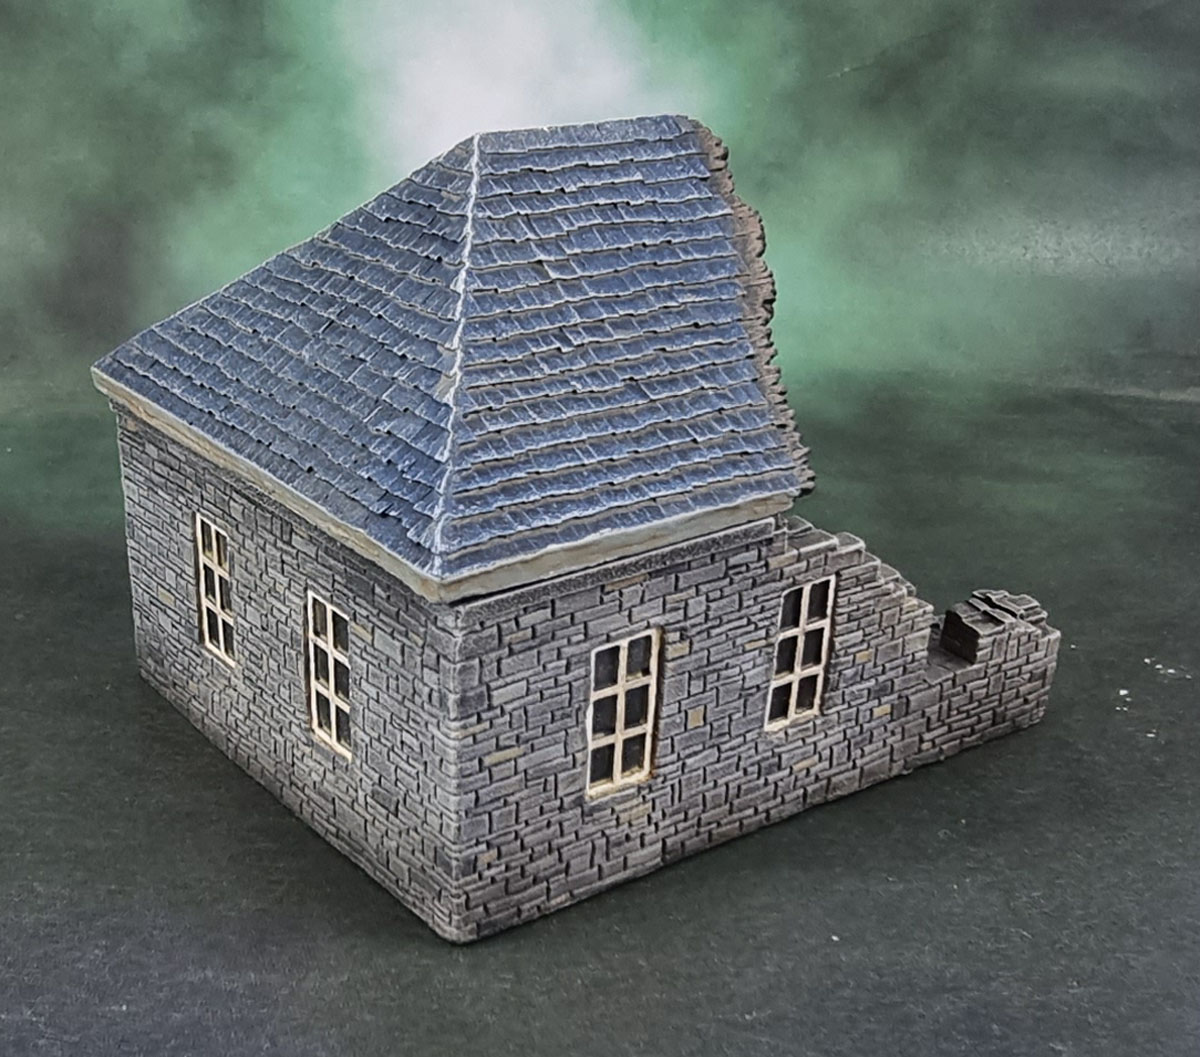
This stone building got a bit more effort, as I painted in slate/stones in a number of shades of grey across the whole thing, as well as adding in pale tan bricks to give a more natural variation.
Esentially the kind of changes your eyes would tend to not notice since they look pretty natural – which is why I have to point them out! 😀
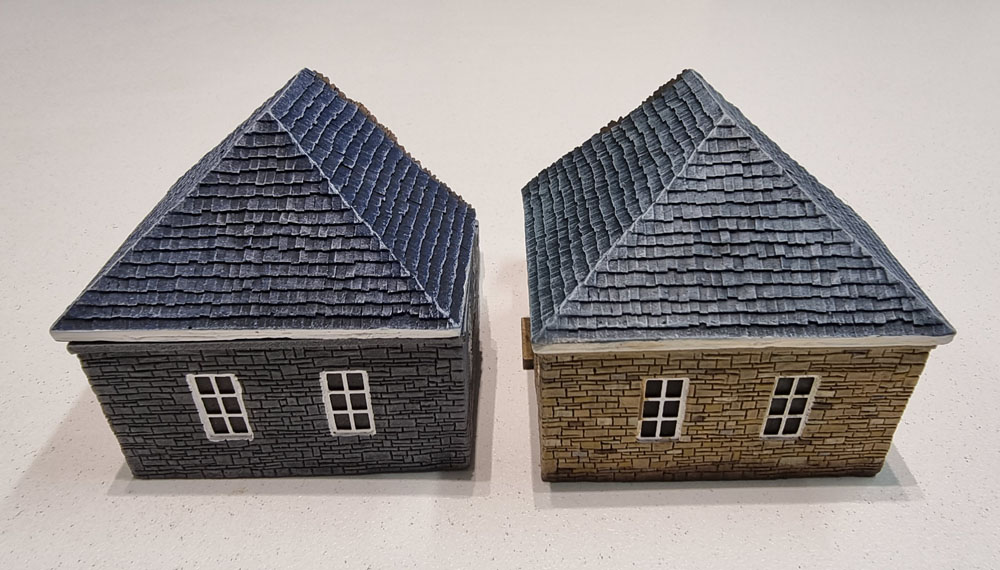
I’ll just drive the point home by adding in this pic of the grey building on the left (and the totally repainted sandstone variation) before I painted the different bricks in. See what a good boy I am!

I also added in paint on the ceilings as, in standard BFiaB fashion, they were a plain matte black. Washed and drybrushed the floors, picked out some of the debris.. yadda yadda, you get the idea.
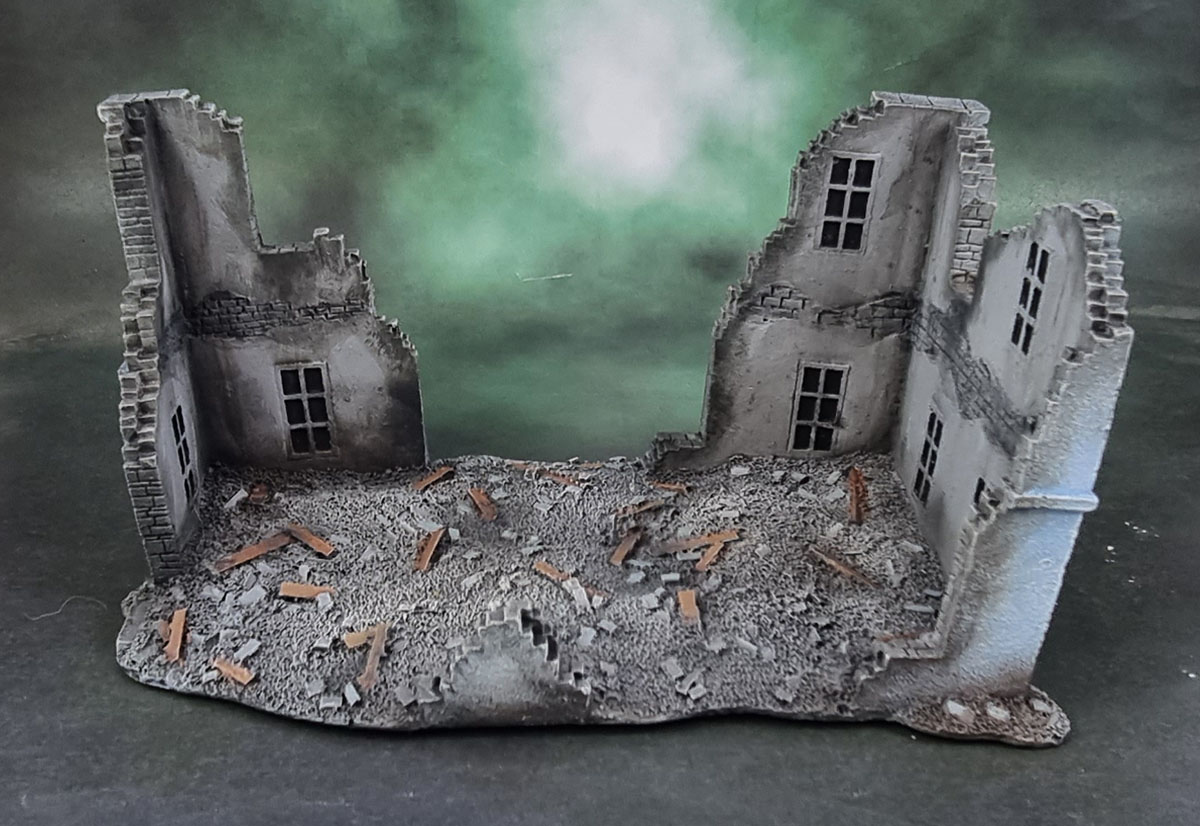
I did the same with the large building. Check out that warpage in the centre! Kind of annoying, but something I can live with.
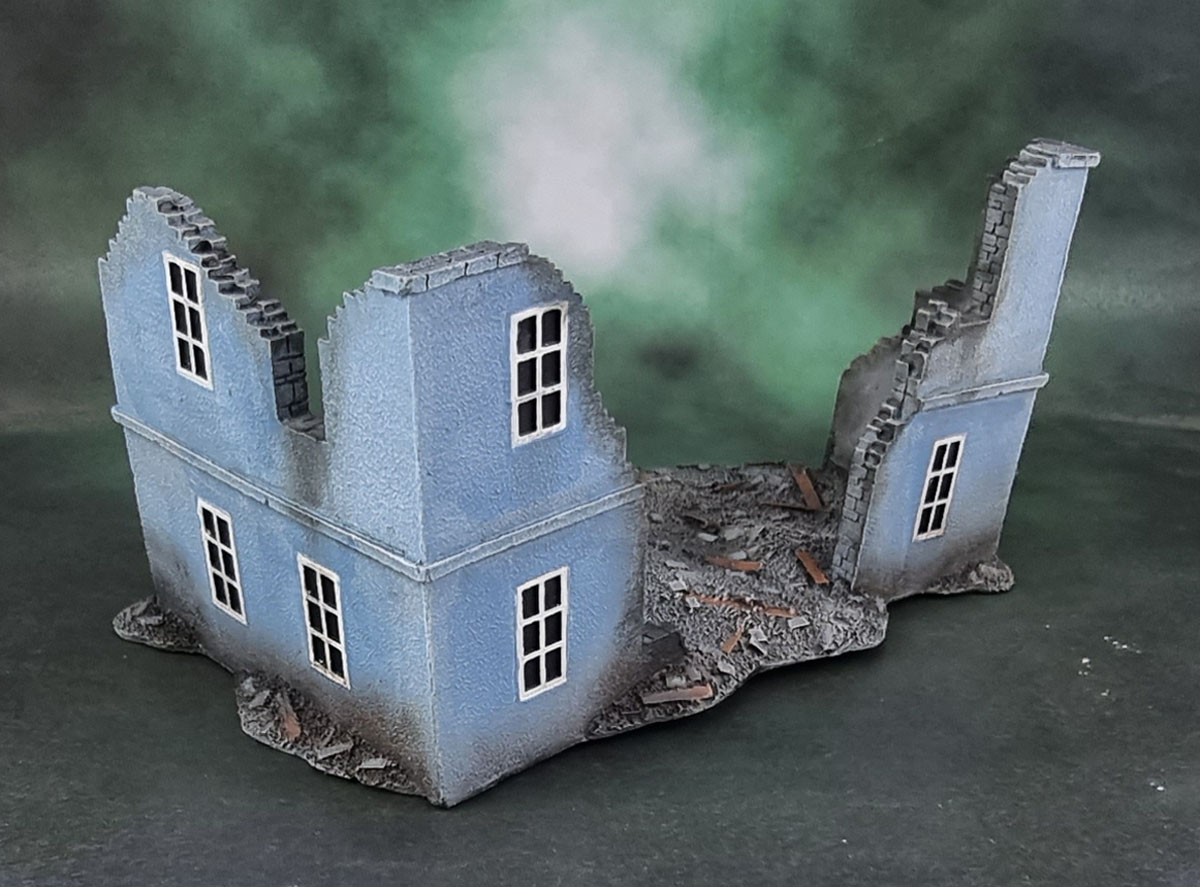
And finally, the exterior. I kept the original blues of the building shell and simply added grime, streaks and El Scorcho. (With a nod to any Half-Japanese girls reading – especially if they’ve never heard of Green Day…)
These three were also finished post-Christmas, so more grist for Dave Stone’s Paint What You Got challenge.
And dat’s dat for dis one. Now that I’ve got the terrain posts for 2021 completed, the next couple of posts will have miniature humanoidz. 28mm ones, even! Then the round-up!

You could always go to their room and read their diary…
Nice work on the buildings, once again!
LikeLiked by 4 people
Now *that* sounds like a plan! – cheers, Dave!
LikeLiked by 3 people
Very cool 👍
LikeLiked by 3 people
Cheers, Alex! 🙂
LikeLiked by 1 person
Nice work as always mate, that “bow” in the base of the last one is a bit annoying though isn’t it.
Cheers Roger.
LikeLiked by 4 people
It is indeed, and being resin it’s not like I can give it the heat treatment. I could go all-in and add putty/material underneath, then sand it flat and smooth but the point of me picking up these pre-painted buildings is to avoid the boring BS aspect of doing terrain, so I’ll just live with it, I reckon.
LikeLike
Great work on all mate, and a massive improvement on the basic model.
LikeLiked by 3 people
Thanks Dave – I do enjoy doing things like those brick/stone walls for some reason so it’s a nice, easy distraction sometimes.
LikeLiked by 1 person
Very nice- they look much improved.
Cheers,
Pete.
LikeLiked by 3 people
Thanks Pete – a good payoff for not too much work at least!
LikeLike
My favourites so far I think! 🙂
LikeLiked by 3 people
Cheers John – they’ll combine well with the others (and maybe some non-destroyed buildings???)
LikeLiked by 1 person
These look fantastic, mate. They should add a nice bit of life to any battlefield!
LikeLiked by 2 people
Thanks mate! I’m looking forward to playing with them, though it’s so hot out there it might not be for a month or two till we can use the room again now…
LikeLiked by 1 person
I have just been bingeing on all your past building posts and I have to say you have done a brilliant job on all of them mate, a big pat on the back !!
LikeLiked by 2 people
Thanks Pat! I’m very much looking forward to when I can get them all out together on a tabletop!
LikeLiked by 1 person
Pingback: 15mm Terrain Unboxing Review: Flames of War Battlefield in a Box – Cherbourg House (BB157) & Munich House (BB159) | Azazel's Bitz Box.