
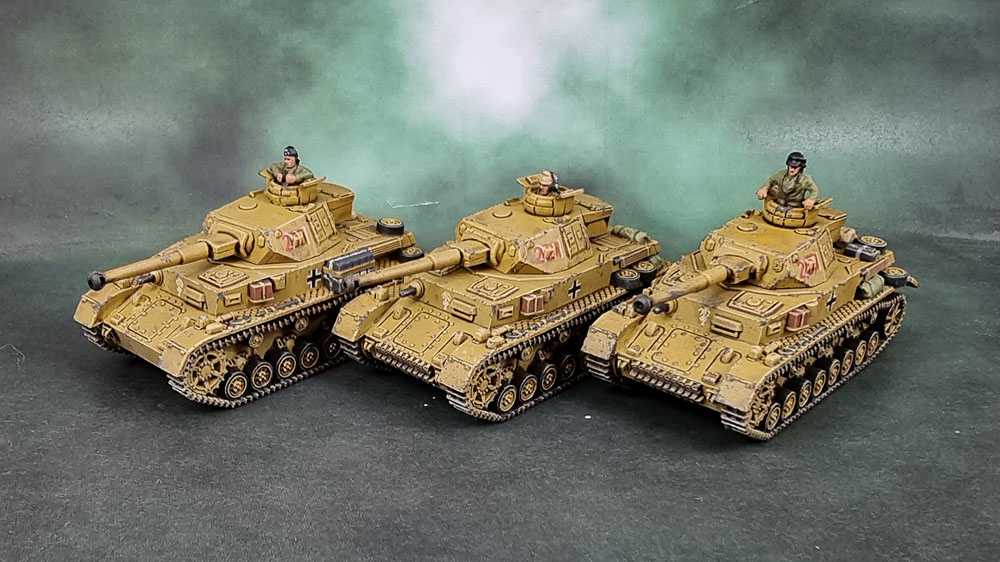
As I went through the process of painting my Afrika Korps armour, I got asked a few times in various places how I did it, and also about the possibility of putting together a painting tutorial to share my methods, so after a bit of a delay, here it is.
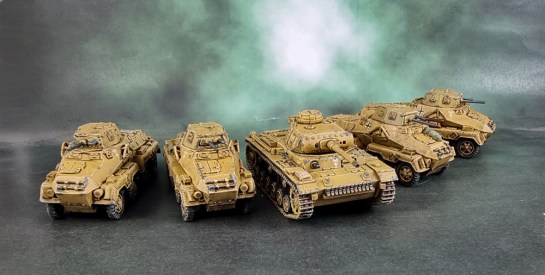
This method works well for pretty much any vehicle. I haven’t started on my softskins yet, but the simple step-by-step method outlined here should get you through most of those as well without much trouble. I haven’t tried this on larger scale models yet, but I have some Bolt Action 28mm/1:56 German Panzers I intend to paint with the exact same methods, and I don’t foresee any issues using the same techniques.
Enough preamble! Get to the monkey!
Obviously, you clean and assemble the model before we get started. You can figure out that part on your own, or perhaps with the supplied instructions or webpages as appropriate.
STEP 1: Start with a Spray Prime. I don’t use black or white over the bare plastic/metal/resin kit – I just go straight for US Khaki (Vallejo)
You should spray the turret and hull as seperate pieces, and I do the undersides of both as well, but you do you on that.
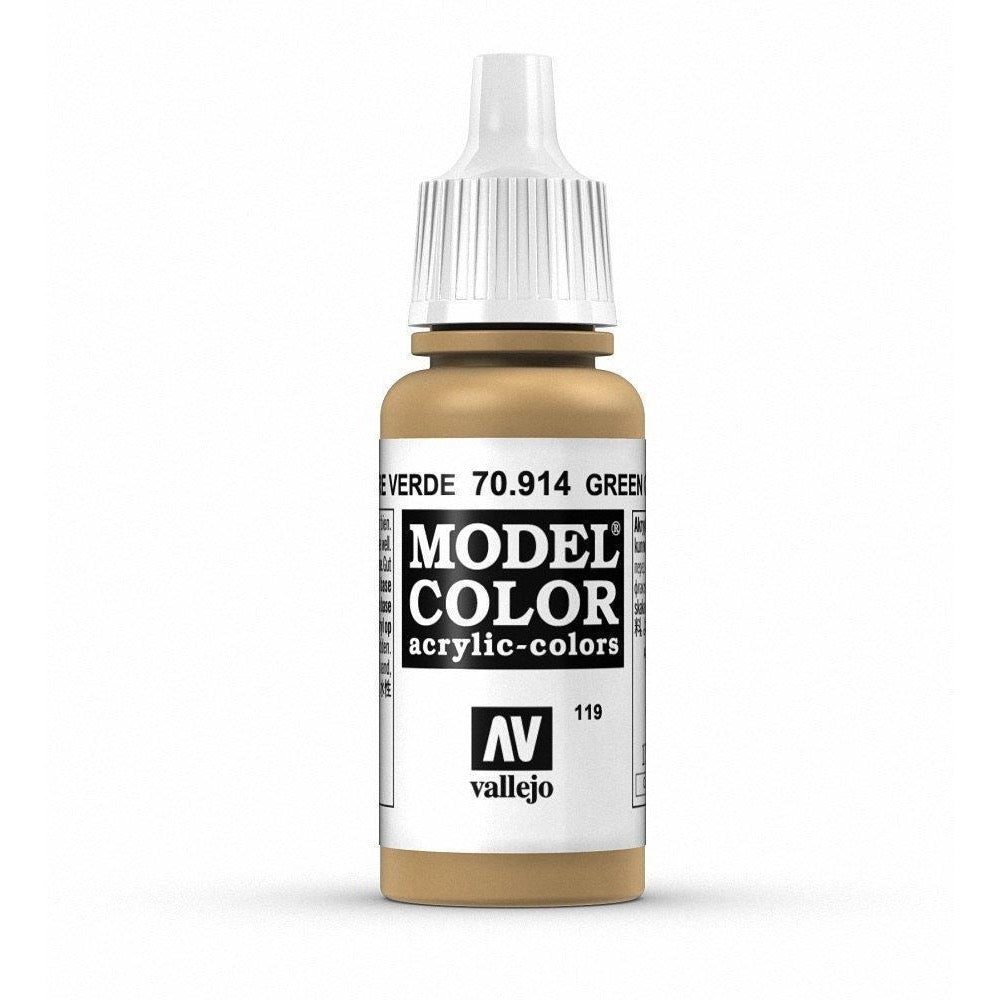
STEP 2: Spray Basecoat Desert Yellow (Vallejo). I do this as a Zenithal coat from the top and top angles of the model. It’s also worth noting that Vallejo’s Spray Can Desert Yellow is actually the equivalent to Vallejo Model Colour Green Ochre 74.914 and NOT Vallejo Model Colour Desert Yellow 70.977. This is because…. reasons.
You should again spray the turret and hull as seperate pieces, though we’re not doing the undersides of the model this time. We’re leaving that US Khaki there.
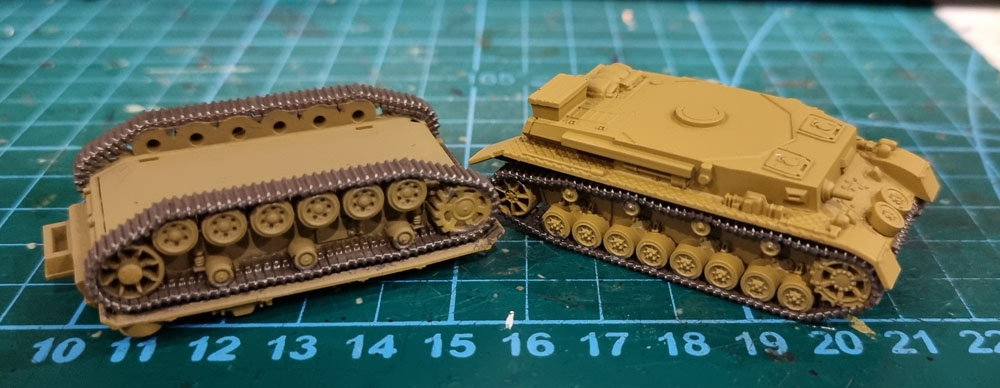
STEP 3: Paint Tracks with Vallejo Panzer Aces Track Primer (304). Try to be reasonably neat, but mistakes can of course be fixed up with that Green Ochre mentioned above.
STEP 4: Drybrush tracks with Citadel Leadbelcher.
For this step, you could also choose to drybrush with a mid-dark grey (Panzer grey) and then more lightly drybrush the metallic over the top of that. Either works, especially at this scale, though I’d probably use the grey as a mid-point if painting a 28mm/1:56 scale model for say, Bolt Action.
Once again, try to be neat here just to save you some work afterwards.
STEP 5: Brush on AK Interactive Gloss Varnish (AK11239) where you’ll add decals to create a good surface to apply the decals. Let the varnish dry fully.
Where to add decals? It depends on the vehicle type/unit/etc. There are lots of sources that can show you proper placement for the markings on Tigers, Panzer IIIs, Panzer IVs, 222’s and so on.
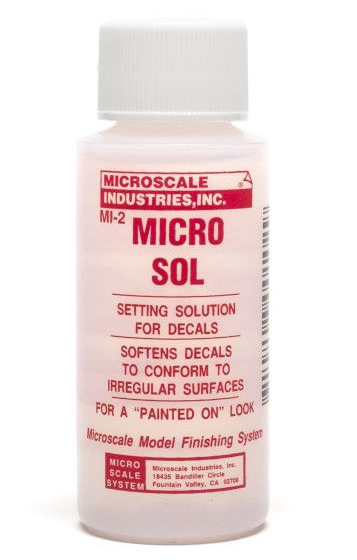
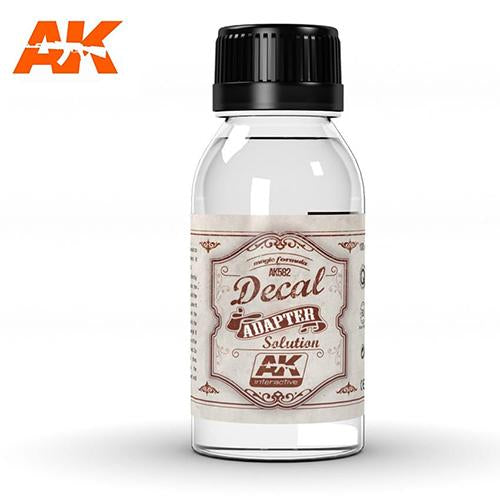
STEP 6: Add decals where appropriate. I highly recommend using Using Micro Sol to apply and Micro Set or other equivalent products like AK Interactive Decal Adapter (AK582), Mr Mark Softer, etc. to fix them over the vision ports. Once again, Let the decals set fully.
I’ve now fully moved to using the AK product for the softening step over Micro Set for the softening step, but still recommend Micro Sol for the application (and for when you don’t need to soften a decal to fit over uneven surfaces.)
STEP 7: Apply another coat of AK Interactive Gloss Varnish (AK11239) by brush over decals to seal them in. Again, let the varnish dry fully.
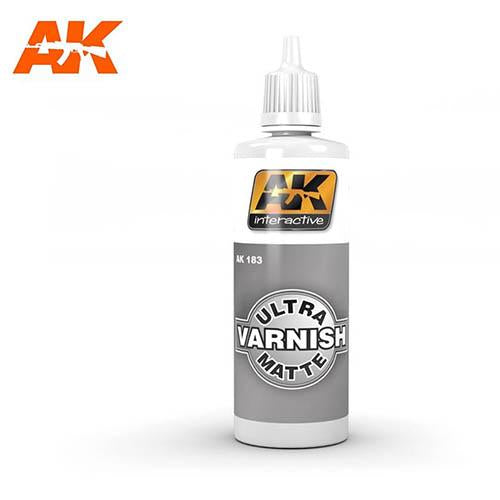
STEP 8: 50-50 mix of AK Interactive Ultra Matte Varnish (AK 183) and AK Interactive Satin Varnish (AK11238) over the glossy area where the decals are located, including the decals. I use the mix to achieve the same finish that the paints have at this stage, so the next steps of washing will be consistent over the entire model.

IMPORTANT ASIDE: I haven’t taken photos of each decal application step because it’s simply adding decals and varnish. The layers of varnish stop the “frosted” look that the the transparent film on decals can sometimes have – this frosted look is caused by applying the smooth decal to the rough surface of the model. Adding the gloss varnish before adding the decal creates a smooth base to lay the smooth decal on, and the gloss over the top “seals” the decal in, so the result is that the decal should look like a part of the model. The models look pretty much the same throughout these steps, though – there are lots of good YouTube videos on applying decals.
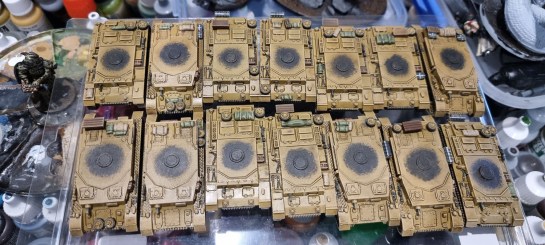
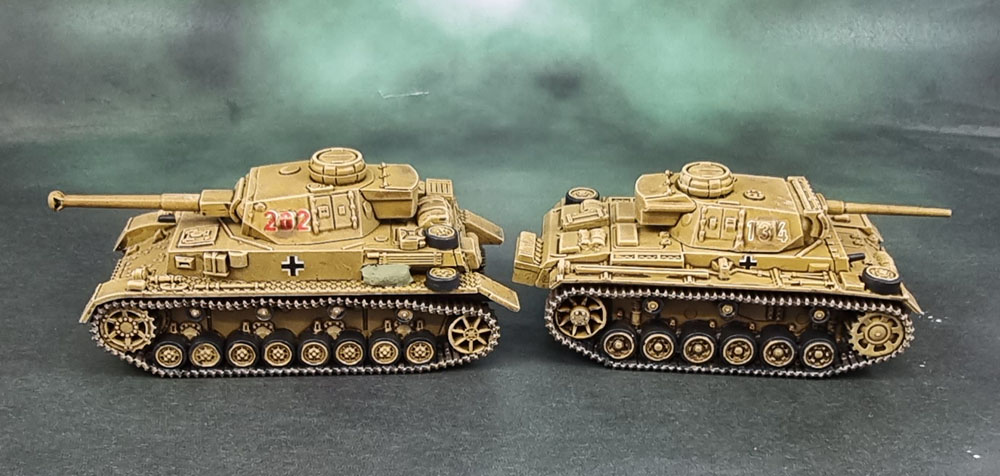
STEP 9: Wash everything with Citadel Agrax Earthshade Gloss.
For best results, I find that It’s best to do the turrets separately, and even do each side of the tracks separately.
This pic shows one side of models after washing en masse,. Make sure you let the Agrax Earthshade Gloss dry for a good amount of time, then flip them and do the same again before finally placing them upright on their tracks and washing the rest of the hull.
At any point from here you can call the model(s) done, if you really like. They’re perfectly playable at this stage, but continuing really does reap aesthetic rewards.
STEP 10: Drybrush #1 – the “Desert Yellow” parts of the tank with Vallejo Model Colour Green Ochre (70.914) – you want this to be a decent drybrush, but you don’t want to go too heavy and cover up the effects of the wash. You’re just reestablishing the base colour.
STEP 11: Drybrush #2 – 50-50 mix of Vallejo Model Colour Green Ochre (70.914) and Vallejo Panzer Aces Highlight British Tanker Crew (321).
This is a lighter drybrush, more concentrated on the edges and upper areas of the vehicle. It really makes the edges pop nicely as you can see.
STEP 12: Paint the road wheel rims/rubber with Vallejo Surface Primer German Panzer Grey (73.603) This is the most painful part of the entire procedure – it’s all uphill from here. …or is it downhill? Uphill, I think…
Paint hull and turret machineguns with Vallejo Surface Primer German Panzer Grey (73.603) as well since you have it out. Cleanup / neatening up as needed using Vallejo Model Colour Green Ochre (70.914).
STEP 13: Now is when you paint the bits and pieces. Stowage boxes (whatever browns you like), tarps and bedrolls (whatever military greens through browns you like – I tend to use the same pale sand colours and browns listed below for modulation and rain streaks),
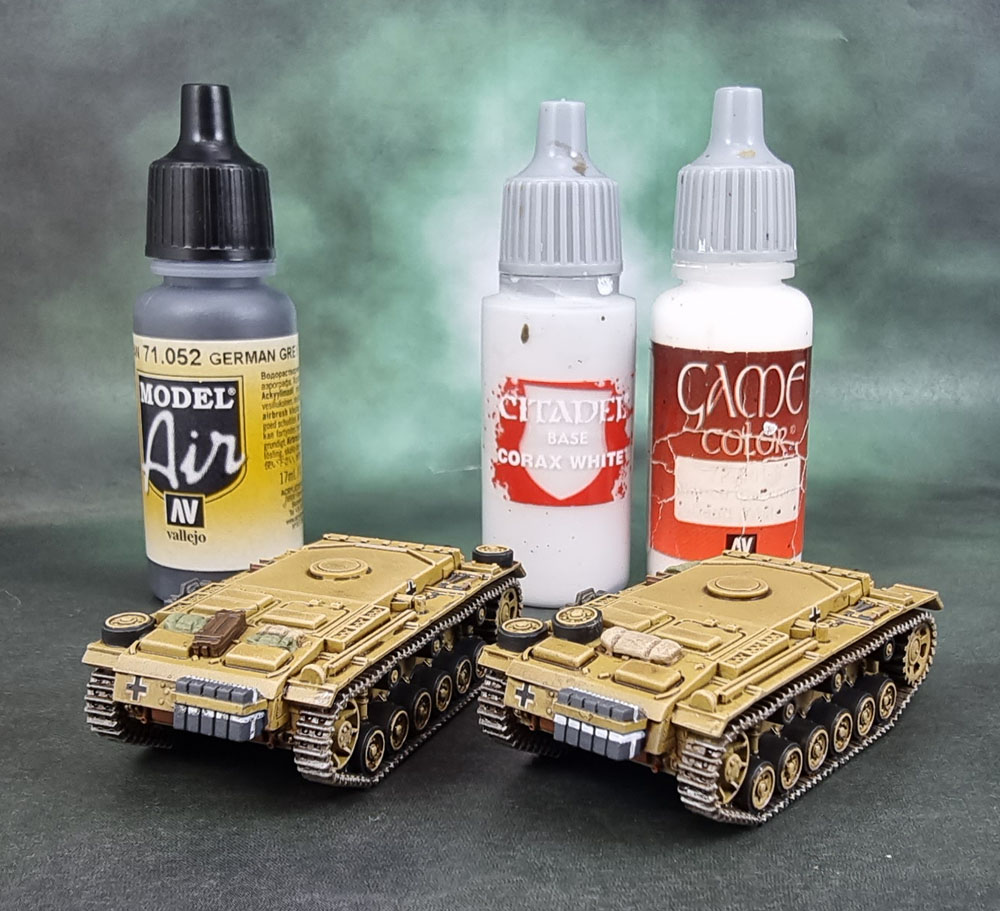
Jerry cans – I like using Vallejo Model Air German Grey (71.052), with thin Citadel Corax White for the crosses on Jerrycans – with little picked out bits of Vallejo Game Colour Dead White (72.001) (or whichever brand you like) for highlights. For those little integral boxes caged on the sides of Panzers I use Vallejo Model Colour Saddle Brown (70.940),
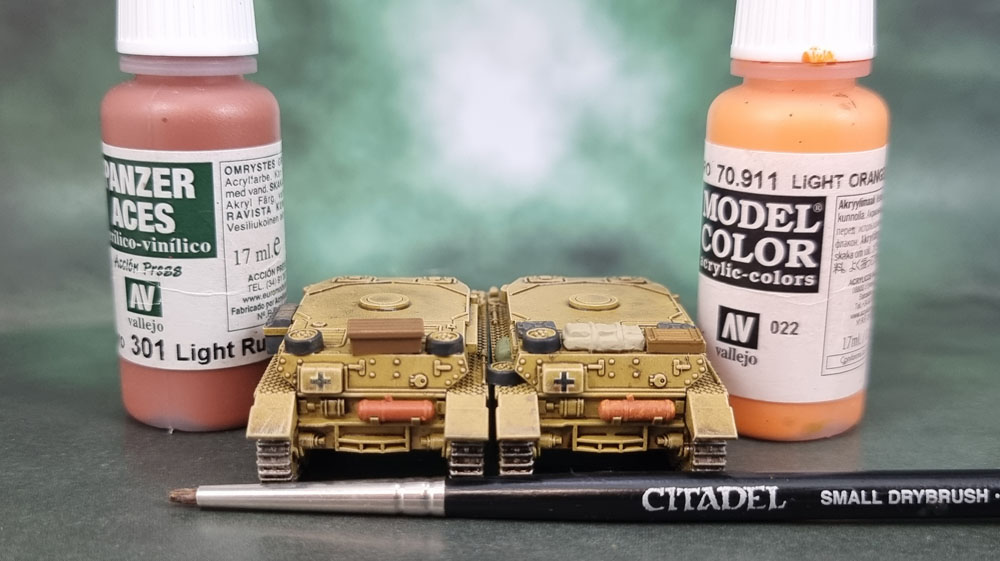
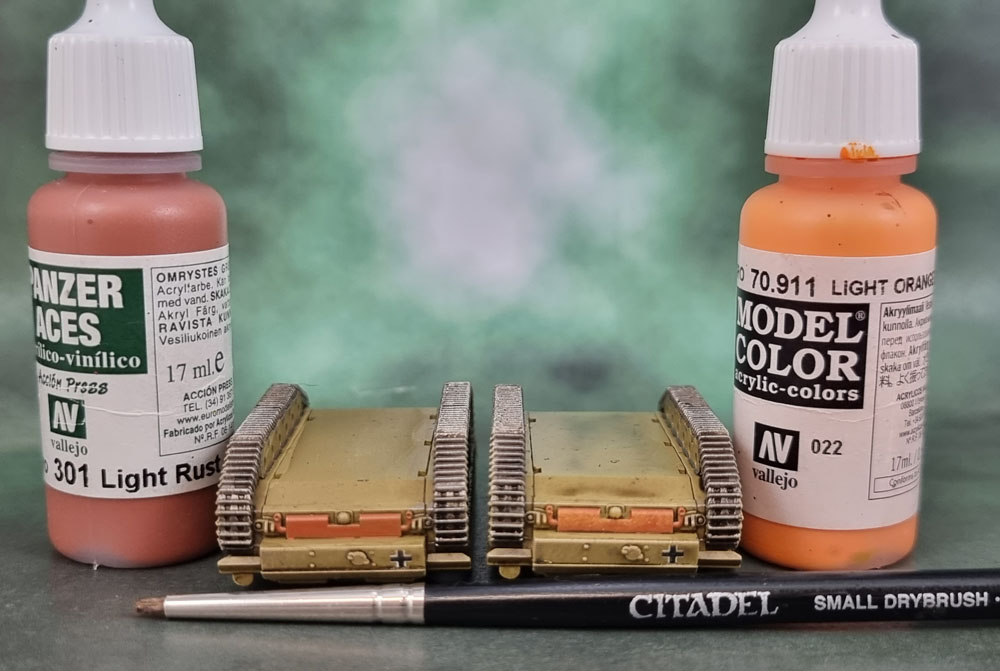
For the exhausts Vallejo Panzer Aces Light Rust (301), then carefully and lightly stippled with Vallejo Model Colour Light Orange (70.911). We’ll wash that with Agrax Earthshade Gloss to bring out the details and darken it a little. You may even choose to give it a followup coat of regular Agrax Earthshade or Army Painter Strong Tone if you prefer darker exhausts.
STEP 13: Spot wash all the rest of that crap with brown and/or green washes. (I’ve got the paints for the Jerrycans in the pic above!)
I use Army Painter Quickshade Military Shader for greener tarps and Army Painter Quickshade Strong Tone (Citadel Agrax Earthshade is just as good) for boxes and brown tarps. Agrax Earthshade Gloss over the exhausts as noted earlier.
I forgot to take a photo of Step 14. I’m so embarassed, since the tanks look bloody nice here. Even I was tempted to stop the first time.
STEP 14: Drybrush #3 – 80-20 mix of Vallejo Model Colour Green Ochre (70.914) and Vallejo Panzer Aces Highlight British Tanker Crew (321) (a really light drybrush this time)
Now they’re “finished” if you want nice, “clean” models that have a similar overall look to the Games Workshop type of finished vehicle.
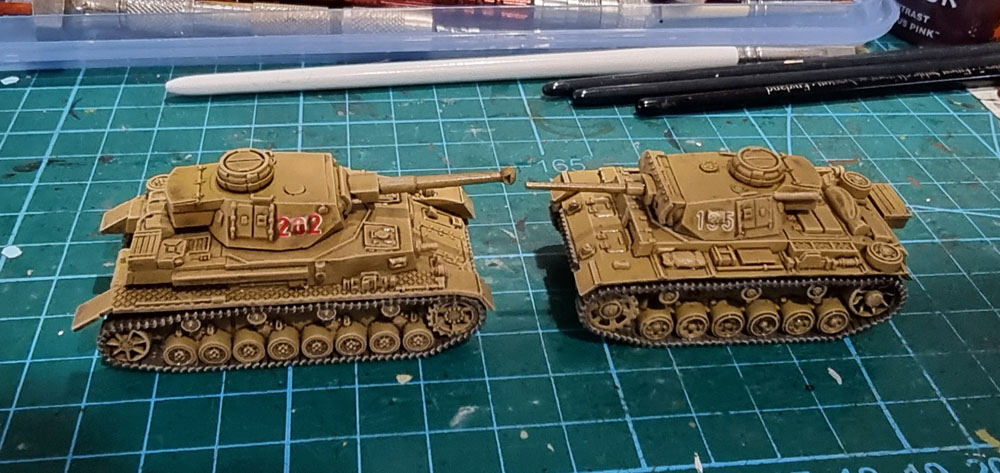
Optional step 1: Colour Modulation I – Thin down Vallejo Model Colour Green Ochre (70.914) with Citadel Lahmian Medium/Water/your medium of choice – add some colour tone and variation back into the larger panels to taste.
Optional step 2: Colour Modulation II – Thin down Vallejo Panzer Aces Track Primer (304) and/or Vallejo Game Colour Leather Brown (72.040)/Citadel XV-88 with Lahmian Medium/Water/your medium of choice – add some colour tone and variation back into the larger panels to taste. Be sparing, but this is where you add some additional tonal variation – as little or as much as you feel they need.
Optional step 3: Rain Streaks – Thin down some sand coloured paint – your choice but I like anything from Citadel Ushabti Bone/Vallejo Game Colour Bonewhite (72.034), Vallejo Model Colour Iraqui Sand (70.819) and thin them down with Lahmian Medium/Water/your medium of choice. Then with a very fine brush, add some vertical streaking to represent rain streak marks. I find less is more, so don’t overdo it.
I almost always do the two colour modulation steps, but they’re kind of hard to photograph in a meaningful way.
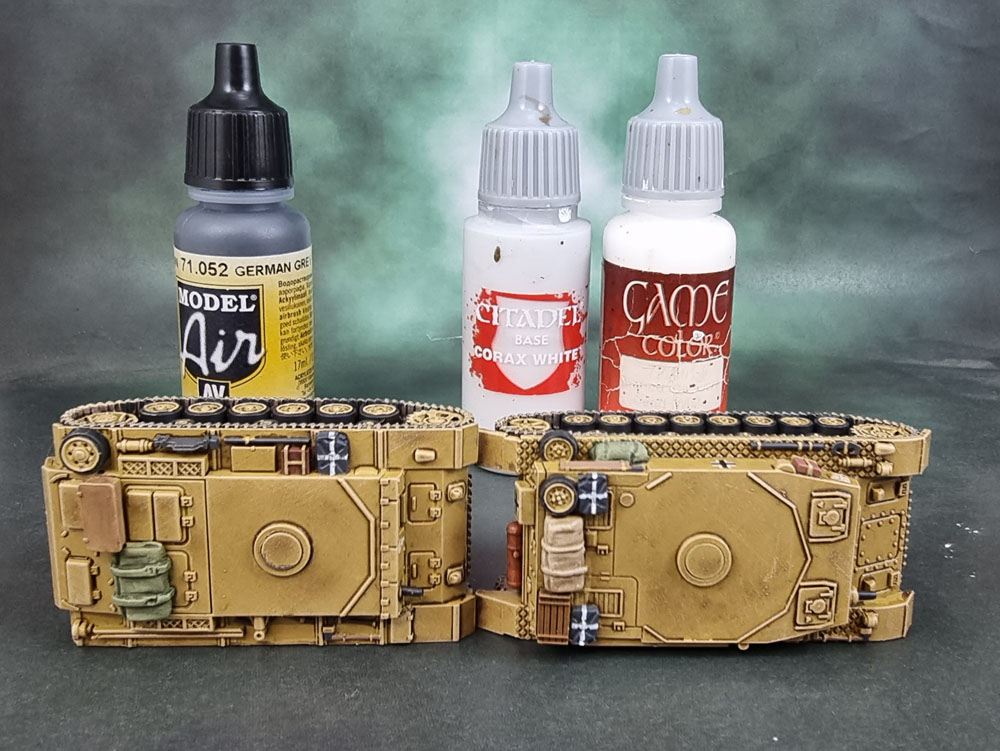
Tank hulls after the first layer of stippling.
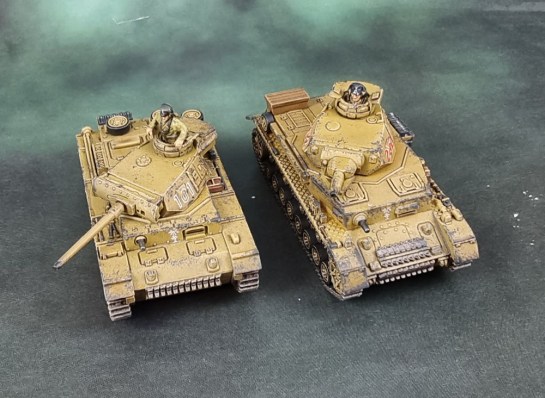
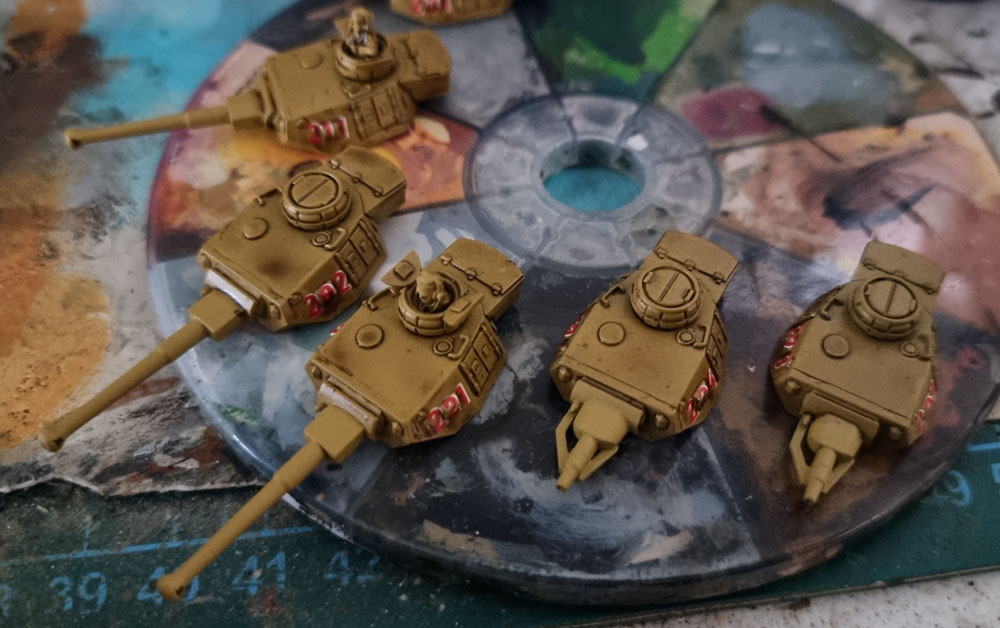
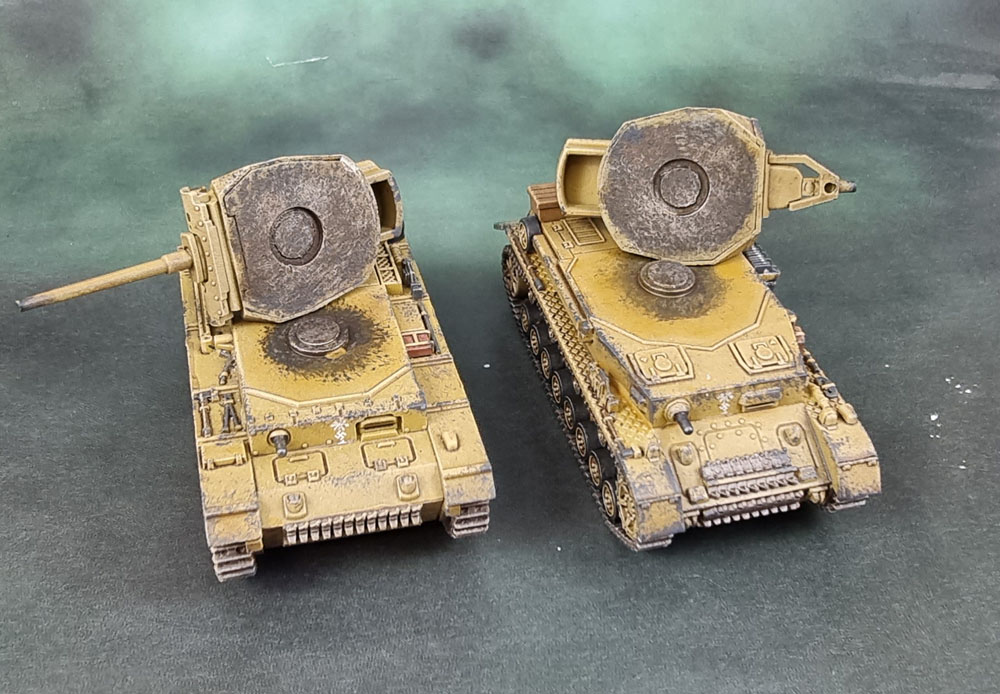
Advanced Step 1: Turret Damage. This is something that probably hasn’t been seen on the blog, since it’s not visible when I post my usual images of finished tanks and vehicles, but it’s an extra step I’ve done on every tank and AFV that has a removable turret. It’s much more for gameplay aesthetics than display models, since it will be hidden much of the time.
It’s basically just a number of layers of progressive stippling. You can see the colours I use from left to right, and how they look at each stage. I use a cheap, medium-small makeup brush from Amazon (about 6mm diameter). In order, the paints above are:
Vallejo Surface Primer German Panzer Grey. (I get the 200ml bottles and decant it into the dropper bottle for everyday use with a brush), Vallejo Model Air Metal Black (71.073), Vallejo Game Colour Tinny Tin (72.060), Citadel Leadbelcher, and then after the final stipple step, I wash them with a 1:1 or 50/50 mix of Vallejo Game Colour Smokey Ink (72.068) and Citadel Lahmian Medium.
Tanks be fine.

Tanks go boom!
Advanced Step 2: For me, this is the big one.
Chipping – I found that a “proper” panzer grey looks too black against the sand colour that the armour is painted in, so I used Vallejo Model Colour Dark Grey (70.994). Put a little on your palette, use a small bit of torn foam on the end of a pair of tweezers and dab it into the paint. Dab most of it off onto the paper/a tissue etc and then carefully touch it to the edges and panels of the tank to taste – again, be careful to not overdo it – it’s easy to go back later and add more, but a bitch to try and remove it!
Here’s a quick, quality tutorial from Secret Weapon Miniatures.
Advanced Step 2: Drybrush the ends of gun barrels with Vallejo Panzergrau Coloured Surface Primer (73.603)
Sealing: Spray with AK Interactive Matt Varnish Spray (AK1013) – again, do the turret and hull separately. It gives a nice, flat (but not too boringly flat) finish.
DONE!
Materials I use.
These are the paints and materials that I use for my Afrika Korps vehicles. You can of course use whatever you like, and paints that are close enough to the ones listed here should net you a close enough outcome.
Sprays:
US Khaki (Vallejo)
Desert Yellow (Vallejo)
AK Interactive Matt Varnish Spray (AK1013)
Brush-Applied Paints:
Vallejo Model Colour Green Ochre (74.914)
Vallejo Model Colour Saddle Brown (70.940)
Vallejo Model Colour Light Orange (70.911)
Vallejo Model Colour Iraqui Sand (70.819)
Vallejo Model Colour Dark Grey (70.994)
Vallejo Panzer Aces Track Primer (304)
Vallejo Panzer Aces Highlight British Tanker Crew (321)
Vallejo Panzer Aces Light Rust (301)
Vallejo Model Air German Grey (71.052)
Vallejo Model Air Metal Black (71.073)
Vallejo Game Colour Dead White (72.001) OR Any proper white paint that works nicely – Citadel White Scar is generally trash.
Vallejo Game Colour Leather Brown (72.040) OR Citadel XV-88
Vallejo Game Colour Bonewhite (72.034) OR Citadel Ushabti Bone
Vallejo Game Colour Tinny Tin (72.060)
Vallejo Surface Primer German Panzer Grey (73.603)
Citadel Leadbelcher
Citadel Corax White
A couple of whichever military greens through browns through tans you like for wooden boxes, bags and rolled tarps. Pick some from above.
Brush-Applied Mediums/Washes:
Citadel Lahmian Medium
Citadel Agrax Earthshade Gloss
Army Painter Quickshade Military Shader
Army Painter Quickshade Strong Tone OR Citadel Agrax Earthshade
Vallejo Game Colour Smokey Ink (72.068)
Brush-Applied Varnishes and Decal Solutions:
AK Interactive Gloss Varnish (AK11239)
AK Interactive Ultra Matte Varnish (AK 183)
AK Interactive Satin Varnish (AK11238)
AK Interactive Decal Adapter (AK582) (or Micro Set)
Micro Sol


Nice looking armor and a good tutorial too.
LikeLiked by 4 people
Thanks Ann! 🙂
LikeLiked by 1 person
Excellent 🤘😎
LikeLiked by 2 people
Cheers, Alex!
LikeLiked by 1 person
Well, that’s pretty comprehensive I’ve got to say! 🙂 Good stuff!
LikeLiked by 3 people
Thanks John – not something a veteran tanker like you needs of course, but hopefully it was at least interesting! 😀
LikeLiked by 2 people
I’ll be honest – you paint your tanks way better than I do and you do all the detail bits I can’t be bothered with, like chipping! 🙂 I learnt quite a bit from this and might try the Agrax gloss method on some lighter coloured thanks meself!
LikeLiked by 2 people
You undersell yourself, John! Having said that, I’m certainly looking forward to seeing what you produce, though! 😀
LikeLiked by 2 people
Congratulations first on the clarity and accuracy of your tutorial, but also on all the work behind your completed models! I doubt that we will ever have the opportunity to use all the procedure you propose here, unless the beastmen decide to use a tank to raze the villages of the Empire! 😉
However, there are many interesting points to use independently for other painting jobs, such as decals, color combinations, drybrushes. It is always a pleasure to read and learn new techniques!
LikeLiked by 1 person
Thanks mate! I guess you could use some of the techniques with different colours if you ever do some Steam Tanks or Dwarvern Mechanicals to defend the Empire or the Dwarven Holds from the beastman hordes! 😉
LikeLike
Great tutorial- thanks for putting it up.
Cheers,
Pete.
LikeLiked by 2 people
Thanks Pete – welcome!
LikeLike
This is an excellent guide and it makes me appreciate the work you put into the tanks to produce such nice-looking ones! 🙂
LikeLiked by 3 people
Thanks Kuribo! I’m looking forward to seeing your first 3d printed Fallout tanks for scenery… https://fallout.fandom.com/wiki/Tank_(Fallout_4)
😀
LikeLiked by 1 person
That is something worth making and there is an official STL for them too. You can count on me referencing this guide when I do paint a tank! 😉
LikeLiked by 2 people
You might need to reference something way more weathered, depending on how rusted and worn and trashed the tank is! 🙂
LikeLike
Thanks for sharing Azazel, lots of great tips and tricks there, a great tutorial 🙂
LikeLiked by 2 people
Welcome mate – and thank you!
LikeLiked by 1 person
Very good tutorial. And great results of course.
LikeLiked by 1 person
Cheers, Warburton! At some stage I want to try out using the same production method on some Bolt Action tanks I have here. 🙂
LikeLiked by 1 person
Excellent tutorial mate, if you could do one on how you paint so damn fast, we’d be golden ! LOL
LikeLiked by 3 people
Haha thanks Dave! I think it comes down to not watching all that much/many TV or movies and listening to a lot of music and podcasts while I paint for that “external” entertainment…
LikeLiked by 1 person
Wow mate thats was a very informative post, like John I learnt heaps, thanks mate !
LikeLiked by 3 people
Cheers Pat – quite a compliment coming from you! 🙂
LikeLiked by 1 person