I know, right? Another bloody unwieldly post title. Basically, as I’ve mentioned before, my Dungeons and Lasers Woodhaven Kickstarter pledge arrived recently, so I’ve been doing quick review and paintups of several of the kits I got in my pledge …uh.. recently.

So I had the bright idea of cracking these Kickstarter Stretch Goal Extras boxes open and knocking out a whole bunch of interesting scatter terrain quite quickly. Unfortunately, “quickly” is rarely as quickly as we might hope, so a few fiddly bits caused these to take a few days longer than I’d hoped. Not the end of the world, mind you, but I had been hoping to be finishing off several other models in the time I’ve been buggering about with these, and my time off work has expired so it’s back to the grind with fewer finished stuff than planned.
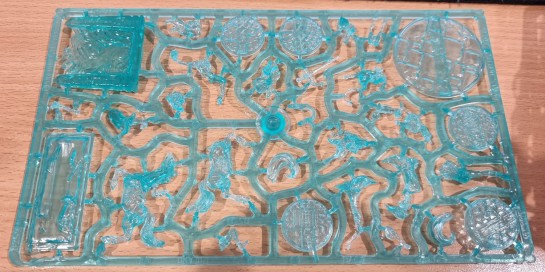
Anyway, this first box comes with six distinct sprues including one on transparent plastic, that’s much harder then the softer-than-GW HIPS used.. I’ll share ’em with you here:
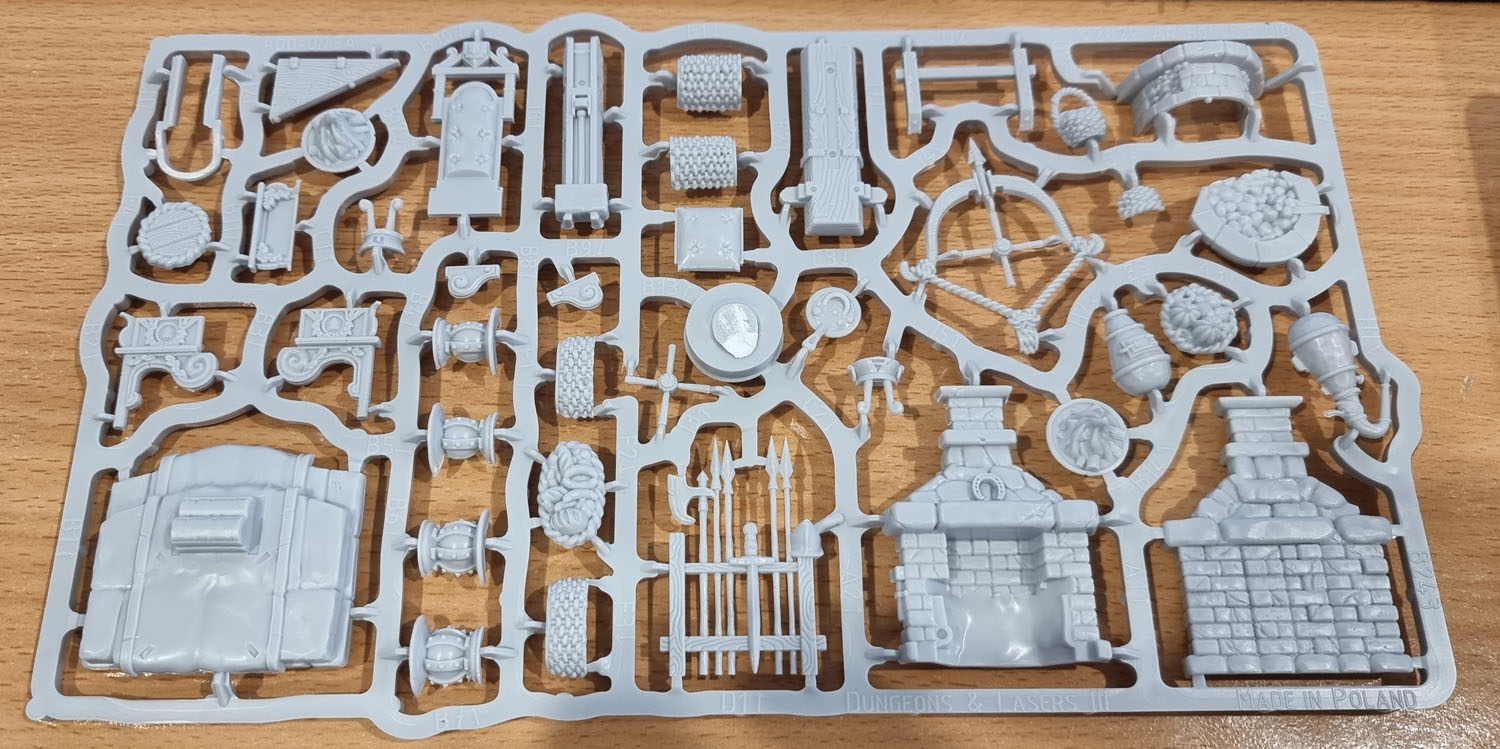
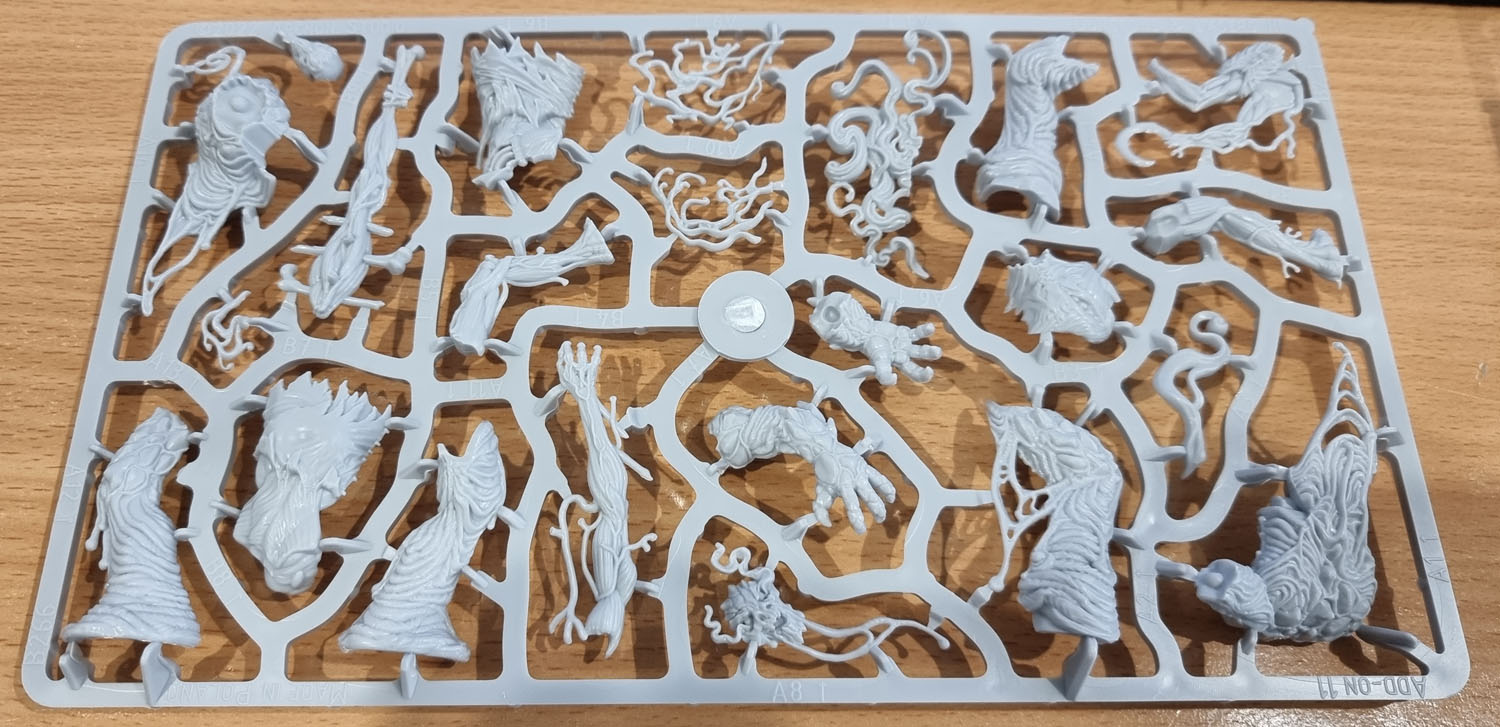
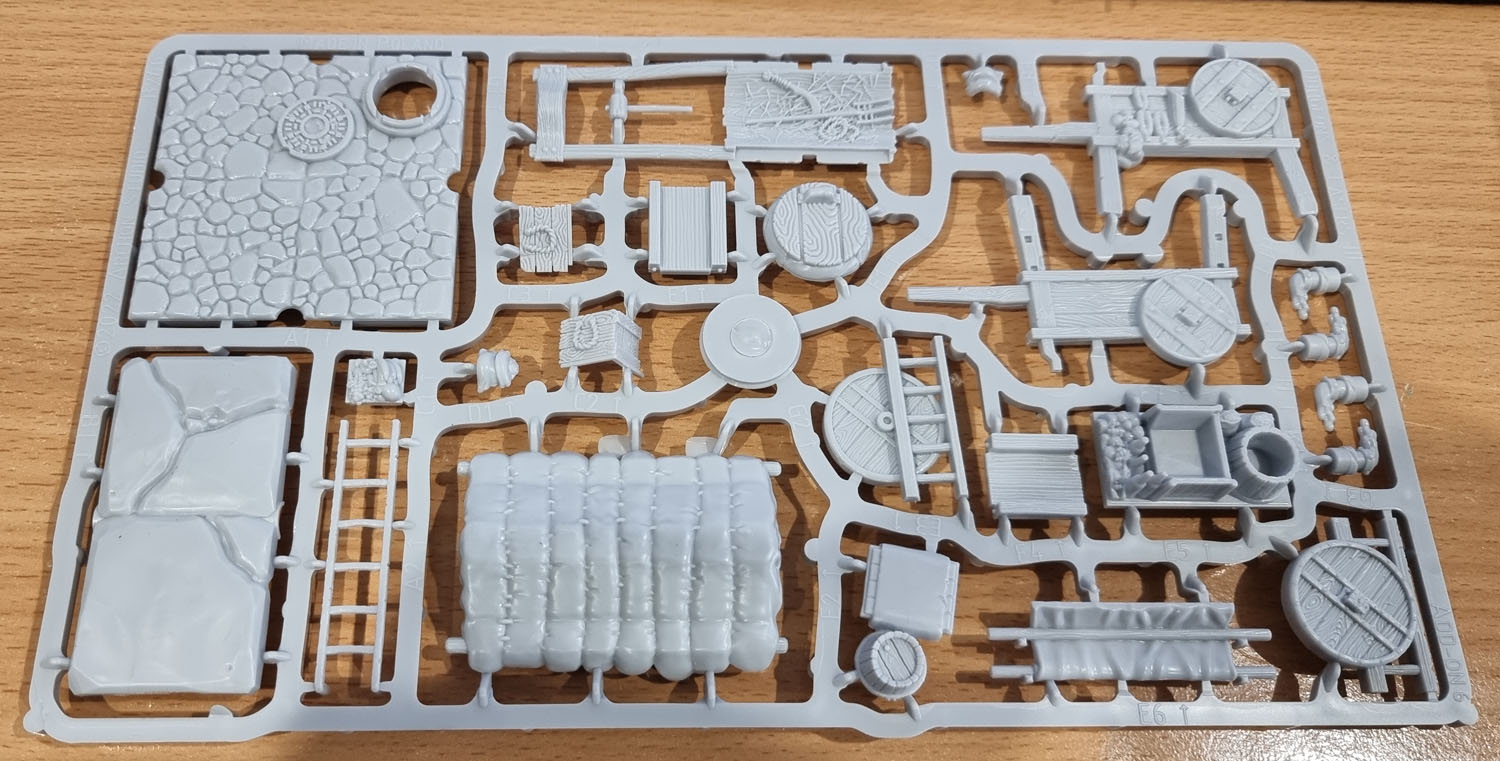

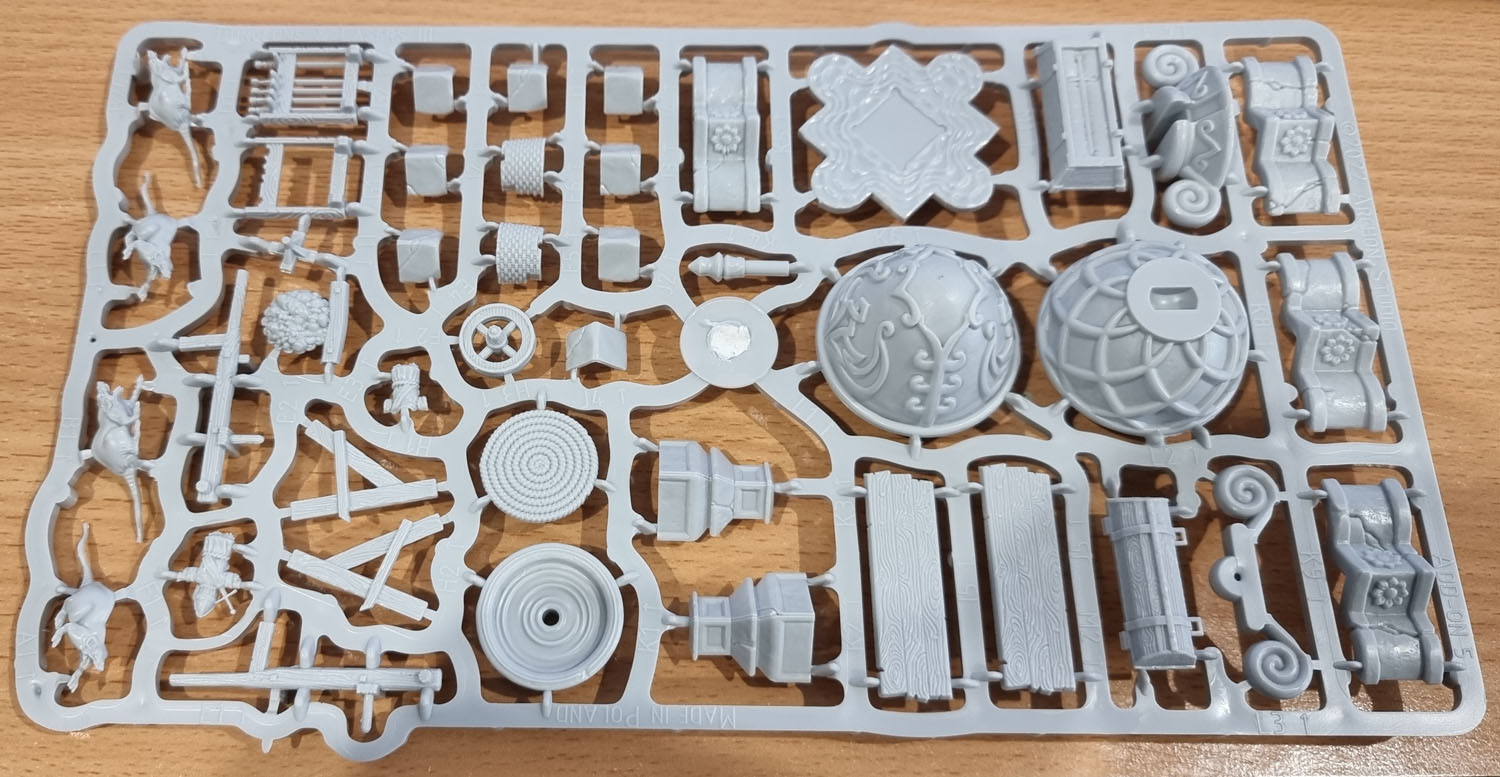
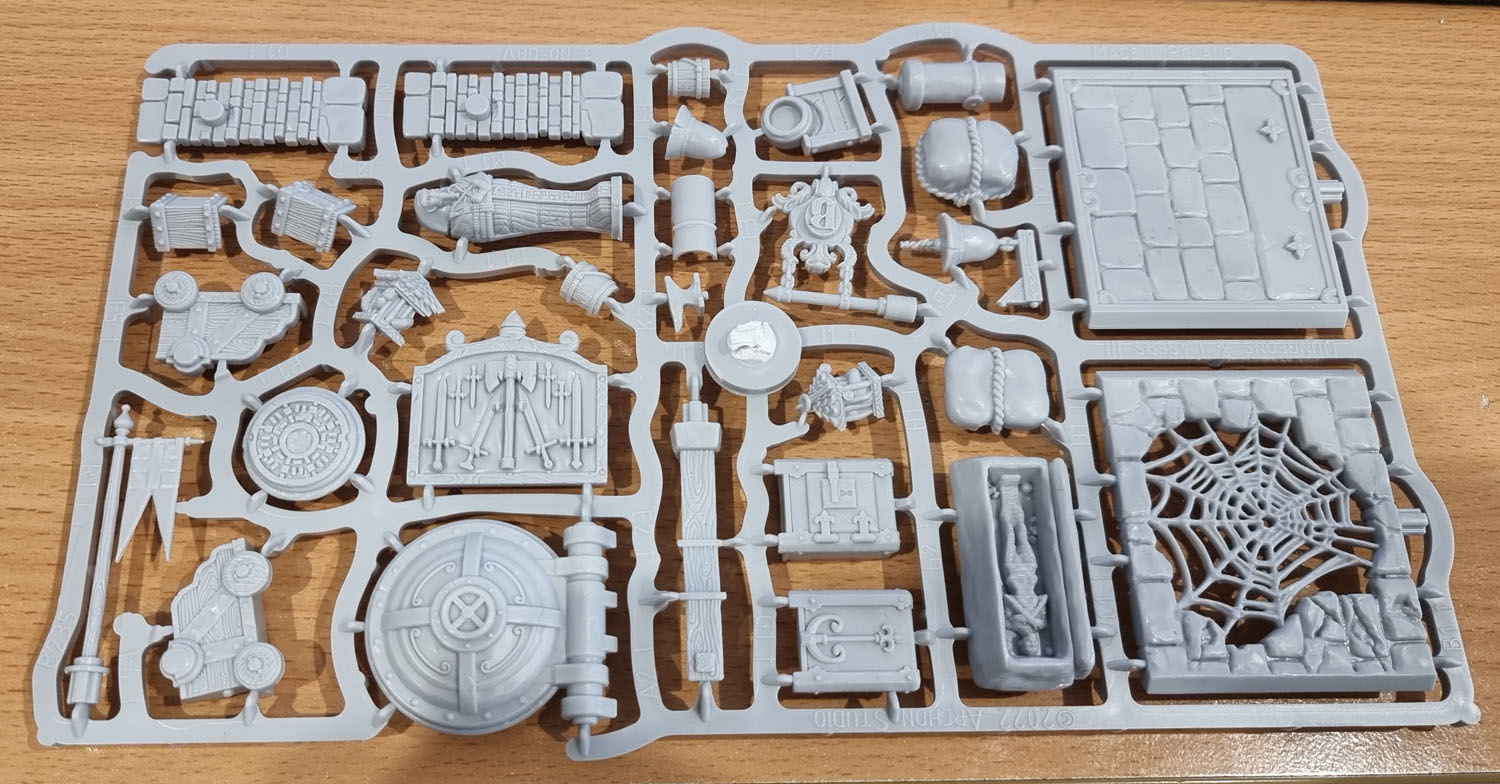
There’s a fair bit of variety here – it’s all fantasy themed this time but still pretty random feeling. There are also a few critters in the set as well.
Now usually I like to have smaller posts with specific things in them, but in this case I thought it more approriate to have all of the stuff I managed to finish from this first box in September in the one post. I’ll continue to (slowly) work my way through Box 1, then move onto Box 2, and then… well, I’ll leave the following step as a mystery. Also – I got two sets of these – one included in my pledge and then I added a secodn set of Stretch Goal boxes to my pledge – in this post I’m showing both of them, but you won’t get dupes if you end up picking these up via a late pledge or retail/website purchase.
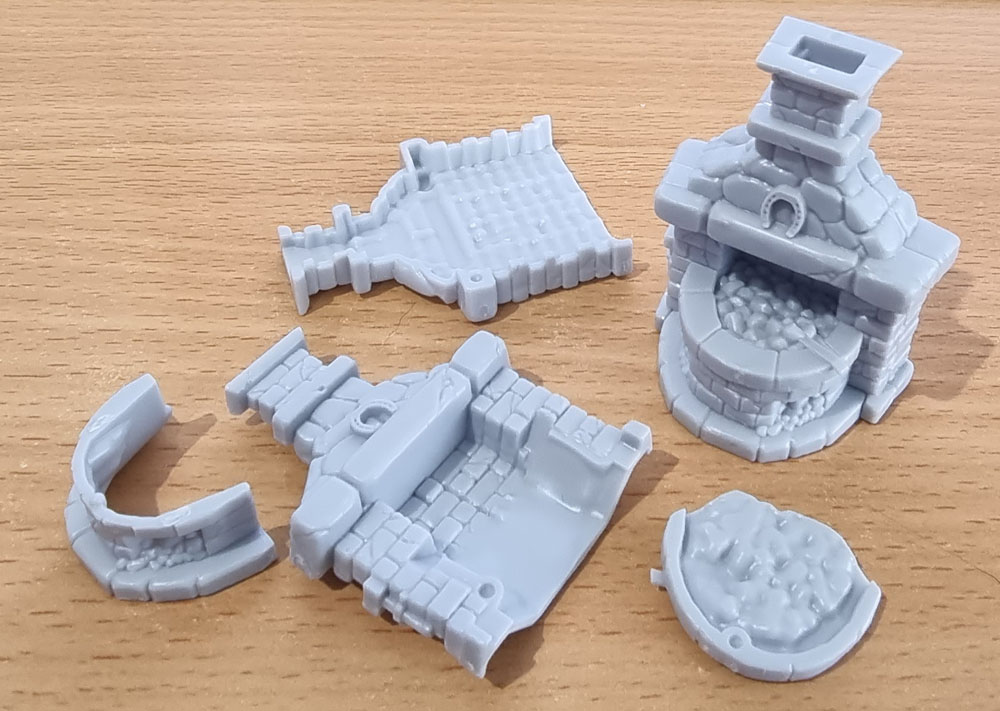
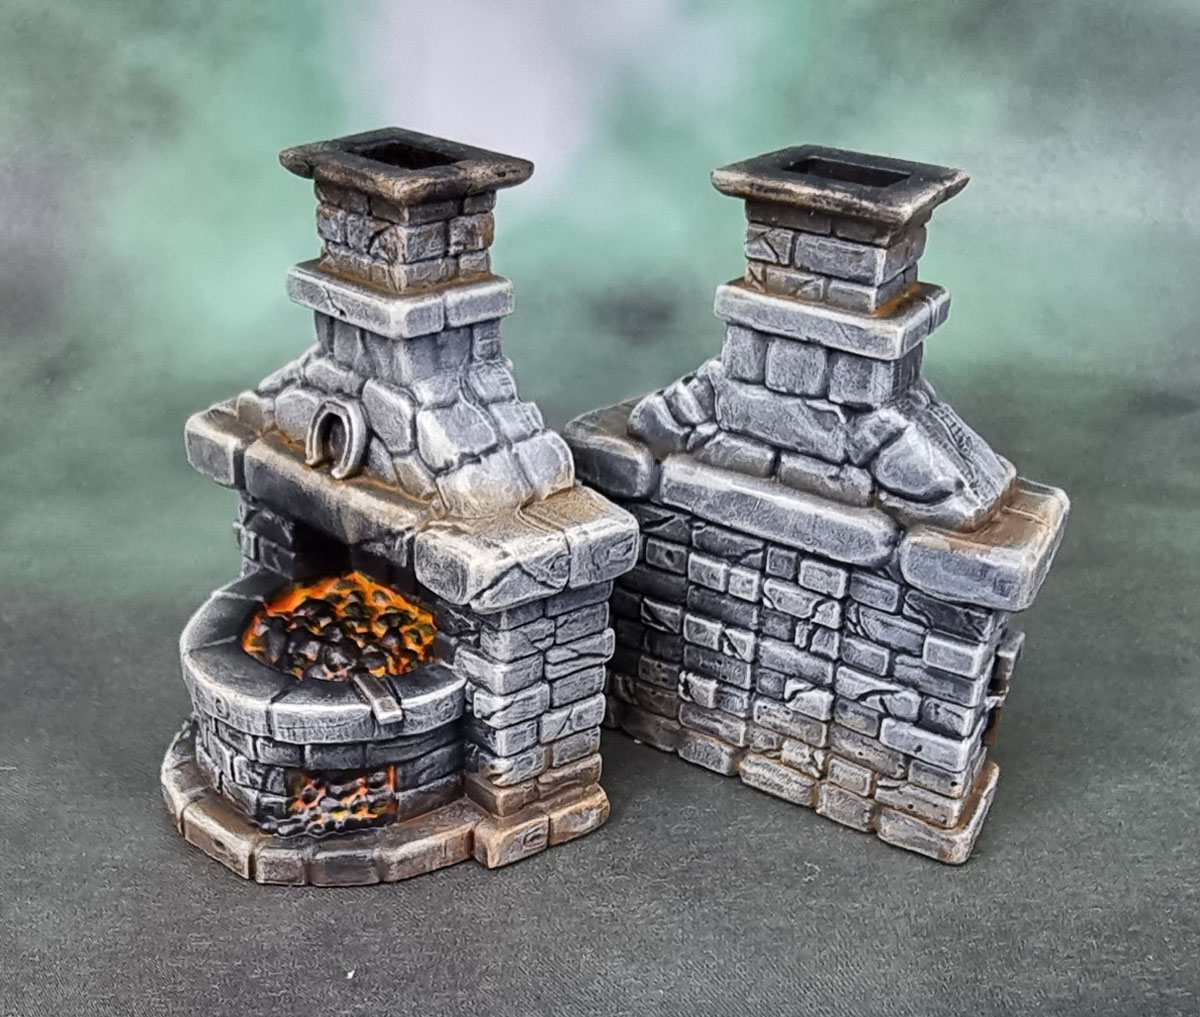
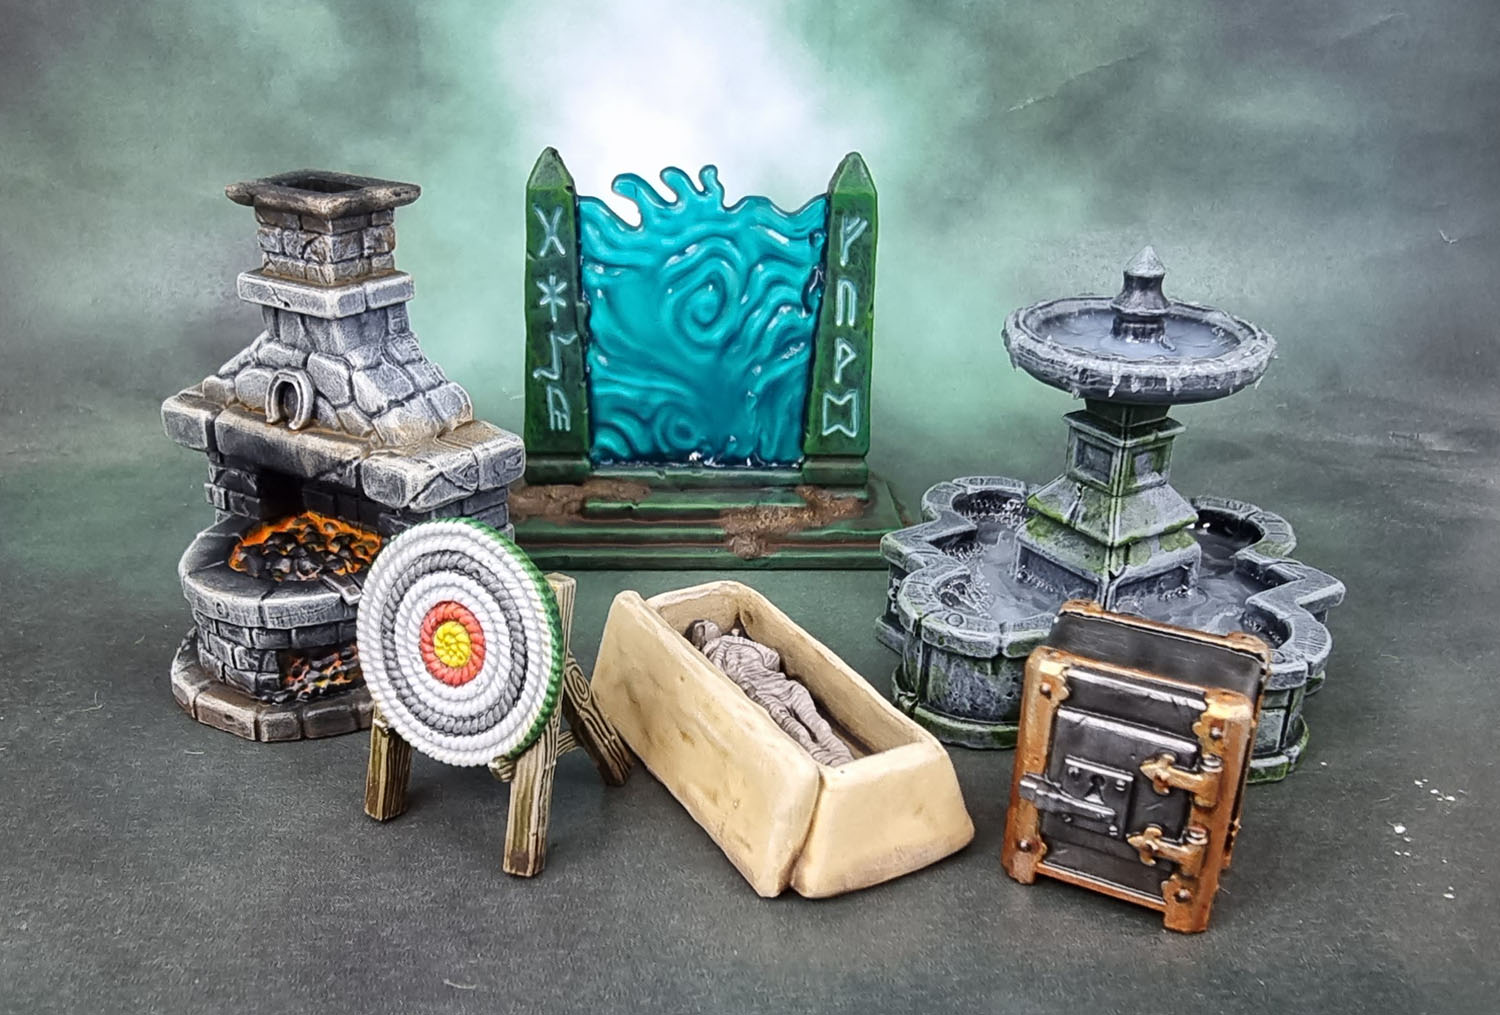
So first up, I’ve got the Blacksmith’s Forge. It’ll be something that I can pair with all of the Anvils that various Kickstarters keep throwing my way. It’s a pretty nice little piece. Quick and easy to assemble. I used white ink followed by yellow and orange washes to create the glow in the coals. I then drybrushed the top of the coals with german grey and then black to create that nice contrast.
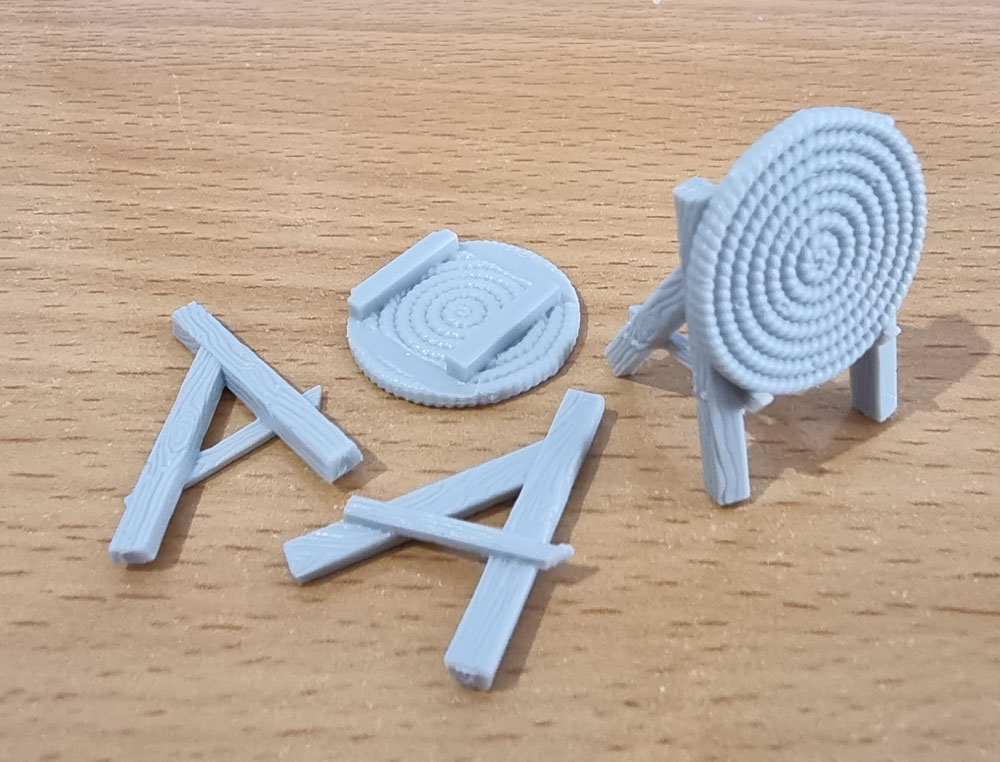
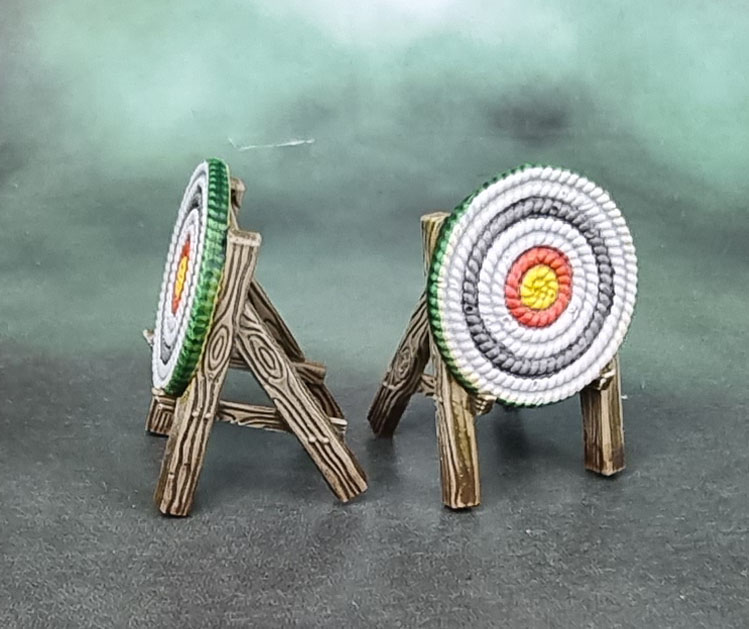
Here we have a pair of Archery Targets. I googled the colours of the rings and found an article on coiled straw mats for targets, and then went with a more archaic colour scheme from over 200 years ago, given the styl;e of the targets and the whole “fantasy/historical” gaming thing that we do. These were almost entirely painted using contrasts over grey primer, except for the base white on the target’s face.
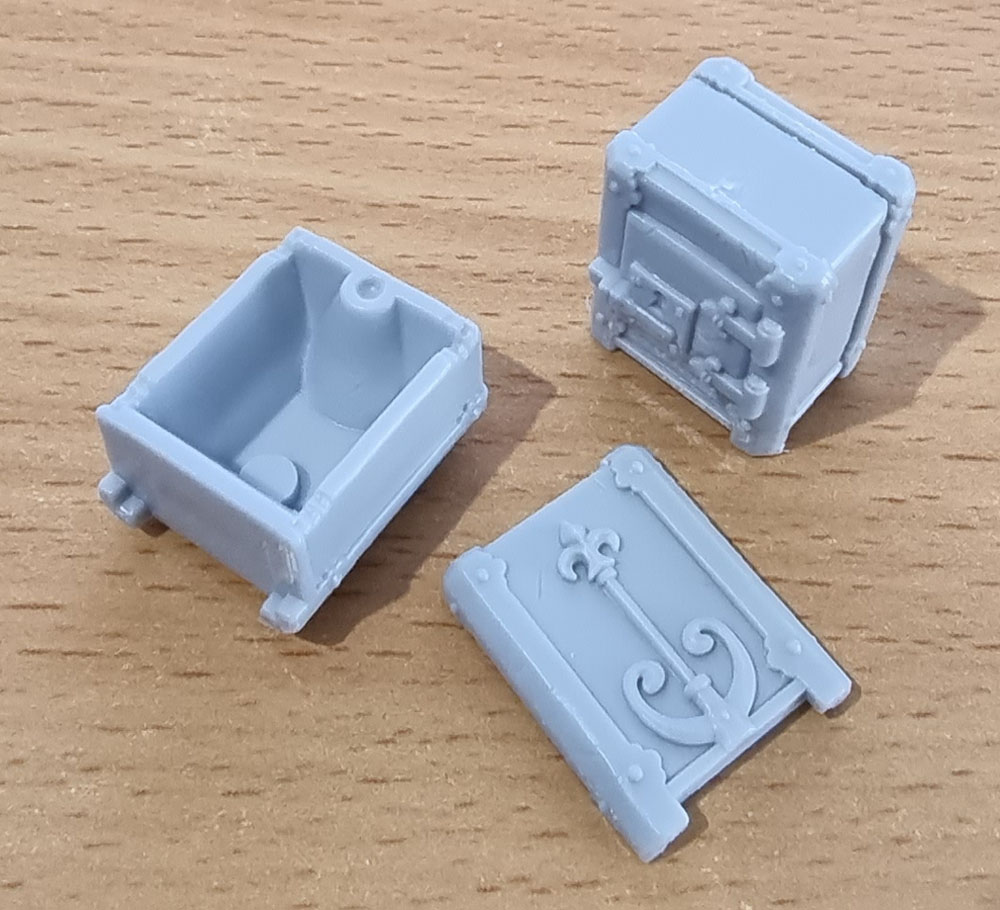
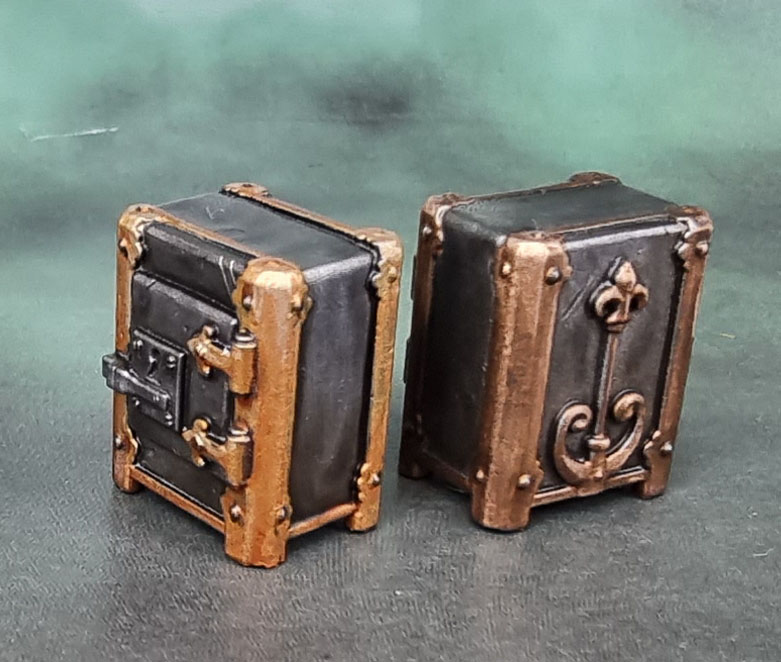
The safe is …fine. I painted them with metallics and washes. They’d have been much faster if I hadn’t decided to get fancy with them. Something that certainly haunted me later on…
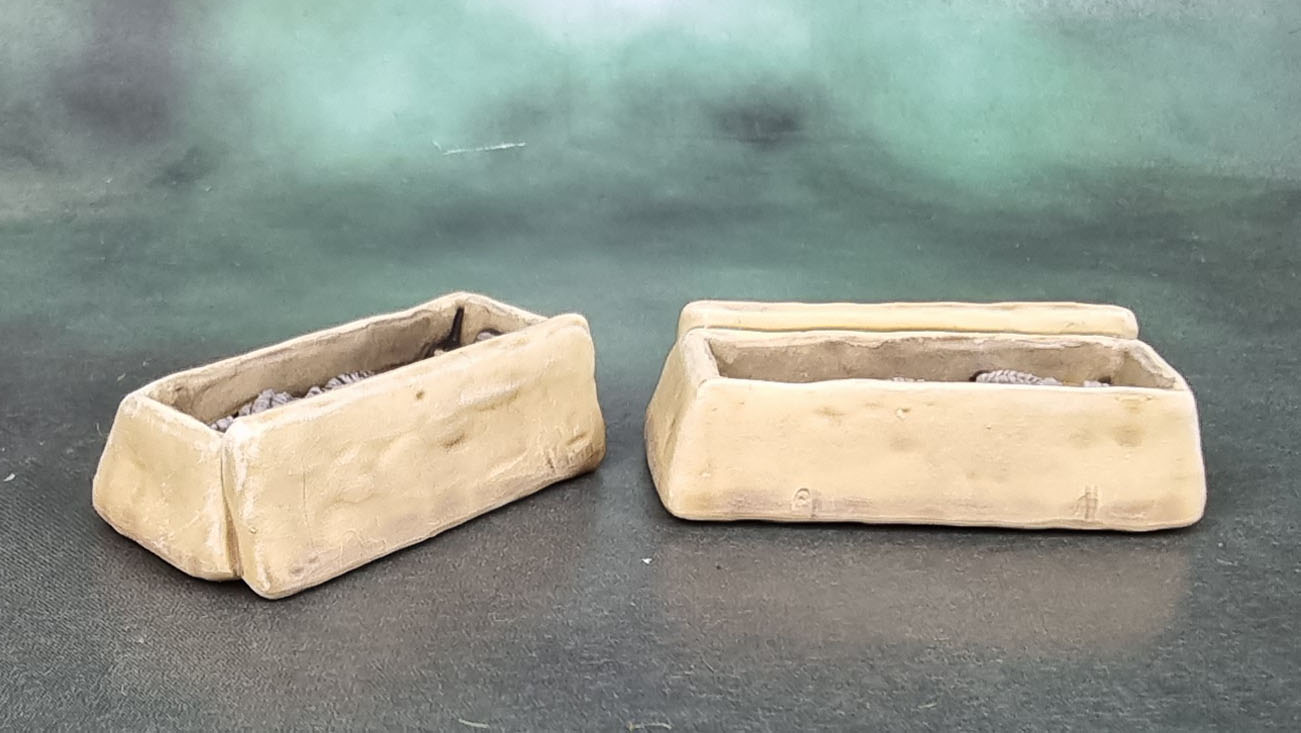
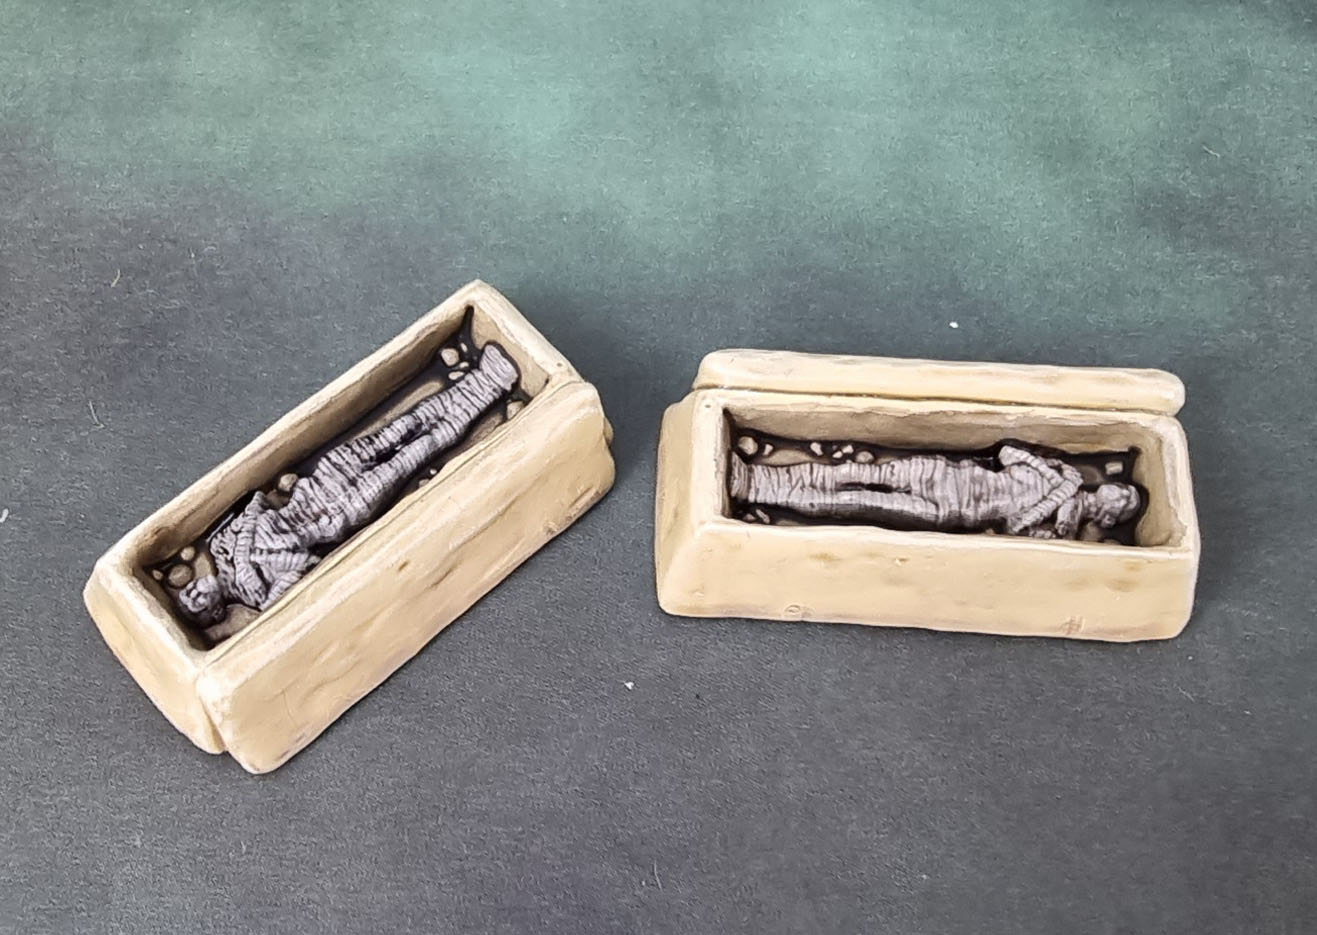
A Mummy in “box” style sarcophagus. Apparently I didn’t bother to photograph these in naked plastic. Probably because there was no assembly required on these as a one-part casting.
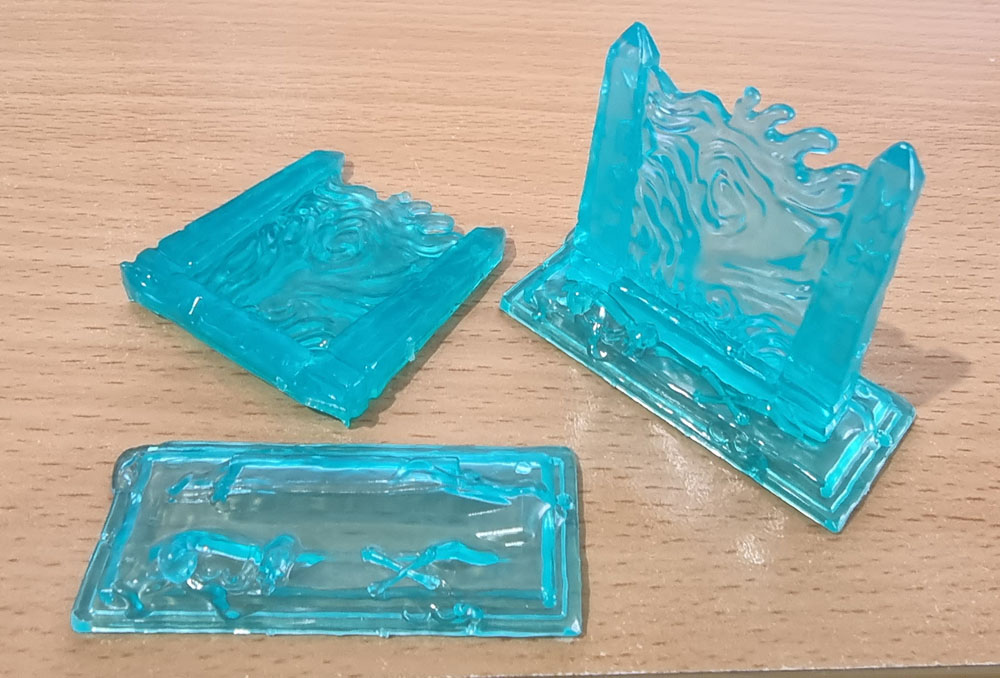
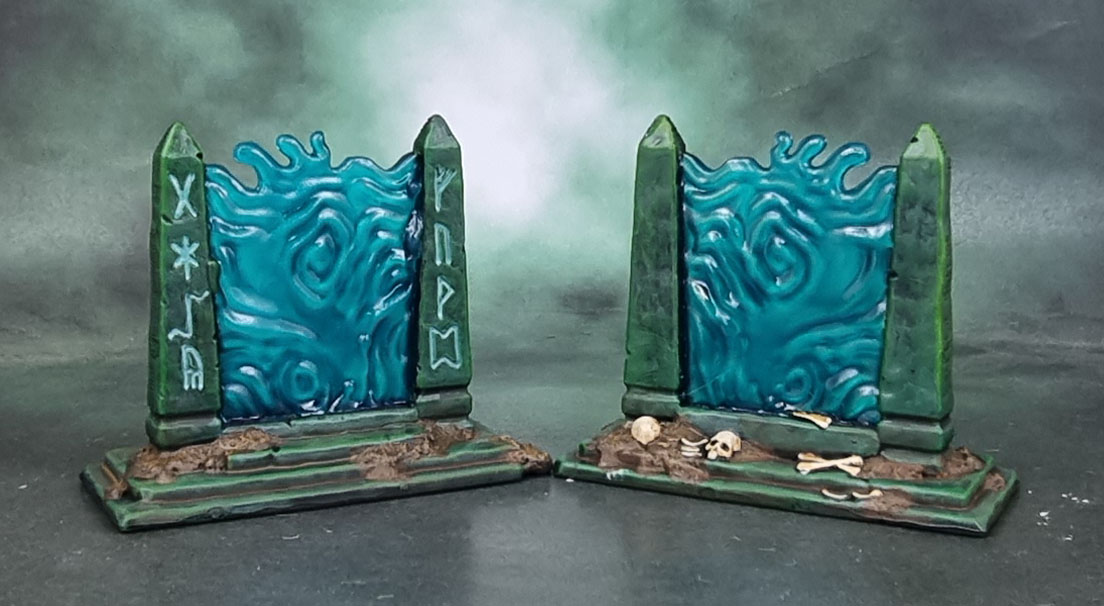
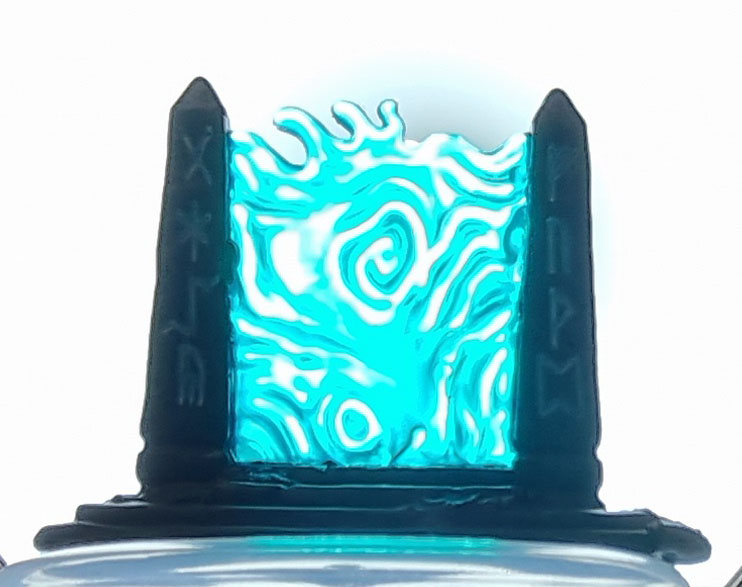
The Spellgates are cast in the transparent blue plastic. Did I say getting fancy earlier? I masked off the gates with blu-tac (poster putty to some of you), then sprayed the models black, drybrushed grey then some greens (because magic!) Carefully dripped my old friend Nihilakh Oxide into the runes for a glowy effect, then some thinned White Ink for highlights in there that you can barely see in the photos. Went over the super-plasticky rubble with texture paste. drybrushed – then peeled off all of that unhappy blu-tac, leaving the bare plastic underneath. I then spray varnished the whole thing satin which also serves to give some texture to the transparent plastic, which then allowed me to use some thinned Contrast paint to the portal, giving it some depth and leaving it to dry on its side (covered). Once dry, flip over and repeat. Once dry, gloss varnish one side. Once dry, flip over and repeat. Te last photo shows it with a light behind it. It’s more exaggerated than you’d see in a real game, obviously, but it still illustrates the effect kinda nicely. A little weathering power on the steps to complete the model.
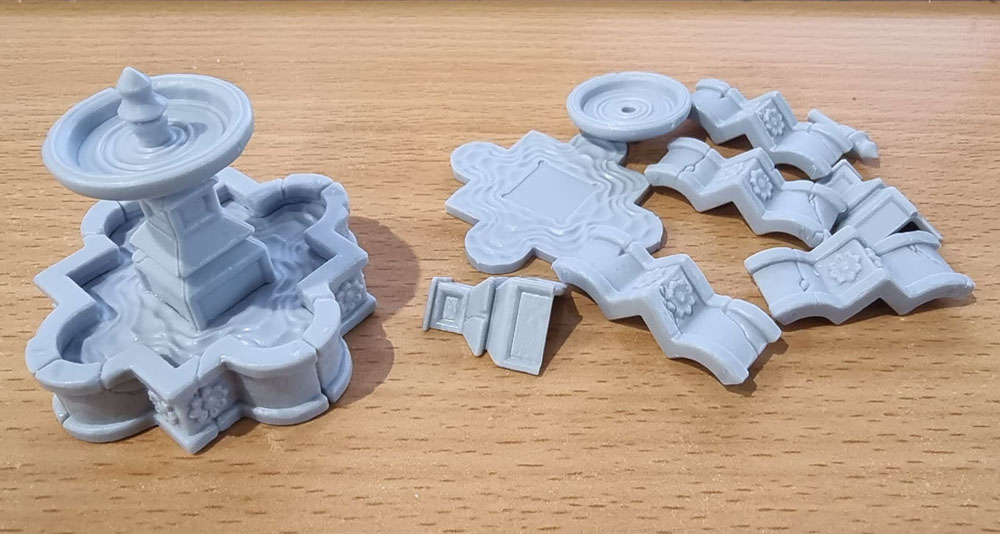
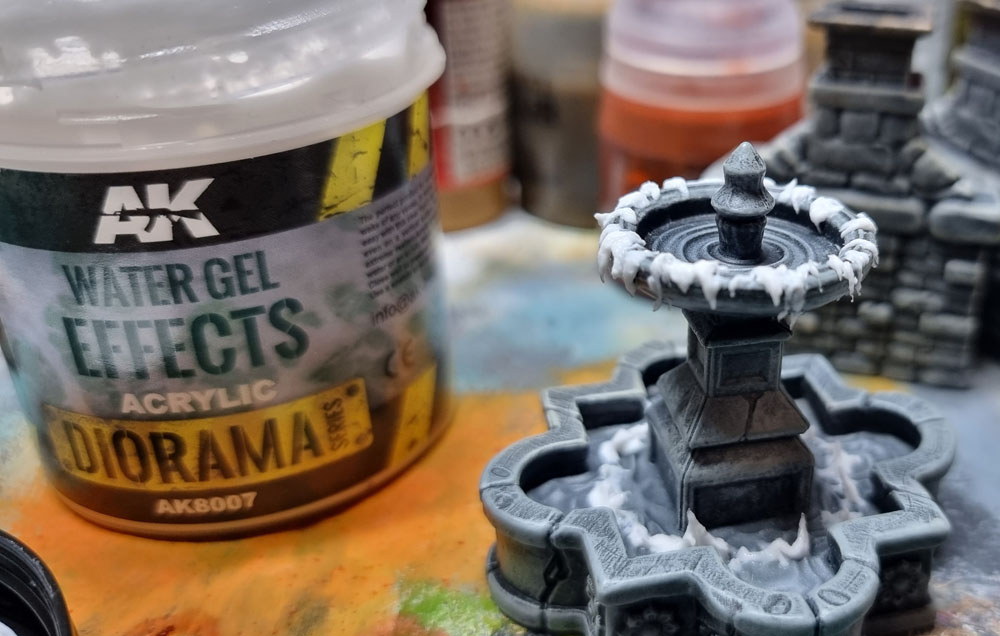
Speaking of faffing about and taking more time than expected, there’s the Fountains. Assembly was straightforward, though a bit more fiddly than ideal due to the number of parts – but fine.
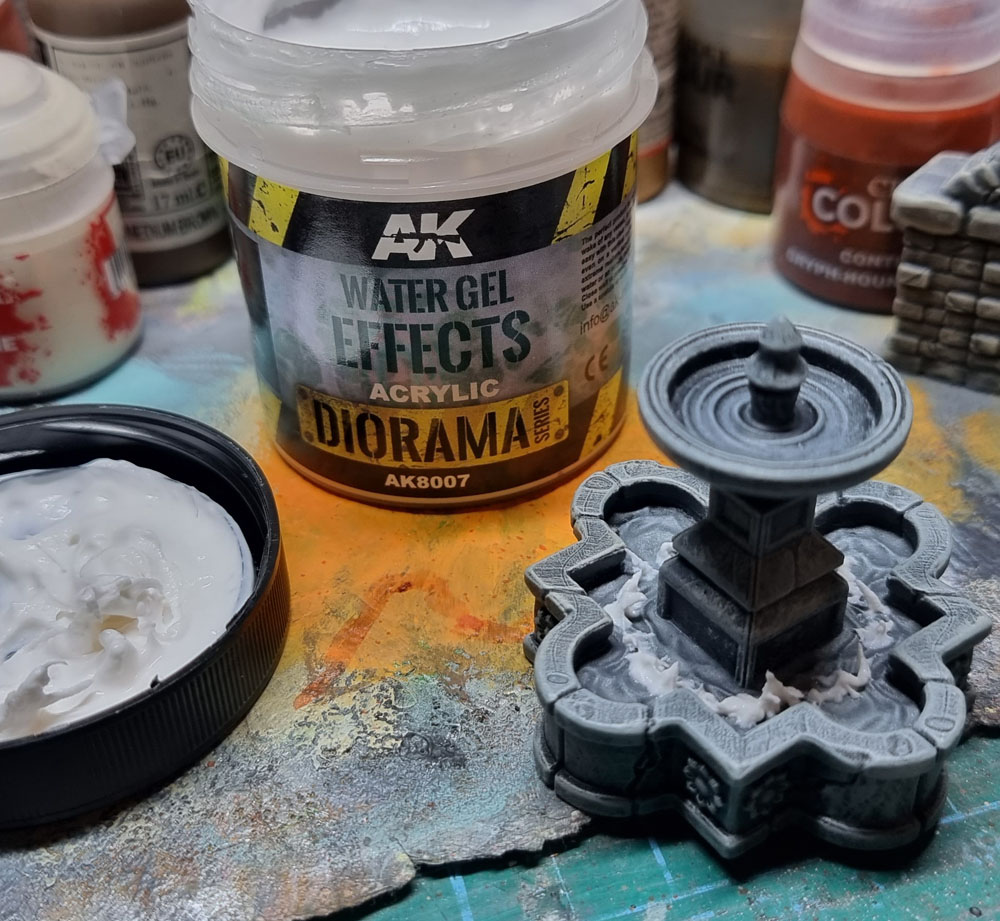
I thought I should give it some water action, so added some splashy bits to the bottom of the fountain.
And then of course I couldn’t leave well enough alone…
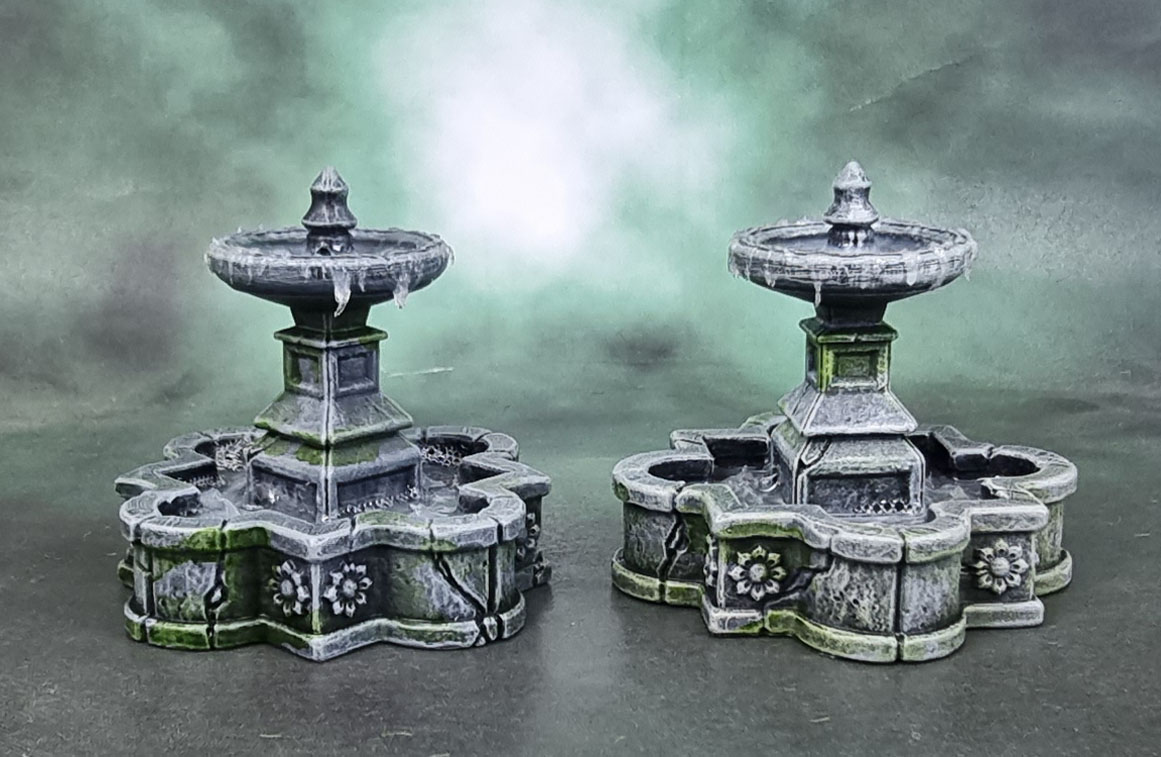
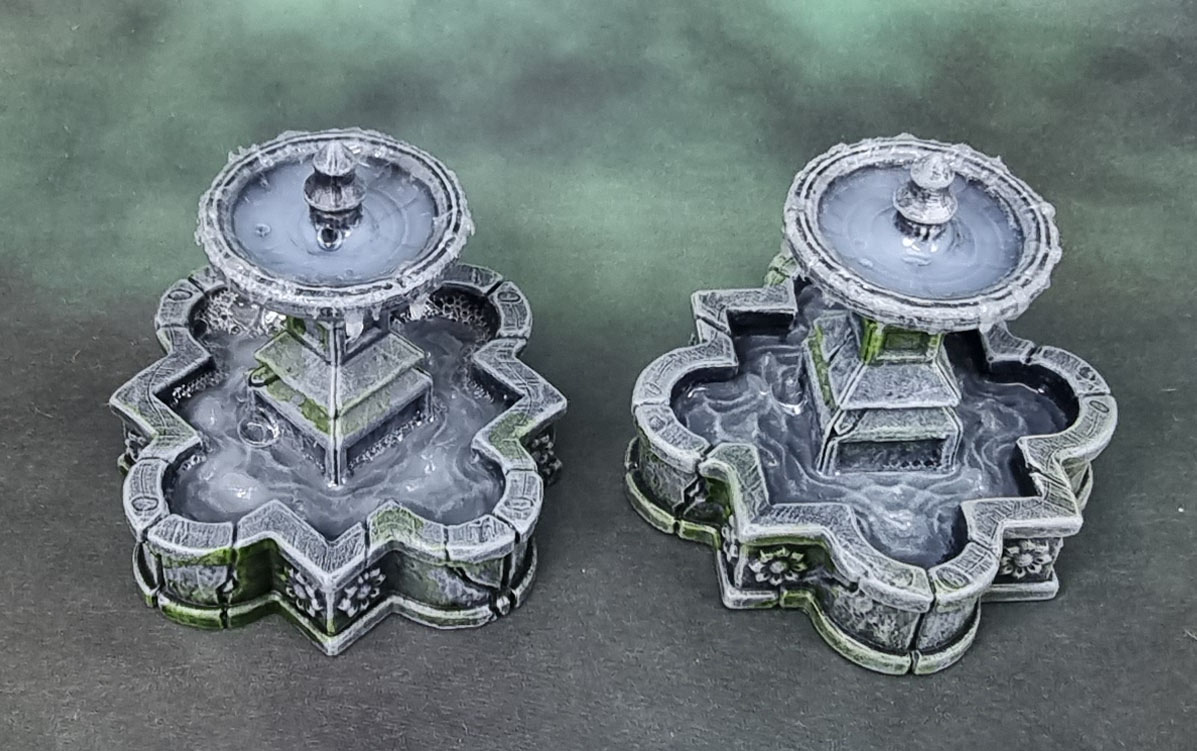
When it came to adding the Woodland Scenics Realistic Water, I found that the edges weren’t watertight, and had one of them drip Realistic Water resin everywhere. I had to patch them bpoth up from underneaht using Sprue Goo, which took an extra day to dry. I then added the water in small amounts over three days to get to the pointy where it now looks like this, and did bothing to discourage the bubbles, even though some are a bit out of scale – it’s still an appropriate effect. I think the cloudy water in the top dish will eventually clear up… finally, i added some more of that Dirty Down Moss Effect weathering paint…
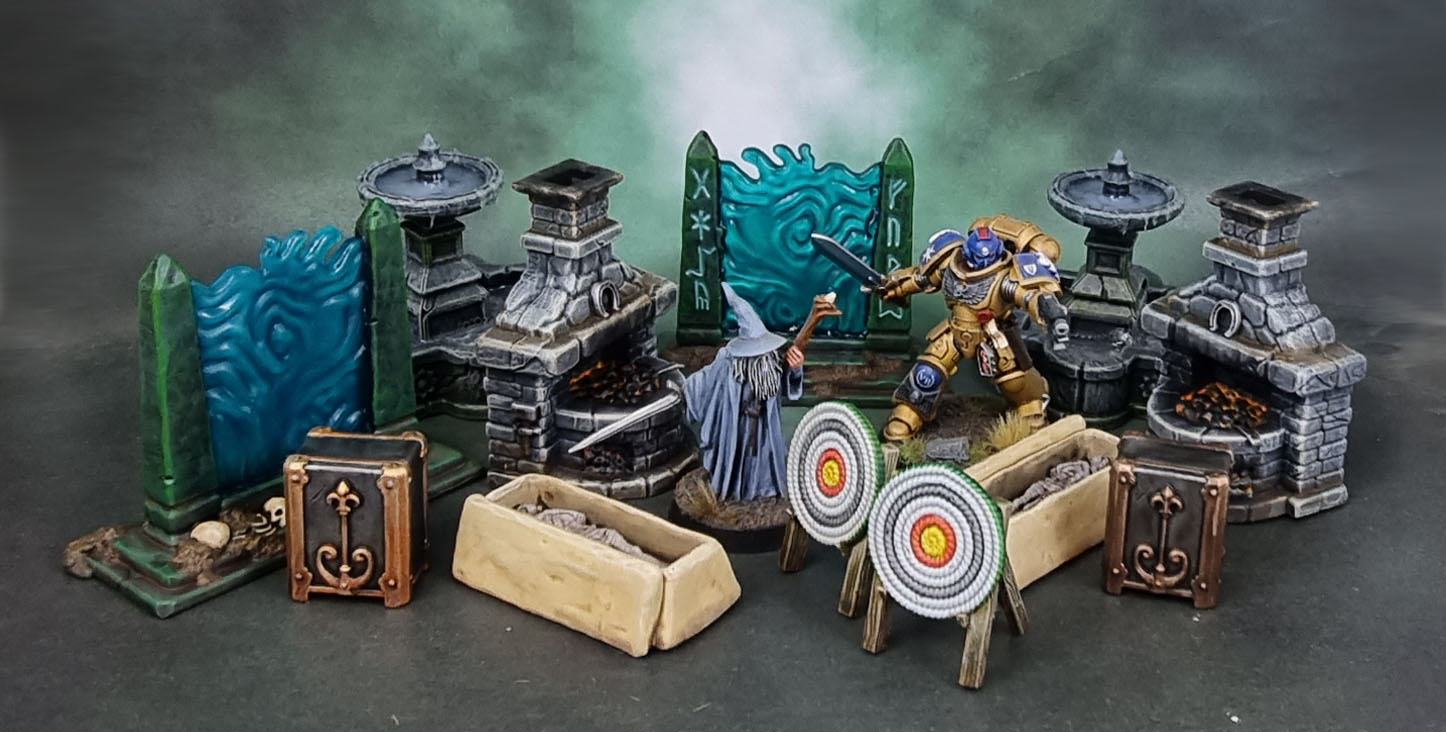
And there we are – a dozen bits of decent-looking scatter terrain that I have no particular use for destined for a storage tub of random scenic stuff, cleaned up, assembled and painted at the expense of models I’m supposed to be working on. I’ve included Gandalf and a Primaris here for scale – as you can see, these really fit the smaller scale models much better but could still work with some of GW’s oversized models. (I really need to get a Stormcast painted!)
As far as value goes, this is just a small snippet of the three boxes worth of stuff that I gopt in the Stretch Goals. At the time of writing this post, they still have the Pledge Manager open for Late Backers, and this set (if not supplied as a freebie) is 25 Euro, which is pretty bloody good for three boxes of stuff (the sprues above are just the first box of three – I haven’t even opened the others). So while I’m happy with them, I can’t speak to you. The quality is solid – not hyper (or over)-detailed like GW’s plastic terrain, but still nicely detailed and a lot more understated, though as noted – scaled for D&D models more than Warhammer ones. Whether it’s worthwhile for you has to be a personal choice, especially given the costs of postage these days, though being a Polish company, they are shipping from Europe which may benefit some people.
I’m hoping to get at least a few mroe of the models from this Box #1 done each month so I can start onto Box #2 before too much time has expired. Though there is a lot here…

All very nice, although I’d find the amount of bits on the sprues a bit off-putting! The coals in the blacksmith’s forge have come out really nicely! 🙂
LikeLiked by 4 people
You’re not alone, John – though when I figured out that each model only used a small number of them I felt much better. There’s still a few that use more pieces than they should, of course – like the benches…
LikeLiked by 2 people
Wow, you did put some extra TLC into that fountain! Crazy how nice that turned out. These actually would be pretty good items for the games we’re playing, but I’m also trying to cut down buying too much and paint more of what I have. Will see what wins though. Willpower vs Wallet! My other faves are the Blacksmiths forge and the Magic Gate. And now I see while I was trying to type this that JNV just beat me to the first post, arrrgggh!! Ah well, great job and I think your hard work paid off nicely! 😀
LikeLiked by 4 people
Haha thanks! Well, I guess the positive is that if you’re able to pick these boxes up for a decent price (you can *just* buy these stretch boxes from the Pledge Manager, I think without a “pledge” if you choose to) then you’ll have a lot of stuff to use as needed and just bits box the rest…
LikeLiked by 3 people
Fantastic work on all mate, all your extra effort has turned out some outstanding looking terrain pieces. Have to say that you get a fair amount of terrain in these boxes, so look pretty good value for money, bar postage of course.
LikeLiked by 3 people
Thank you Dave! They’ve turned out well – just not sure how much use I’ll get out of them! I’ve got a few larger terrain pieces I really need to try and finish, but I’ve been hoping for some warm/pleasant weather so I can work on them out in the War Room…
LikeLiked by 3 people
Hey Dave – do you know who/where Zombtober is being run this year? My google-fu can’t find it.. Also, is it Zomtober, Zom’tober or Zombtober…?
LikeLiked by 3 people
Simon over at https://www.fantoricalwargaming.com/ ran it last year, and I believe he is this year as well, but hasn’t posted anything yet, I will be passing on details of anyone I spot to him anyrate.
LikeLiked by 3 people
Thanks Dave! If it happens, let me know. (I’ll try and keep an eye out myself as well). Either way, no huge deal if it doesn’t happen since the Zombies & Survivors I’m painting will apparently also qualify for some other bloke’s painting challenge as well…
LikeLiked by 2 people
Couldn’t find anyone else running it so going to add it in to my challenge.
LikeLiked by 2 people
Pretty cool! I’m terrified of using any water effect, so I find it so interesting to see what you did here! Lovely work all over!
LikeLiked by 4 people
Thanks mate – I find that these models – and ones like them – Low-importance Kickstarter models and terrain – are the perfect pieces to practise & experiment with new techniques and “mediums” on. I’ve simply dripped water into holes (ooo-err) quite a few times but never actually tried the drippy-edge thing before.
LikeLiked by 2 people
They look rather useful for set dressing.
I like what you’ve done with the fountains.
Cheers,
Pete.
LikeLiked by 3 people
Thanks Pete! Most of them are pretty much just set dressing – too small to be anyuthing else. 🙂
LikeLiked by 2 people
Good job powering through these sprues, mate. All of the terrain bits came out great and I like that they chose some different kinds of terrain items than say what Terrain Crate makes. It is amazing how many little things like this are on the market now. We’re spoiled for choice on customizing our battlefields and dioramas, I would have to say!
LikeLiked by 4 people
Thanks mate! It’s just a small fraction of what’s on these sprues, so I think even if I do a few each month they’ll last quite awhile yet before getting to the final bits that attach to the walls and such. They’d be perfect for dioramas and highly detailed, permanent pieces, I think.
LikeLiked by 3 people
That mud creature is super cool. Can’t wait to see what you do with it.
LikeLiked by 3 people
It should be fun, though it might have to wait until one of the Monster challenges (March &/or May) next year the way things are looking!
LikeLiked by 2 people
They look great. The spell gate is a real eye stopper and would make a great objective piece.
LikeLiked by 1 person
Thanks! And with two of them they could be used with some sort of rules to jump from one to the other.. 🙂
LikeLiked by 1 person
The fountain looks great, I know you said it took a while but it looks worth it to me!
LikeLiked by 1 person
Thank you! Glad they’re done – they should be pretty flexible little detail pieces and were a good learning experience for using water effects. 🙂
LikeLiked by 1 person
Pingback: Pandemic: World of Warcraft: Wrath of the Lich King – Arthas, the Lich King & Abominations | Azazel's Bitz Box.
There is certainly some neat stuff you have there mate!
LikeLike