Ruined Watchtower: January Terrain 2019

Not a GW kit for a change, today’s terrain piece is a ruined watchtower. I can’t tell you who produced it, though – as I picked it up quite a few years ago now in a job lot with a whole lot of other bits and pieces.

Speaking of pieces, it was in several until I finally assembled the thing earlier this month, with this month’s challenge and the good spraying weather finally motivating me to finally get the thing done!

It went together simply, if not easily – with some drilling and clipping needed to get the pieces together. The different segments don’t fit together perfectly, but they’re close enough so that it can be difficult to notice.

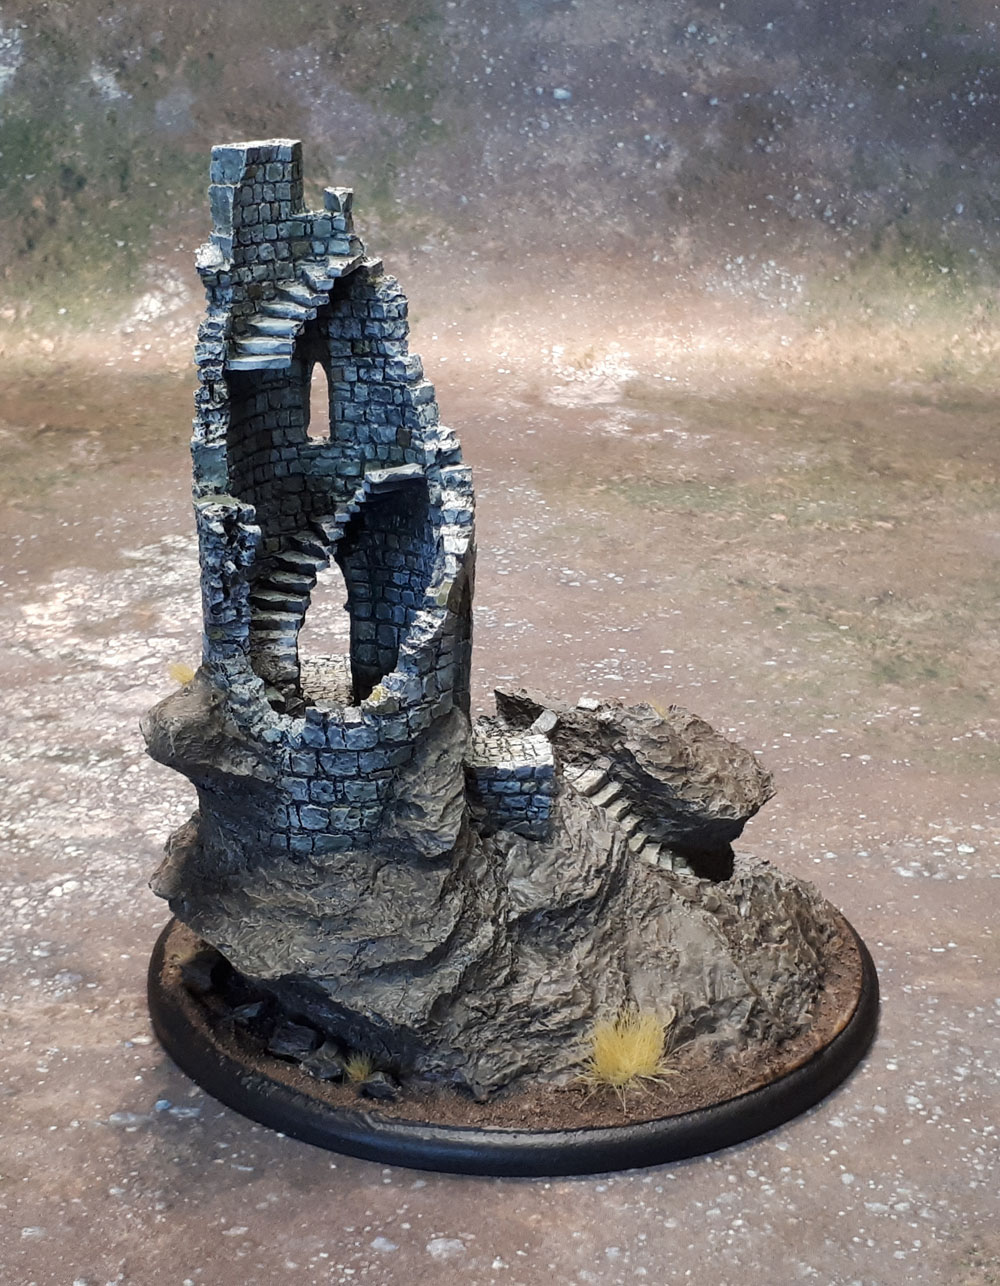
Once again, the sheen from several layers of varnish combined with a lot of lights belies the more matte appearance that it has in person. It looks almost like flowing mud here! What can I say? My lighting options for larger pieces are pretty shithouse! It’s kinda hard to see, but I’ve attempted to have the orientation of the grass on the tufts “flow” with he contours of the model, as the whole thing has a pretty windswept look to it.

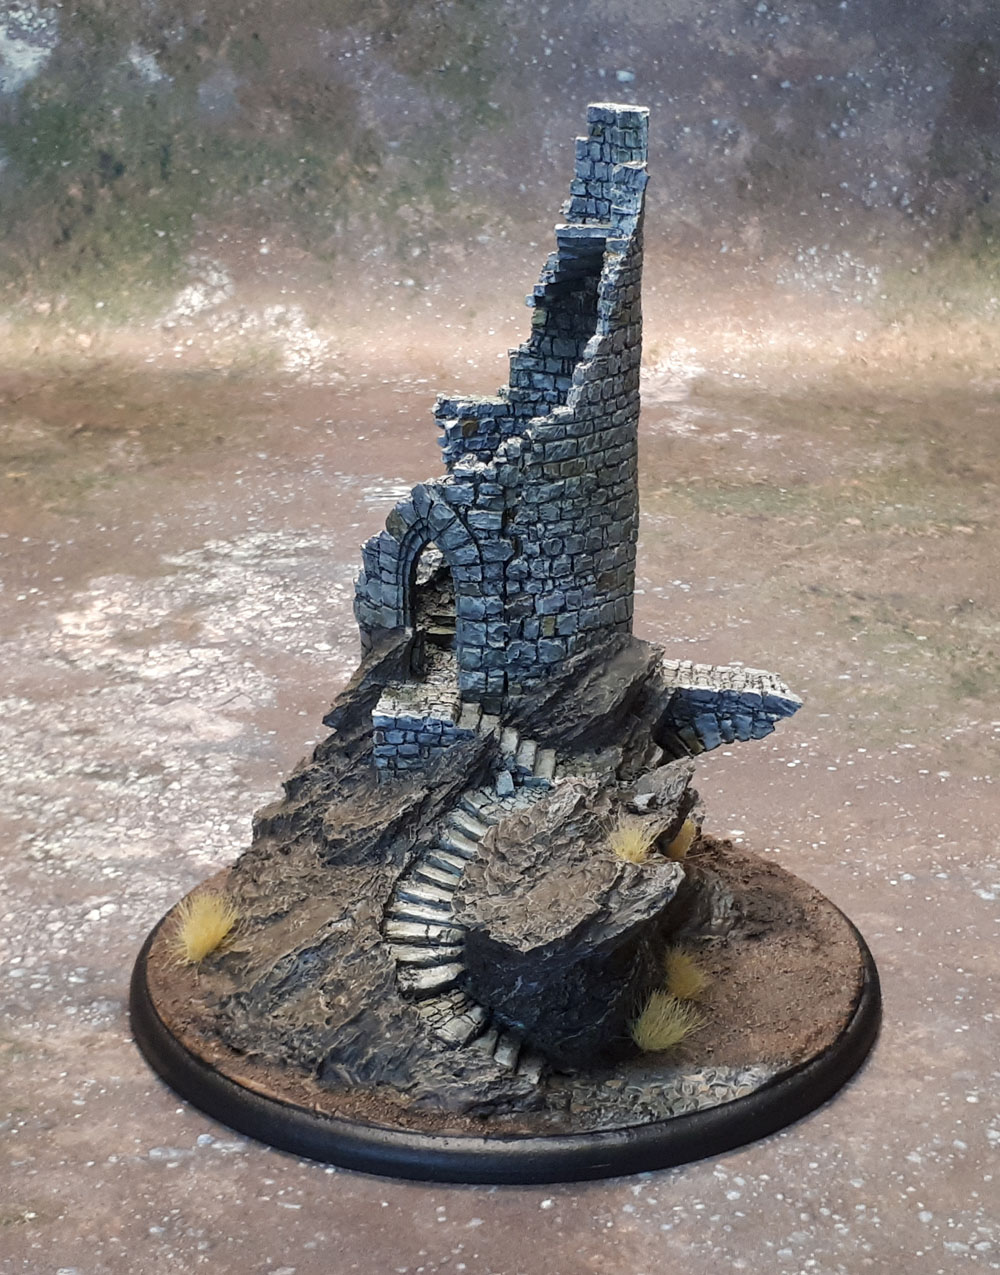
That big section where it looks like it’s fit together extraordinarily badly is part of the sculpt – it’s intentional – rather than being the result of my terrible modelling skills. I’ve mounted it on an inexpensive wooden teapot stand to give it a nice sturdy base, and rather than trying to bevel it to the ground or try to paint the edges in an awkward (to me) brown so it “fits in better” with my table surfaces, I just went full fuggit and gave it a similar black rim as I do with many of my bases. I did roughly sculpt some simple flagstones in the ground, giving the indication of a small path that may or may not continue on the battlefield surface.

The scale of this model seems a bit smaller than most “heroic” scale models. Here we have it with a few Heroes of Men from the LotR range, with their slightly smaller scale showing the sizing. True historical models would be a touch smaller yet, so would fit in even more nicely with the tower. I also thought our friend The Imperfect Modeller would appreciate how close this almost gets to a proper diorama! I’d just need an appropriate figure to put in Gandalf’s place there, and a pin to hold them there on!

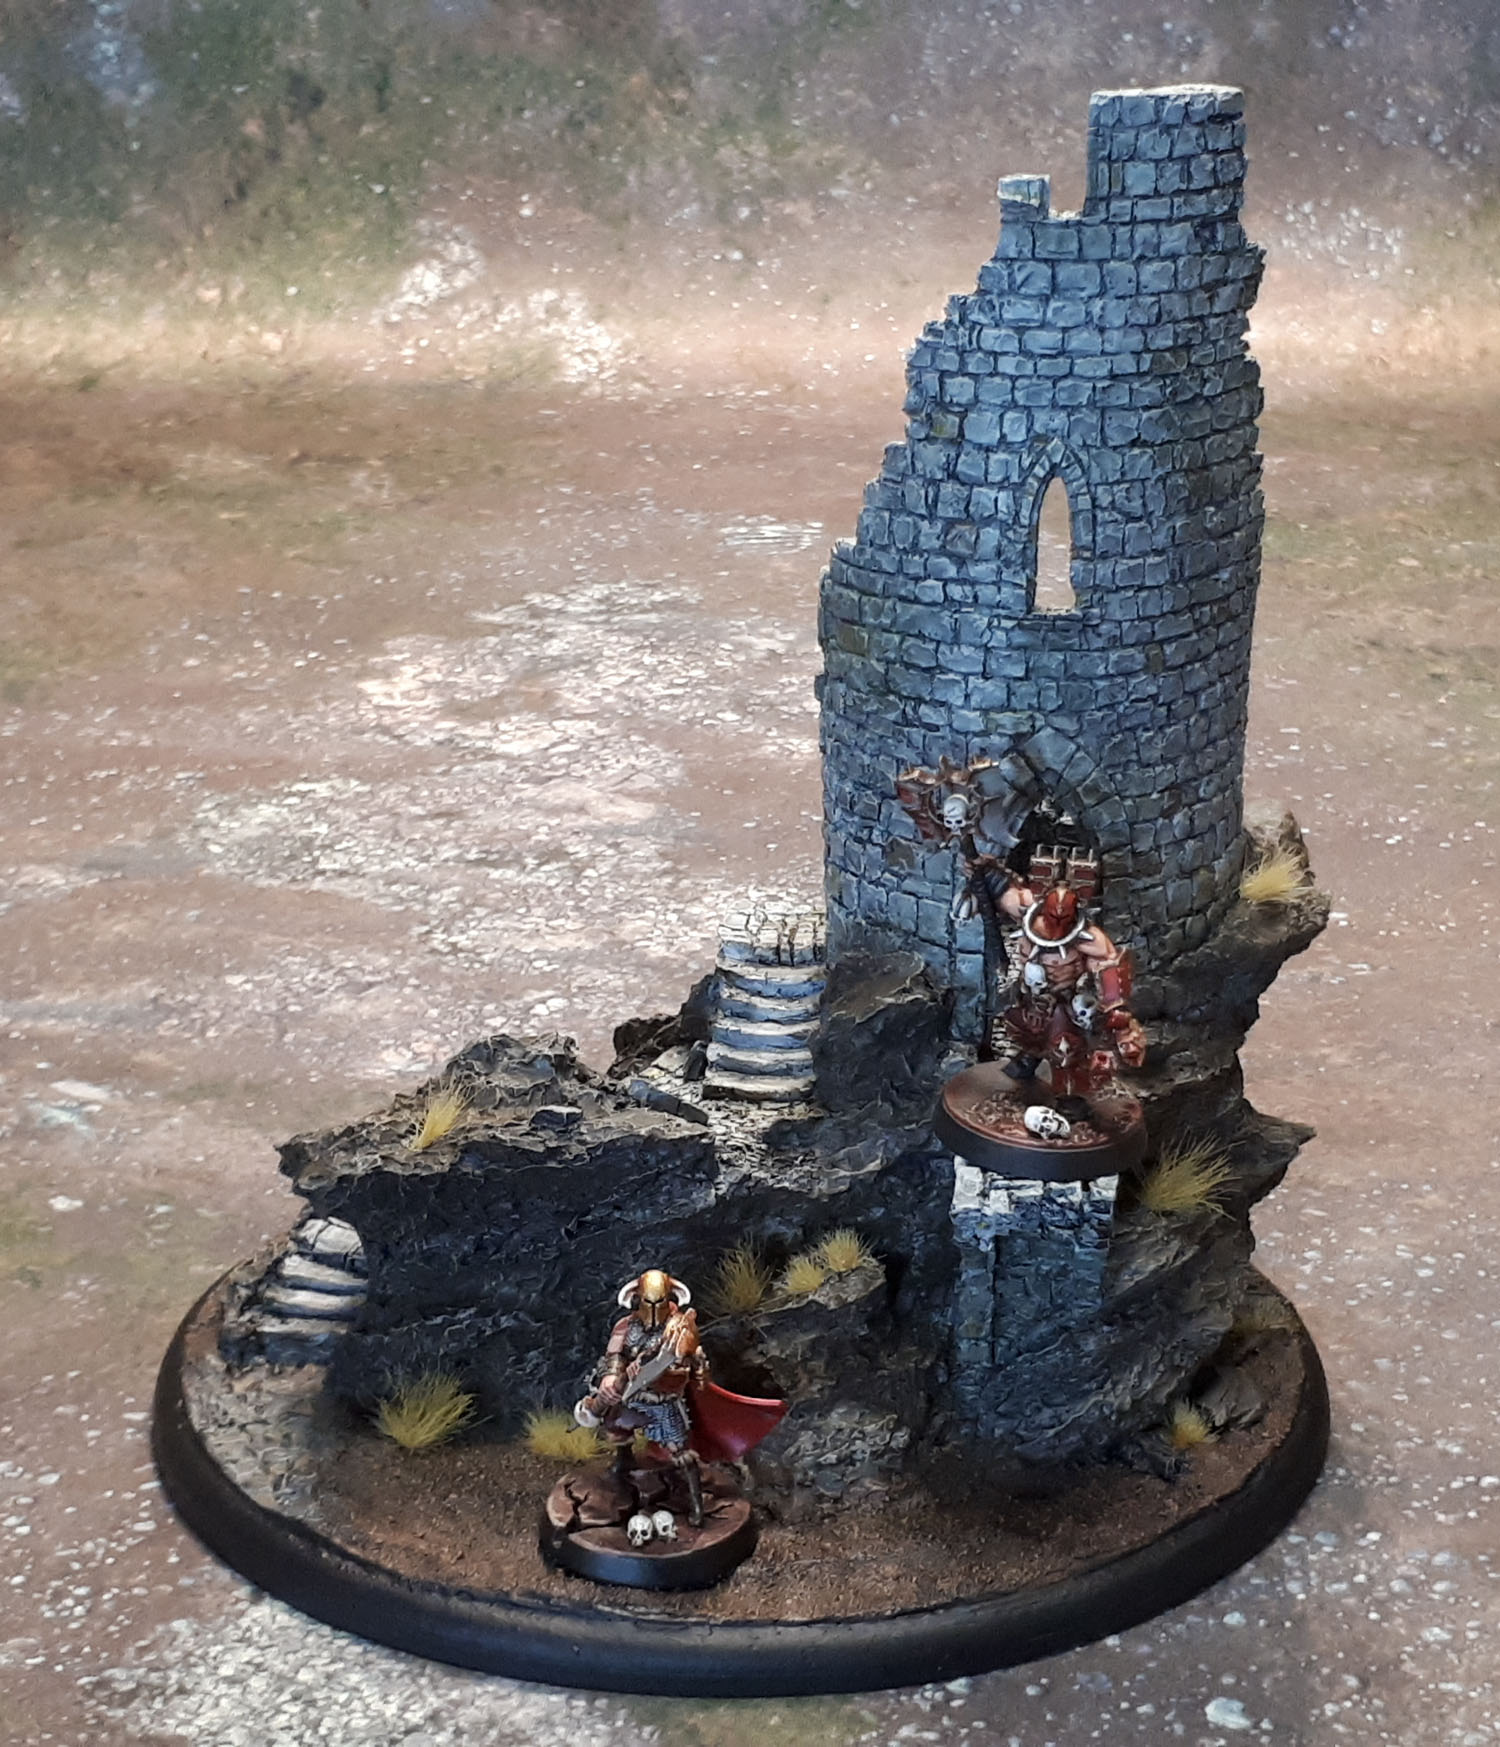
FInally, as a point of contrast, I thought a couple of more modern-scale AoS Bloodbound figures (ok, one is at least 50% Shieldwolf) would be a nice counter to the above – as you can see, it’s still very much usable for Fantasy of pretty much any stripe. And the number of times that Space Marines have fought their foes over terrain that resembles Terra’s ancient medieval castles must be beyond count!

Necromunda Scenery, Scotia Grendel Hatches – and a random bit of Resin Terrain (MechaNovember ’18)

Necromunda 2018 Sump Monster, Oldhammer Necromunda Escher, Scotia grendel 10040 - Sci-Fi Accessories Hatches, Necromunda Terrain, Kill-Team Scenery

This post is dedicated to (or blamed on) fellow Blogger, Wudugast and his recent terrain post Take Cover Part 3. Deep down on his post are a pair of hatches that are clearly from some sort of Necromunda-friendly kit. When I saw those, my “that would be quick and easy” sense perked up. I do like scenery bits that can be done simply like that.

Scotia Grendel 10040 - Sci-Fi Accessories Hatches, Necromunda Terrain, Kill-Team Scenery

But then it turned out that they’re from a set that I don’t yet own Citadel Ryza Ruins set.

Scotia Grendel 10040 - Sci-Fi Accessories Hatches, Necromunda Terrain, Kill-Team Scenery

But then I remembered that I have these – like the crates I posted a couple of days ago, I picked this set up in the 1990’s and have done literally nothing with them since. So I grabbed them out and painted them up. Naturally, they’re still available from Scotia Grendel. Funny thing was that the crates I finished a few days ago were in the same storage box that these hatches were in, and it was when I got these out that I got the crates out. Painted them after the hatches, but before the other stuff in this post was done. And three hatches hardly warrants a post, so they had to wait.

Actually, let’s take a quick aside now – I do now finally know what colour to paint the floors which was one of the reasons they’ve sat untouched for two decades – my custom Necromunda Blue mix. What about the lockers? Military Green? Bright Red? Muted Blue? Plain (weathered) Iron? I should probably try to get the rest of these painted in the next couple of months…

Necromunda 2018 Sump Monster

Almost last but not least, the sump-monster which lies in wait for unwary gangers. Another pair of models that got clipped, assembled and painted straight from seeing Wudugast’s post – I really liked his pale and sickly looking renditions of these tentacles, so I did something similar, though using a deep turquoise and an ivory with a slight yellowish tinge. They don’t look great in these photos, admittedly – they’ve come up a bit too stark here – not sure if the shiny gloss varnish on them is helping a lot with that, to be honest. The pic at the top looks a lot more true to how they look in hand.

Necromunda Terrain, Kill-Team Scenery

Finally, there’s this thing. I’m not exactly sure what it is, or who made it. I got it with a whole lot of other secondhand stuff back in the 1990’s. I suspect that it was originally some homemade terrain that was cast, as it doesn’t have the fine detail of the other pieces I have from the same era, like the various Grendel pieces, or some of the other random bits I have that date back to the same period.

Necromunda Terrain, Kill-Team Scenery

It was also cast in a pretty horrible yellow resin. As you can see, there’s quite a few holes and bubbles on the thing. Some of the black paint I’d spray-primed it with back int he day had even flaked off. It does look very much like a homemade piece, though – cobbled together from various household items in an interesting manner. I think that’s a highlighter pen lid on the side.

Necromunda Terrain, Kill-Team Scenery

Anyway, I sprayed it with a beaten dark metal Krylon spray, drybrushed the thing in dark metallics, added my Necromunda Blue around the base, then considered adding some coloured metals and calling it a day – but then I had the bright idea of deciding to use it as an experimental piece for some of my GW scenery that I need to get working on properly. So it was time to break out the Vallejo Model Colour Iraqui Sand and Pale Sand, get chipping with Metal Black and Plate Mail Metal, get rusty with Rust Wash and get dirty and streaky with Dirt Brown Wash. The chipping medium that I added was a complete failure, as you can see. Or can’t see. I guess if I don’t mention it, you won’t know I tried to use it – but then, that’s what experimental pieces are for!

Necromunda Terrain, Kill-Team Scenery

A few decals before the weathering, heavier damage where there were more bubbles and miscast resin bits, and another piece of terrain that’s been sitting around here for literally two decades is finally ready for the table. Better yet, a badly cast piece that seemed to flake the paint appears to be stable (thank you, Krylon!) and will now look quite decent on the tabletop. Sure, it still ain’t pretty. It’s still ugly. Could I do better with it? Sure – but I have better things to spend my time on than this badly-cast thing, so it’s very much “good enough”.

What’s this piece got to do with Wudugast? I spotted it sitting on a table as I moved from one place to another while varnishing the hatches – and because I’ve been doing scenery – thought: “I should paint that fucking thing.” So I did.