Battle for Macragge Crashed Aquila Lander (40k 4th Ed Starter Set Terrain)

Battle for Macragge Crashed Aquila Lander 40k 4th Ed Starter Set Terrain

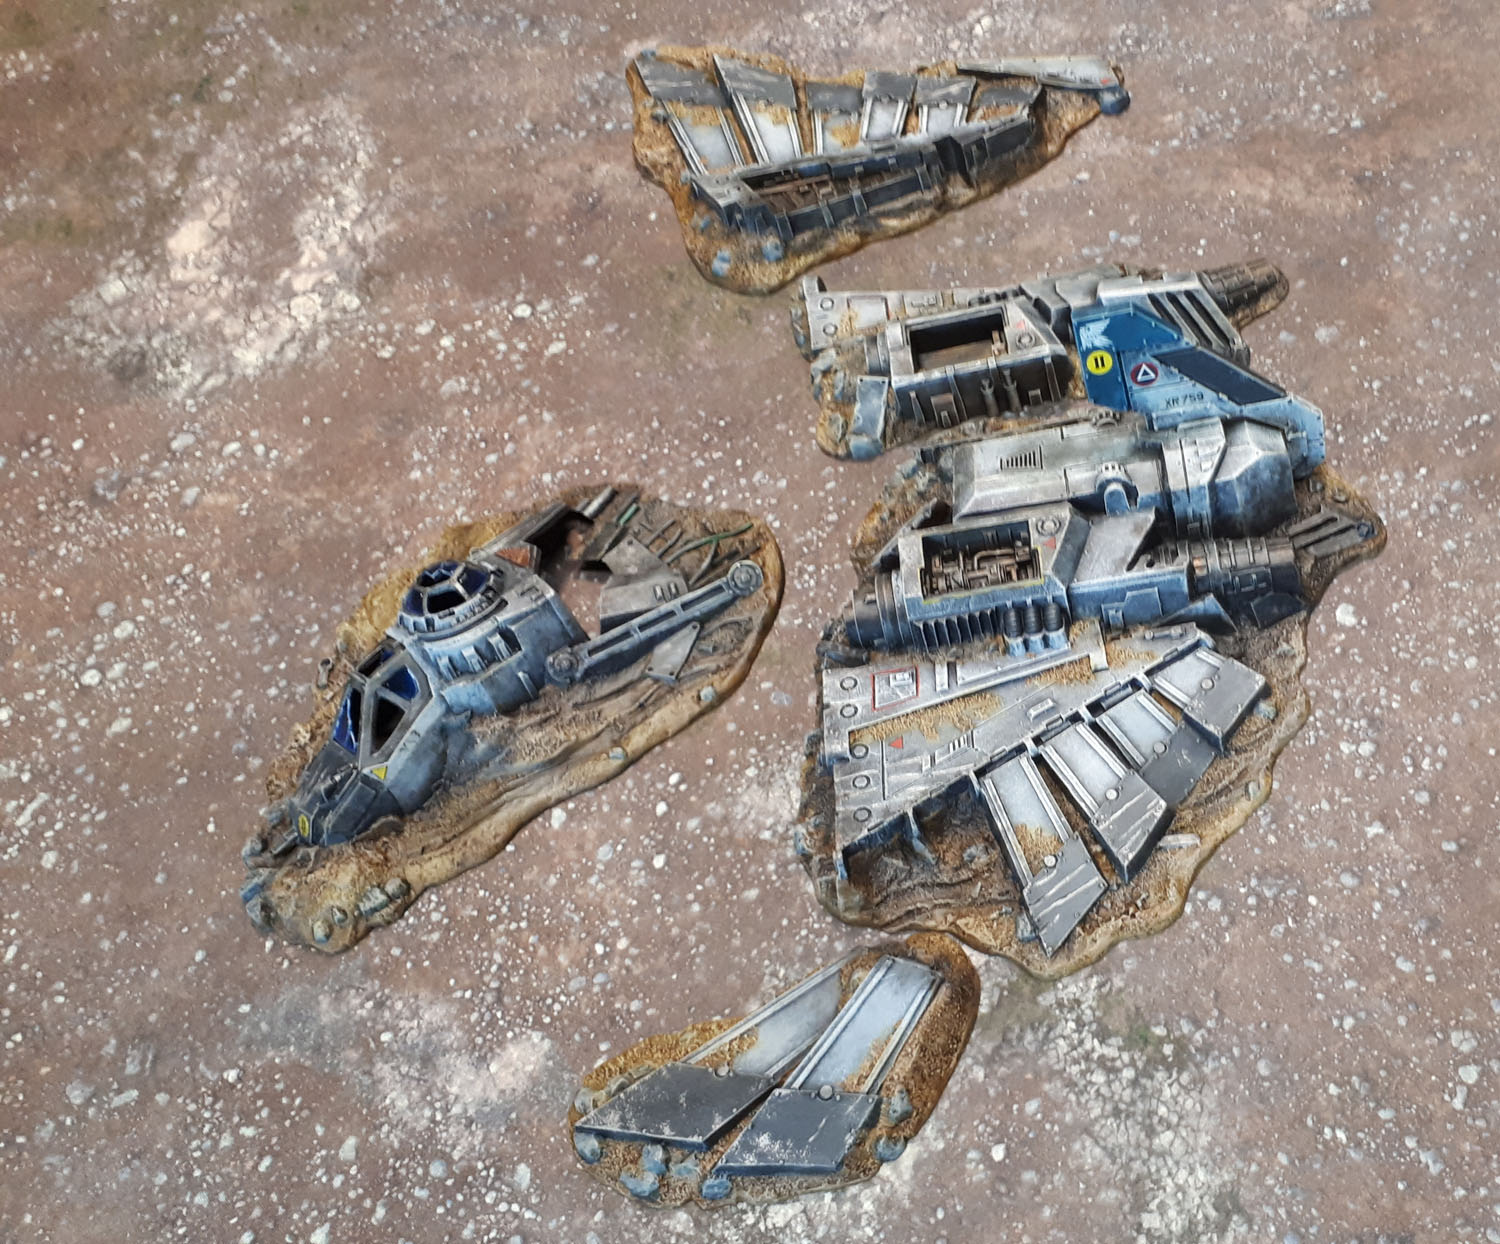
Today we have a model (well, five distinct models that make up a multi-part terrain feature) that hits several targets. Firstly, they were a big part of my first painting Tray, so getting them done really clears them off and gets me close to completion and able to start the next one. The crashed Aquila Lander is of course the centrepiece from the Warhammer 40k 4th Edition “Battle for Macraggae” starter set, released (and purchased by me) in 2004. Ouch.

I did at least finish the Lt.Varras model back in 2015.

Battle for Macragge Crashed Aquila Lander 40k 4th Ed Starter Set Terrain

The second of the three targets that this lets me smack is Dave Stone‘s Summer of Scenery Challenge running through July and August. Even though he’s clearly mislabelled the thing, as we’re in midwinter currently.

Battle for Macragge Crashed Aquila Lander 40k 4th Ed Starter Set Terrain

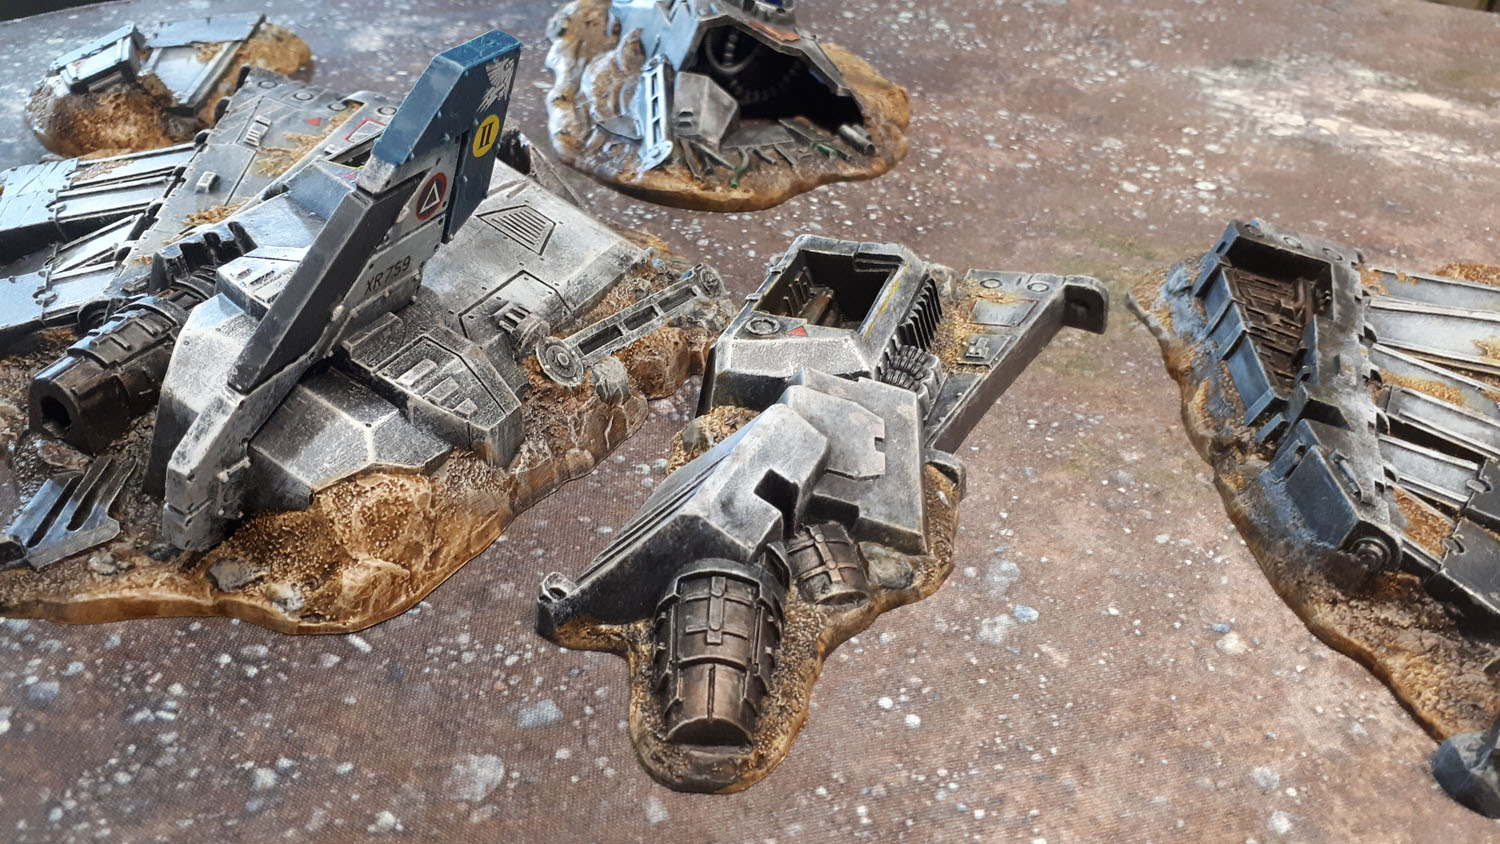
I’ll get to the third momentarily, but first I do want to throw out a thanks to Krautscientist. While I did start painting the thing aroundabouts 2004-5, the project (like so many other things) got kinda shuffled to the side and forgotten about for a long time until recently. And by recently I mean January last year (2019) when the improvements to his lander inspired me back onto the on the road to redoiong this thing. You can’t see it all that well in the pic, but like KS, I blocked up that annoying hole in the back of the cockpick section with a panel and some hanging cabling. Unlike KS, I didn’t go the whole hog and add in an unconsious/dead pilot or a pilot’s seat. Mostly because I’m lazy, but I can always go back and add one in later. Buit probably won’t. Because I’m lazy.

Battle for Macragge Crashed Aquila Lander 40k 4th Ed Starter Set Terrain

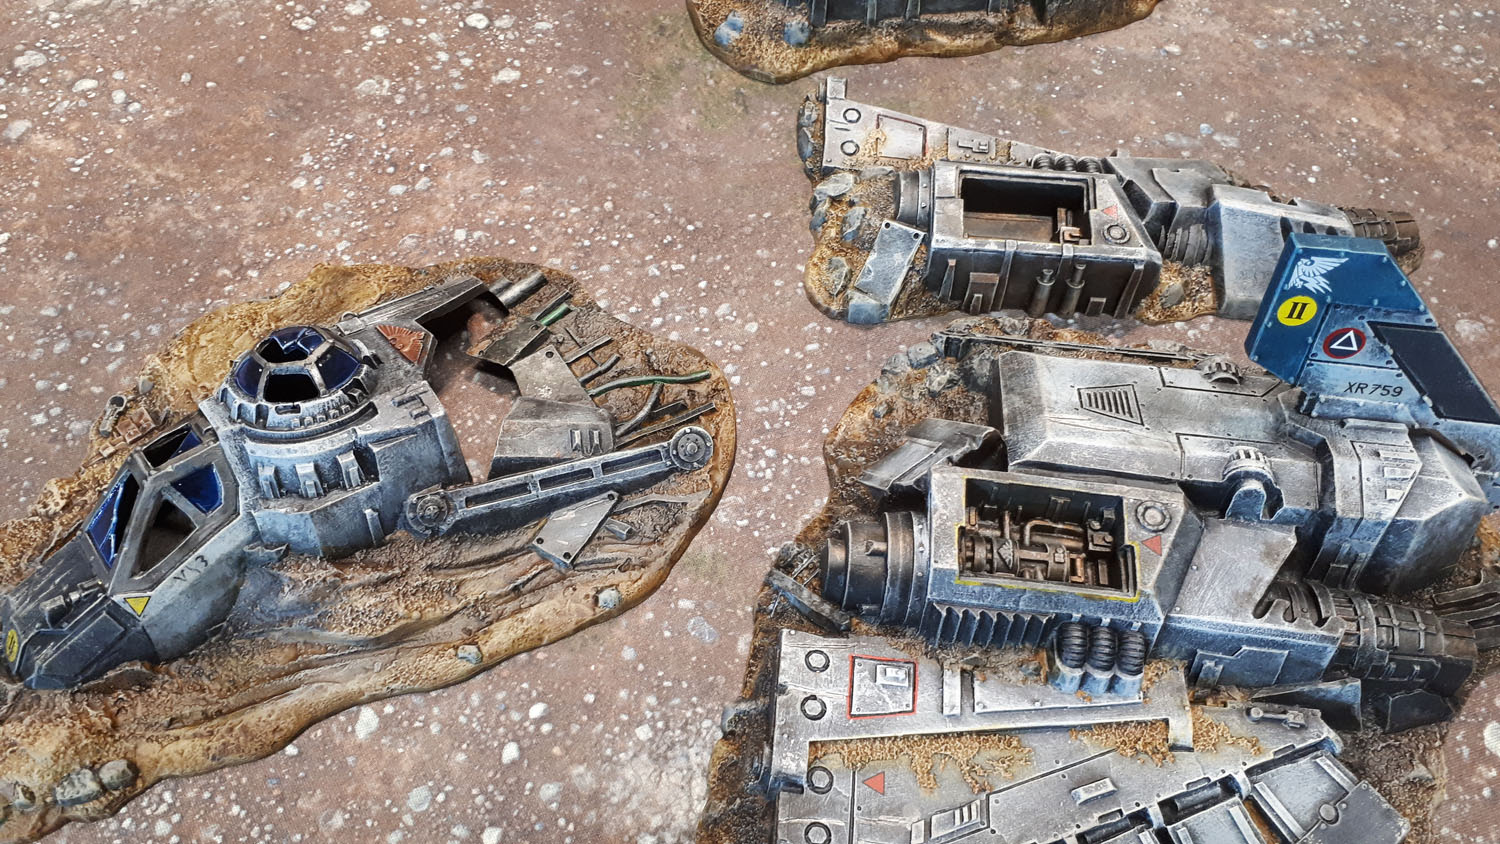
I added a bunch of decals from various kits and my little tub of random decals at certain points to make the flyer look a little more legitimate. Little detail touches like this I find help to make the whole thing look that much better.

Battle for Macragge Crashed Aquila Lander 40k 4th Ed Starter Set Terrain

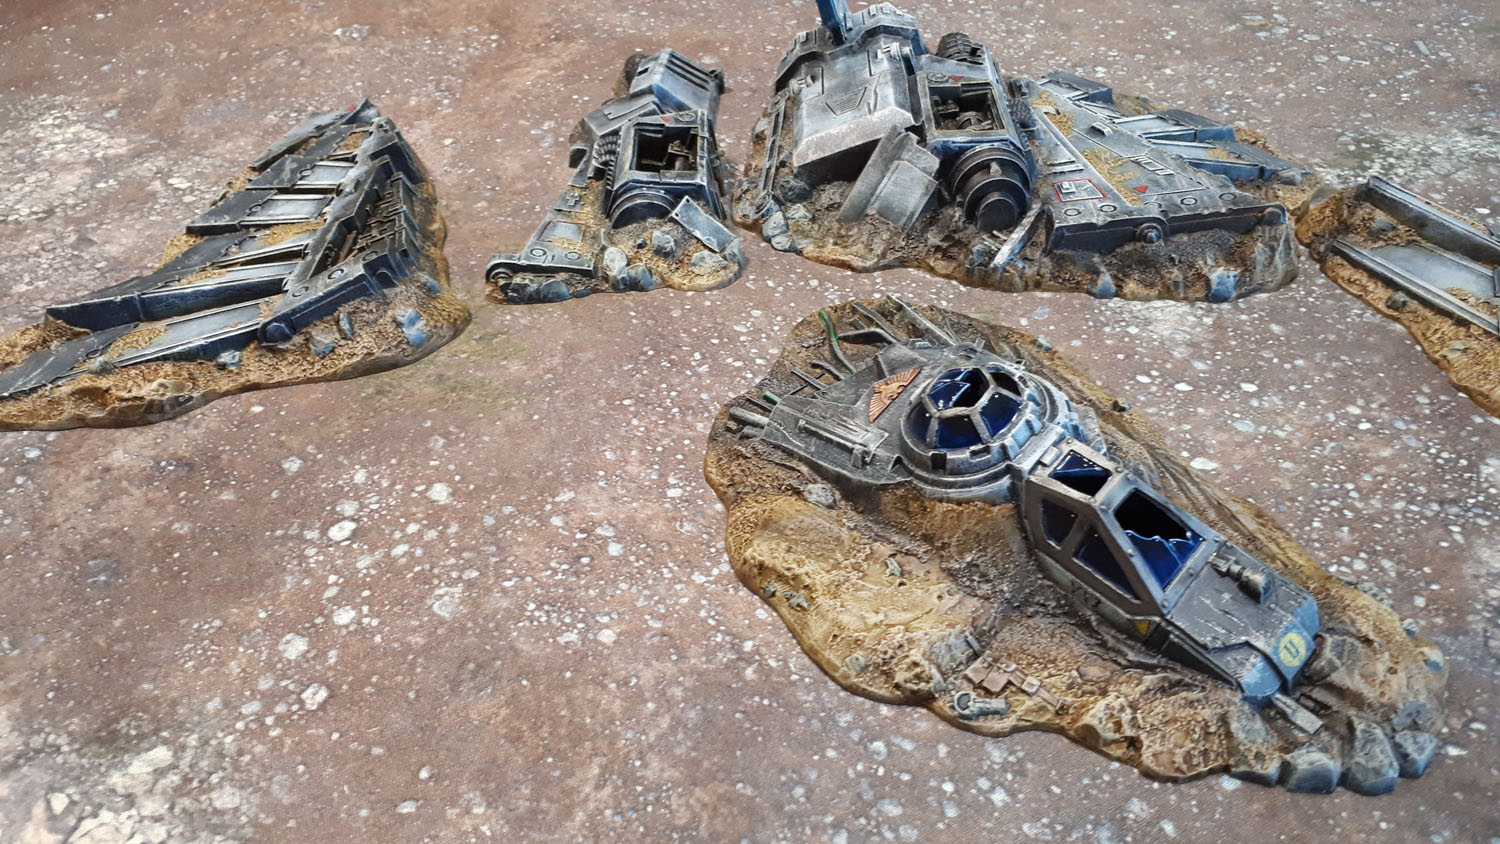
The chewed up dirt was originally in the mid-brown, then known as Citadel Snakebite Leather (currently Vallejo Leather Brown/Citadel XV-88) which was what I used for my desert bases in that time, but I changed that up a little, using the Vallejo Dipping Wash that Dave Kay put me onto after he did his Secret Weapon Tablescapes tiles. This darkened them down. I then used dark soot grey weatheirng powders to add “scorched” effects on the crashes sections as well as the sand/dirt around them, eventually drybrushing some sand colour over the whole lot, Aquila and surrounding dirt to unify it.

Battle for Macragge Crashed Aquila Lander 40k 4th Ed Starter Set Terrain, Mudgullet the Behemoth, Goremaw the Destroyer

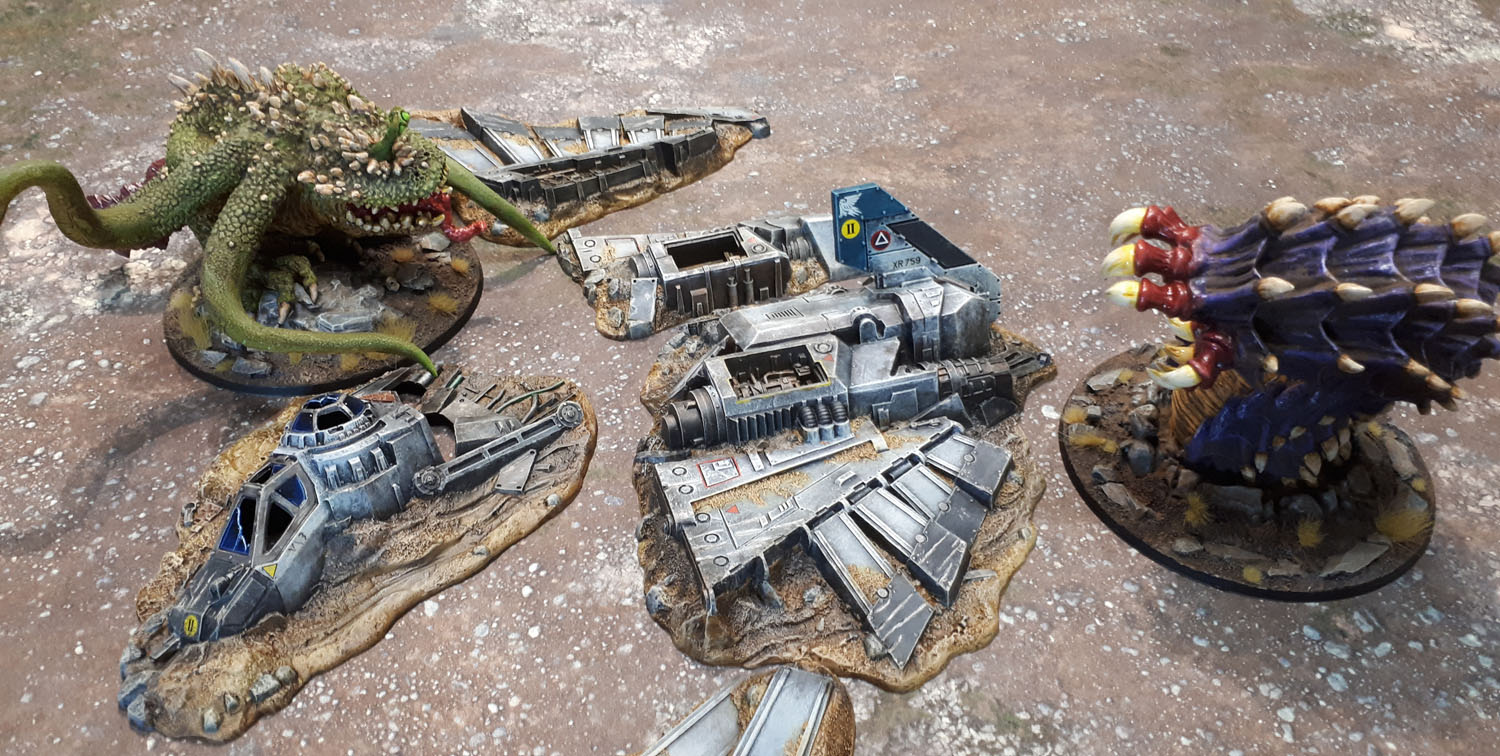
As I alluded to before, there’s also the third target that the Aquila let me hit, and that was one final(?) submission for Ann’s Miniatures of Magnitude Challenge for May & June. When I asked Ann if the Aquila was a large enough piece of scenery to qualify, she was not quite so enthusiastic, but said that she’d happily accept it if there was some kind of giant monster smashing through it, so I present to you, a Kaiju shot with not one, but TWO giant monsters smashing their way through it!

Battle for Macragge Crashed Aquila Lander 40k 4th Ed Starter Set Terrain, Mudgullet the Behemoth, Goremaw the Destroyer

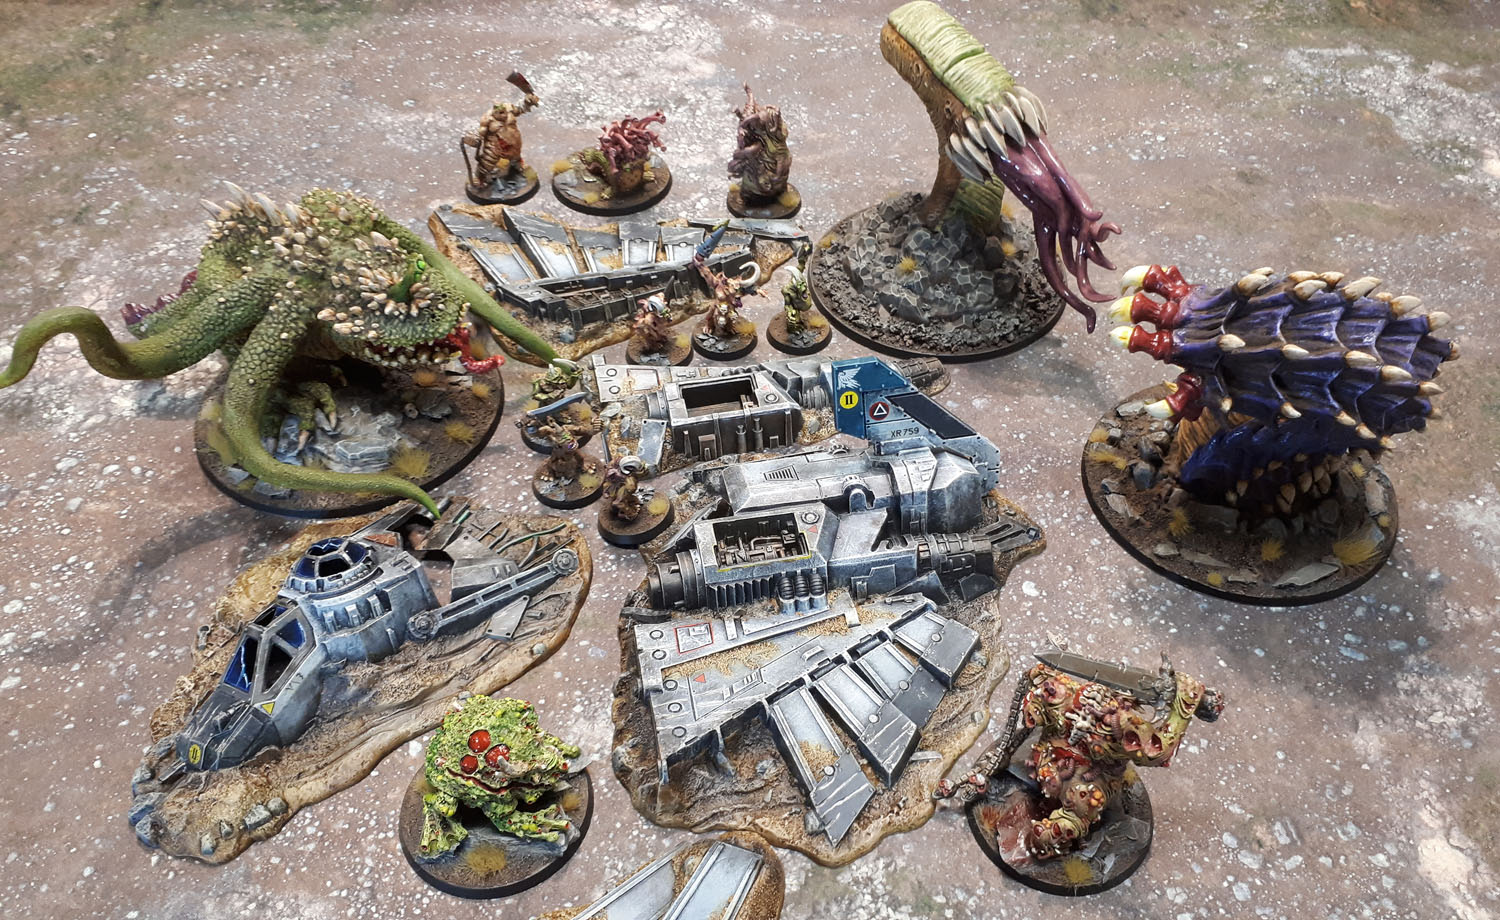
And while we’re at it, why not expand that alongside a few more models, for scale and also for fun! Nurgle zergs Goremaw!

The Aquila is being posted a little out of sequence to fit in with Ann’s Challenge. I’ve still got a few more of my own models for June still to post up over the next several days, as well as another piece of terrain finished yesterday (as my first model of July).

…and just maybe, one more Monster of Magnitude. If I can get the flock situation sorted in time by tomorrow (it takes forever to dry in winter!)

40k Tank Traps from Battlefield Accessories Set (Neglected October ’19)

40k Tank Traps, Citadel Battlefield Accessories Set

I just finished these tank traps/hedgehogs an hour or so ago, and took them outside to photograph them along with all of the models I’ve completed in the last few days to get photos for the next few days worth of posts. These tank traps come from the rather old Battlefield Accessories Set. I actually did paint these years ago, though I did so by painting them all copper and then giving them a brown wash. It actually looked okay, except not at all what these things would or should look like, so they got wheeled in again some time ago for a repaint (aka a respray, and then left in a tub), but with Conquest Magazine being a thing and the issue with the sprue coming out here in Australia a few weeks ago, it was time to finish off the old and paint up the new.

40k Tank Traps, Citadel Battlefield Accessories Set

Orks and Ork-friends chat respectfully near some local rust.

This time I went for seeing if I could effectively paint a more realistic depiction of rust, while still attempting to keep it quick and not too incredibly tedious and painful. Here’s the breakdown:

  1. Spray Dark Metal
  2. Light Spray mid-steel-type silver
  3. Daub all joins and rivet areas really liberally with Vallejo Model Wash: Rust
  4. Leave models to sit for three weeks because you can’t be arsed with them right now.
  5. Decide “fuck this” earlier this evening and make yourself do them even though you really still can’t be arsed.
  6. Daub with Citadel Technical Paint: Typhius Corrosion (the brown, textured stuff) using a large, flat-ended brush, making sure to keep it a bit messy.
  7. Drybrush with Citadel Dry Ryza Rust. Carefully at first, then less carefully as the process drags on way longer than you’d anticipated.
  8. Daub the join areas more carefully with Vallejo Model Wash: Light Rust.
  9. Be slightly disappointed that Light Rust isn’t much lighter than the other Rust wash.
  10. Mix some Vallejo Model Colour 70.911 Light Orange with Dr Faust’s Magic Wash base (1 part Future Floor Wax/Pledge One Go, 4 parts Distilled Water) to make a lighter orange rust wash.
  11. Apply over the top of the Light Rust, while the light rust is still wet.
  12. Allow to dry.
  13. Photograph.
  14. ???????
  15. Profit!

And here we are. I forgot to spray varnish them, but it’s 10pm now, the shed is locked up, I can’t be bothered going back outside and I want to get this post finished and queued up to publish in the morning. I’ll do it tomorrow. There will also be at least two more October posts from me, plus any models I manage to complete after work tomorrow. I’ll sort that out later.

Oh, the last few days have had more typos than usual – it’s the new mechanical keyboard that I got with my replacement computer. Still getting used to it, especially when typing with any speed…

On a semi-related note to my old PC dying and being replaced, I’m now even more behind in replying to comments on my own posts, replying to comments on other people’s blogs to me, a beard-painting description, keeping up with your blogs and posts there, and of course the Round-Ups. We’ll get there eventually.