Painting Tutorial – 15mm German Afrika Korps Armour (No Airbrush needed!)

As I went through the process of painting my Afrika Korps armour, I got asked a few times in various places how I did it, and also about the possibility of putting together a painting tutorial to share my methods, so after a bit of a delay, here it is.

This method works well for pretty much any vehicle. I haven’t started on my softskins yet, but the simple step-by-step method outlined here should get you through most of those as well without much trouble. I haven’t tried this on larger scale models yet, but I have some Bolt Action 28mm/1:56 German Panzers I intend to paint with the exact same methods, and I don’t foresee any issues using the same techniques.

Enough preamble! Get to the monkey!

Obviously, you clean and assemble the model before we get started. You can figure out that part on your own, or perhaps with the supplied instructions or webpages as appropriate.

STEP 1: Start with a Spray Prime. I don’t use black or white over the bare plastic/metal/resin kit – I just go straight for US Khaki (Vallejo)
You should spray the turret and hull as seperate pieces, and I do the undersides of both as well, but you do you on that.
STEP 2: Spray Basecoat Desert Yellow (Vallejo). I do this as a Zenithal coat from the top and top angles of the model. It’s also worth noting that Vallejo’s Spray Can Desert Yellow is actually the equivalent to Vallejo Model Colour Green Ochre 74.914 and NOT Vallejo Model Colour Desert Yellow 70.977. This is because…. reasons.
You should again spray the turret and hull as seperate pieces, though we’re not doing the undersides of the model this time. We’re leaving that US Khaki there.
STEP 3: Paint Tracks with Vallejo Panzer Aces Track Primer (304). Try to be reasonably neat, but mistakes can of course be fixed up with that Green Ochre mentioned above.
STEP 4: Drybrush tracks with Citadel Leadbelcher.
For this step, you could also choose to drybrush with a mid-dark grey (Panzer grey) and then more lightly drybrush the metallic over the top of that. Either works, especially at this scale, though I’d probably use the grey as a mid-point if painting a 28mm/1:56 scale model for say, Bolt Action.
Once again, try to be neat here just to save you some work afterwards.
STEP 5: Brush on AK Interactive Gloss Varnish (AK11239) where you’ll add decals to create a good surface to apply the decals. Let the varnish dry fully.
Where to add decals? It depends on the vehicle type/unit/etc. There are lots of sources that can show you proper placement for the markings on Tigers, Panzer IIIs, Panzer IVs, 222’s and so on.
STEP 6: Add decals where appropriate. I highly recommend using Using Micro Sol to apply and Micro Set or other equivalent products like AK Interactive Decal Adapter (AK582), Mr Mark Softer, etc. to fix them over the vision ports. Once again, Let the decals set fully.
I’ve now fully moved to using the AK product for the softening step over Micro Set for the softening step, but still recommend Micro Sol for the application (and for when you don’t need to soften a decal to fit over uneven surfaces.)
STEP 7: Apply another coat of AK Interactive Gloss Varnish (AK11239) by brush over decals to seal them in. Again, let the varnish dry fully.
STEP 8: 50-50 mix of AK Interactive Ultra Matte Varnish (AK 183) and AK Interactive Satin Varnish (AK11238) over the glossy area where the decals are located, including the decals. I use the mix to achieve the same finish that the paints have at this stage, so the next steps of washing will be consistent over the entire model.
IMPORTANT ASIDE: I haven’t taken photos of each decal application step because it’s simply adding decals and varnish. The layers of varnish stop the “frosted” look that the the transparent film on decals can sometimes have – this frosted look is caused by applying the smooth decal to the rough surface of the model. Adding the gloss varnish before adding the decal creates a smooth base to lay the smooth decal on, and the gloss over the top “seals” the decal in, so the result is that the decal should look like a part of the model. The models look pretty much the same throughout these steps, though – there are lots of good YouTube videos on applying decals.
STEP 9: Wash everything with Citadel Agrax Earthshade Gloss.
For best results, I find that It’s best to do the turrets separately, and even do each side of the tracks separately.
This pic shows one side of models after washing en masse,. Make sure you let the Agrax Earthshade Gloss dry for a good amount of time, then flip them and do the same again before finally placing them upright on their tracks and washing the rest of the hull.
At any point from here you can call the model(s) done, if you really like. They’re perfectly playable at this stage, but continuing really does reap aesthetic rewards.
STEP 10: Drybrush #1 – the “Desert Yellow” parts of the tank with Vallejo Model Colour Green Ochre (70.914) – you want this to be a decent drybrush, but you don’t want to go too heavy and cover up the effects of the wash. You’re just reestablishing the base colour.
STEP 11: Drybrush #2 – 50-50 mix of Vallejo Model Colour Green Ochre (70.914) and Vallejo Panzer Aces Highlight British Tanker Crew (321).
This is a lighter drybrush, more concentrated on the edges and upper areas of the vehicle. It really makes the edges pop nicely as you can see.
STEP 12: Paint the road wheel rims/rubber with Vallejo Surface Primer German Panzer Grey (73.603) This is the most painful part of the entire procedure – it’s all uphill from here. …or is it downhill? Uphill, I think
Paint hull and turret machineguns with Vallejo Surface Primer German Panzer Grey (73.603) as well since you have it out. Cleanup / neatening up as needed using Vallejo Model Colour Green Ochre (70.914).
STEP 13: Now is when you paint the bits and pieces. Stowage boxes (whatever browns you like), tarps and bedrolls (whatever military greens through browns you like – I tend to use the same pale sand colours and browns listed below for modulation and rain streaks),
Jerry cans – I like using Vallejo Model Air German Grey (71.052), with thin Citadel Corax White for the crosses on Jerrycans – with little picked out bits of Vallejo Game Colour Dead White (72.001) (or whichever brand you like) for highlights. For those little integral boxes caged on the sides of Panzers I use Vallejo Model Colour Saddle Brown (70.940),
For the exhausts Vallejo Panzer Aces Light Rust (301), then carefully and lightly stippled with Vallejo Model Colour Light Orange (70.911). We’ll wash that with Agrax Earthshade Gloss to bring out the details and darken it a little. You may even choose to give it a followup coat of regular Agrax Earthshade or Army Painter Strong Tone if you prefer darker exhausts.
STEP 13: Spot wash all the rest of that crap with brown and/or green washes. (I’ve got the paints for the Jerrycans in the pic above!)
I use Army Painter Quickshade Military Shader for greener tarps and Army Painter Quickshade Strong Tone (Citadel Agrax Earthshade is just as good) for boxes and brown tarps. Agrax Earthshade Gloss over the exhausts as noted earlier.
I forgot to take a photo of Step 14. I’m so embarassed, since the tanks look bloody nice here. Even I was tempted to stop the first time.
STEP 14: Drybrush #3 – 80-20 mix of Vallejo Model Colour Green Ochre (70.914) and Vallejo Panzer Aces Highlight British Tanker Crew (321) (a really light drybrush this time)
Now they’re “finished” if you want nice, “clean” models that have a similar overall look to the Games Workshop type of finished vehicle.
Optional step 1: Colour Modulation I – Thin down Vallejo Model Colour Green Ochre (70.914) with Citadel Lahmian Medium/Water/your medium of choice – add some colour tone and variation back into the larger panels to taste.
Optional step 2: Colour Modulation II – Thin down Vallejo Panzer Aces Track Primer (304) and/or Vallejo Game Colour Leather Brown (72.040)/Citadel XV-88 with Lahmian Medium/Water/your medium of choice – add some colour tone and variation back into the larger panels to taste. Be sparing, but this is where you add some additional tonal variation – as little or as much as you feel they need.
Optional step 3: Rain Streaks – Thin down some sand coloured paint – your choice but I like anything from Citadel Ushabti Bone/Vallejo Game Colour Bonewhite (72.034), Vallejo Model Colour Iraqui Sand (70.819) and thin them down with Lahmian Medium/Water/your medium of choice. Then with a very fine brush, add some vertical streaking to represent rain streak marks. I find less is more, so don’t overdo it.
I almost always do the two colour modulation steps, but they’re kind of hard to photograph in a meaningful way.

Tank hulls after the first layer of stippling.

Advanced Step 1: Turret Damage. This is something that probably hasn’t been seen on the blog, since it’s not visible when I post my usual images of finished tanks and vehicles, but it’s an extra step I’ve done on every tank and AFV that has a removable turret. It’s much more for gameplay aesthetics than display models, since it will be hidden much of the time.
It’s basically just a number of layers of progressive stippling. You can see the colours I use from left to right, and how they look at each stage. I use a cheap, medium-small makeup brush from Amazon (about 6mm diameter). In order, the paints above are:
Vallejo Surface Primer German Panzer Grey. (I get the 200ml bottles and decant it into the dropper bottle for everyday use with a brush), Vallejo Model Air Metal Black (71.073), Vallejo Game Colour Tinny Tin (72.060), Citadel Leadbelcher, and then after the final stipple step, I wash them with a 1:1 or 50/50 mix of Vallejo Game Colour Smokey Ink (72.068) and Citadel Lahmian Medium.

Tanks be fine.

Tanks go boom!

Advanced Step 2: For me, this is the big one.
Chipping – I found that a “proper” panzer grey looks too black against the sand colour that the armour is painted in, so I used Vallejo Model Colour Dark Grey (70.994). Put a little on your palette, use a small bit of torn foam on the end of a pair of tweezers and dab it into the paint. Dab most of it off onto the paper/a tissue etc and then carefully touch it to the edges and panels of the tank to taste – again, be careful to not overdo it – it’s easy to go back later and add more, but a bitch to try and remove it!

Here’s a quick, quality tutorial from Secret Weapon Miniatures.
Advanced Step 2: Drybrush the ends of gun barrels with Vallejo Panzergrau Coloured Surface Primer (73.603)
Sealing: Spray with AK Interactive Matt Varnish Spray (AK1013) – again, do the turret and hull separately. It gives a nice, flat (but not too boringly flat) finish.
DONE!
Materials I use.
These are the paints and materials that I use for my Afrika Korps vehicles. You can of course use whatever you like, and paints that are close enough to the ones listed here should net you a close enough outcome.

Sprays:

US Khaki (Vallejo)
Desert Yellow (Vallejo)

AK Interactive Matt Varnish Spray (AK1013)

Brush-Applied Paints:

Vallejo Model Colour Green Ochre (74.914)
Vallejo Model Colour Saddle Brown (70.940)
Vallejo Model Colour Light Orange (70.911)
Vallejo Model Colour Iraqui Sand (70.819)
Vallejo Model Colour Dark Grey (70.994)

Vallejo Panzer Aces Track Primer (304)
Vallejo Panzer Aces Highlight British Tanker Crew (321)
Vallejo Panzer Aces Light Rust (301)

Vallejo Model Air German Grey (71.052)
Vallejo Model Air Metal Black (71.073)

Vallejo Game Colour Dead White (72.001) OR Any proper white paint that works nicely – Citadel White Scar is generally trash.
Vallejo Game Colour Leather Brown (72.040) OR Citadel XV-88
Vallejo Game Colour Bonewhite (72.034) OR Citadel Ushabti Bone
Vallejo Game Colour Tinny Tin (72.060)

Vallejo Surface Primer German Panzer Grey (73.603)

Citadel Leadbelcher
Citadel Corax White

A couple of whichever military greens through browns through tans you like for wooden boxes, bags and rolled tarps. Pick some from above.

Brush-Applied Mediums/Washes:

Citadel Lahmian Medium
Citadel Agrax Earthshade Gloss

Army Painter Quickshade Military Shader
Army Painter Quickshade Strong Tone OR Citadel Agrax Earthshade

Vallejo Game Colour Smokey Ink (72.068)

Brush-Applied Varnishes and Decal Solutions:

AK Interactive Gloss Varnish (AK11239)
AK Interactive Ultra Matte Varnish (AK 183)
AK Interactive Satin Varnish (AK11238)

AK Interactive Decal Adapter (AK582) (or Micro Set)

Micro Sol

15mm Flames of War DAK Grenadierkompanie Army – Completed! – Battlefront Miniatures

Battlefront Miniatures, Flames of War, DAK, Afrika Korps, Deutsches Afrikakorps Army

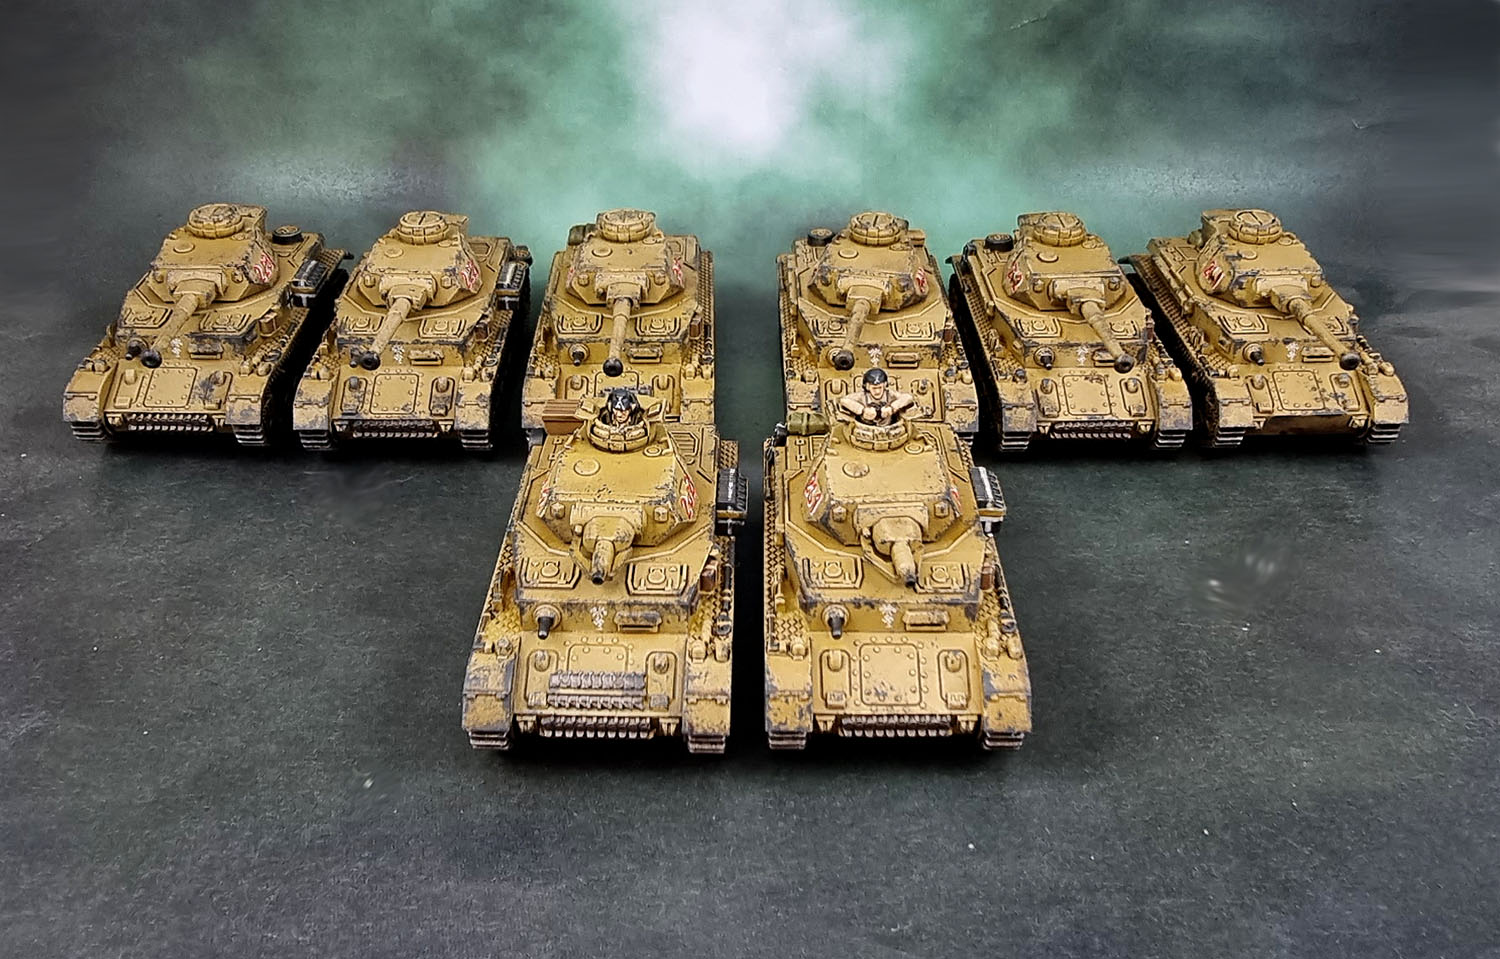
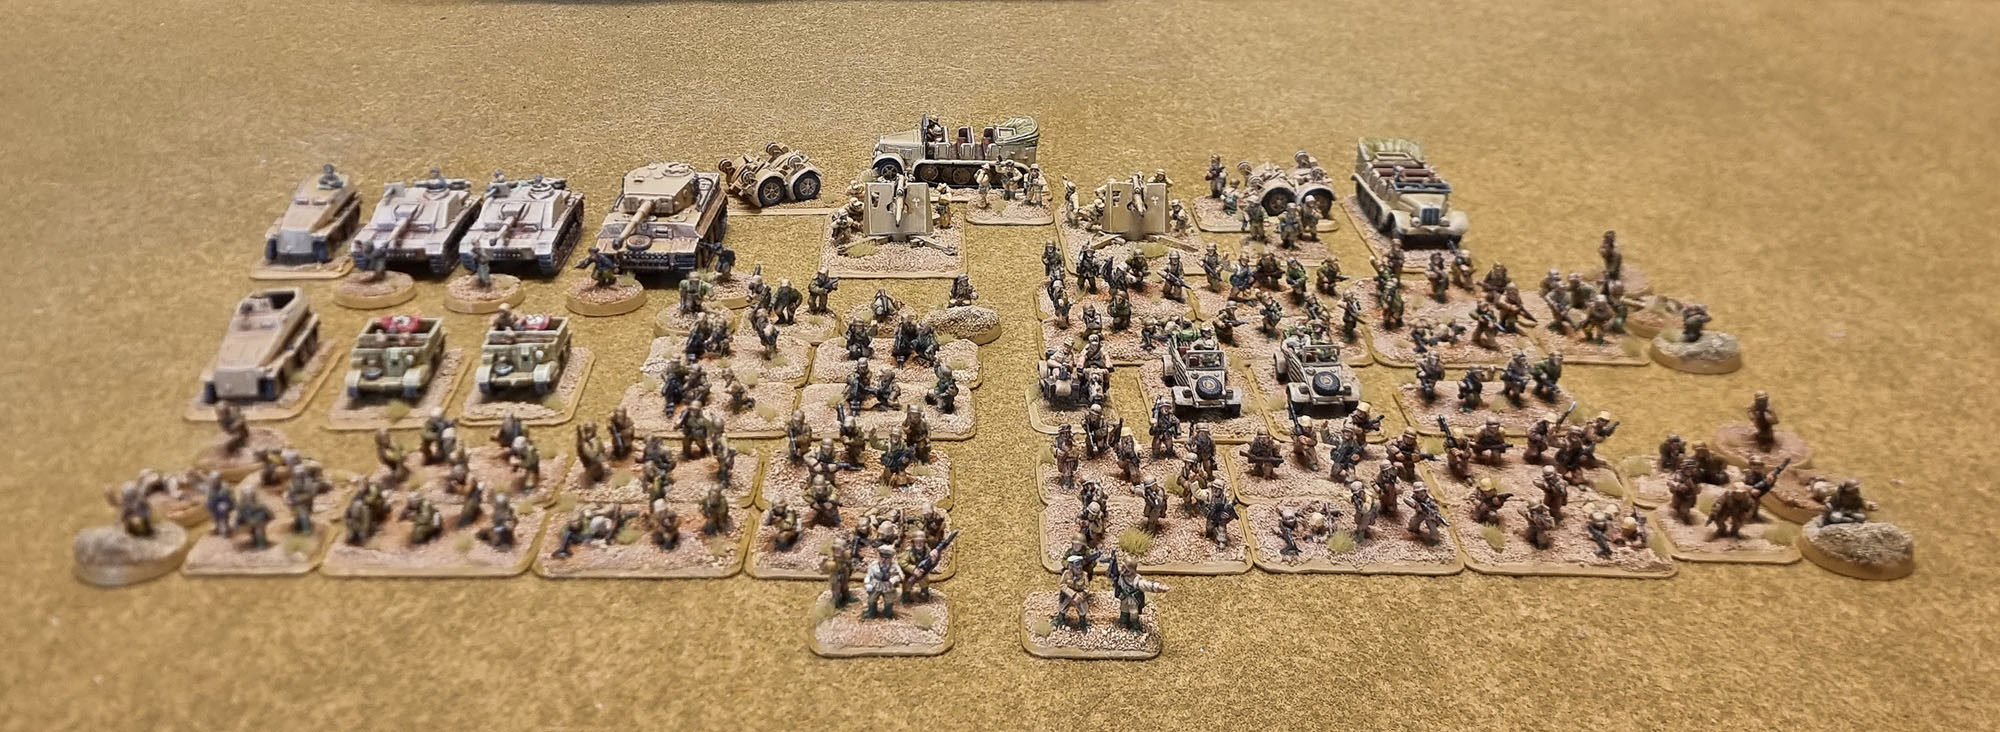
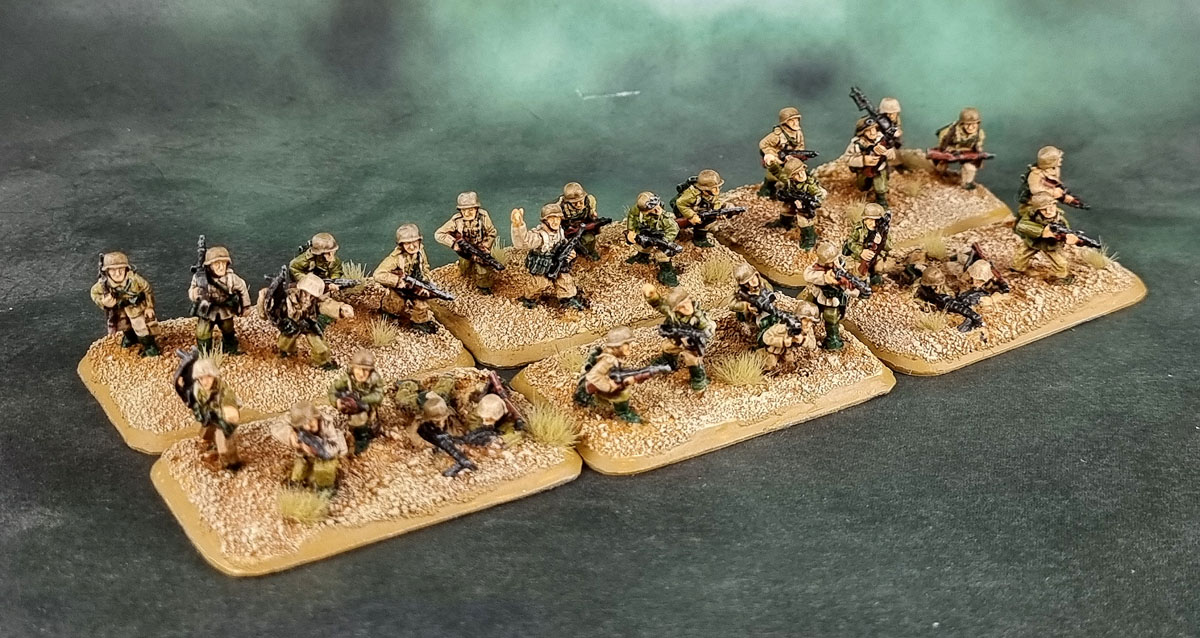
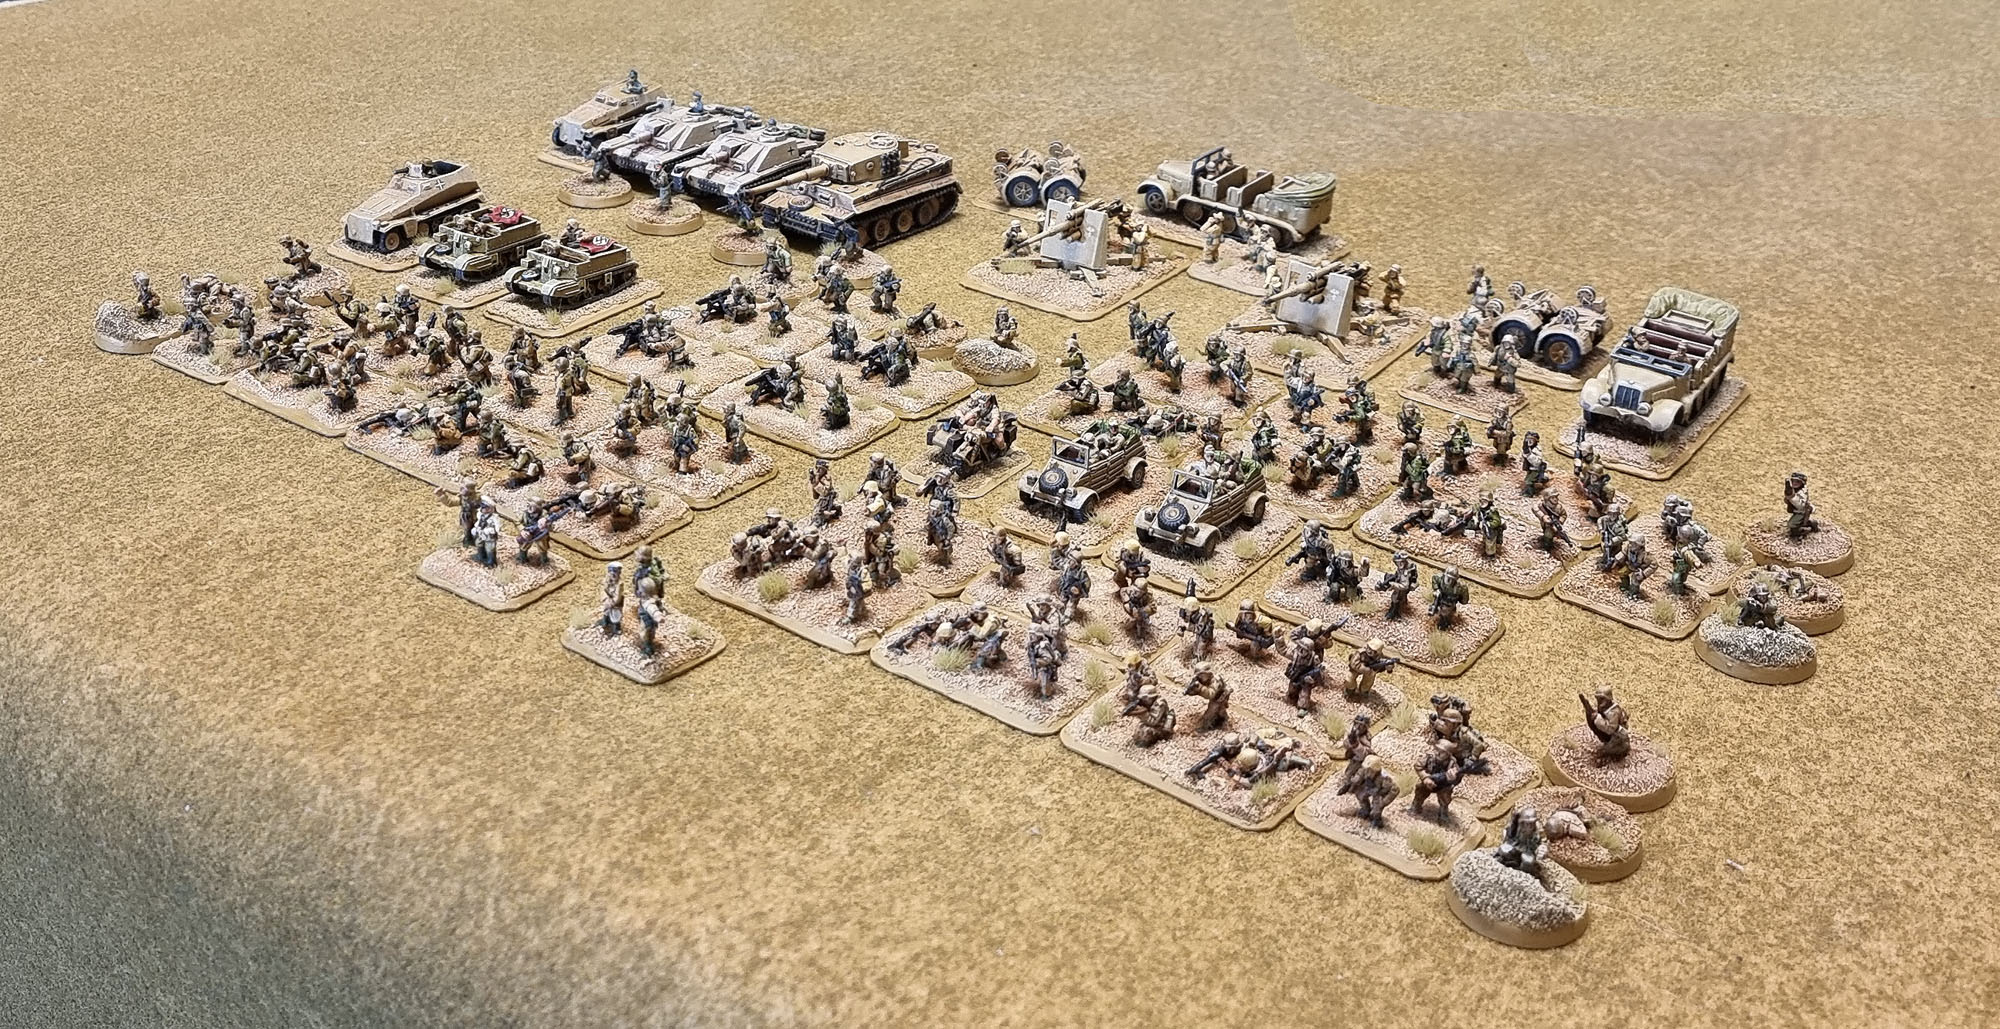
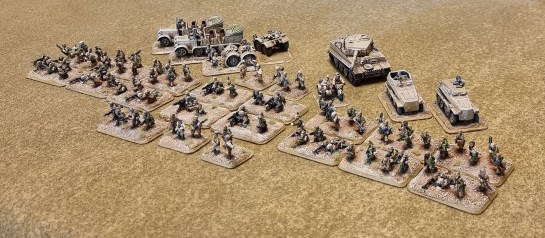
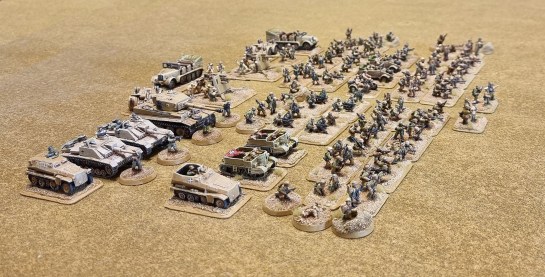
The entire, Complete, (for now) army. More shots at the end of the post. Completed Army pic 1/4.

Big post, this one. After completing first the trio of 28mm British 8th Army Valentine Tanks for for Dave Stone’s Season of Scenery Challenge painting challenge (that allows vehicles) followed by a trio of 15mm US Shermans, I decided to use my painting momentum to get the outstanding DAK Halftracks done, and then pushed on through some of the outstanding infantry, a couple more vehicles, more infantry, a couple of flavour pieces, and then a push through the final blocks of infantry and command. As I’ve been pretty well behind in my post, and these models are all part of the same force, I’m just going to drop them all in the one, large post and then be done with July at the actual end of July…

Battlefront Miniatures, Flames of War, DAK, Afrika Korps, Deutsches Afrikakorps Army

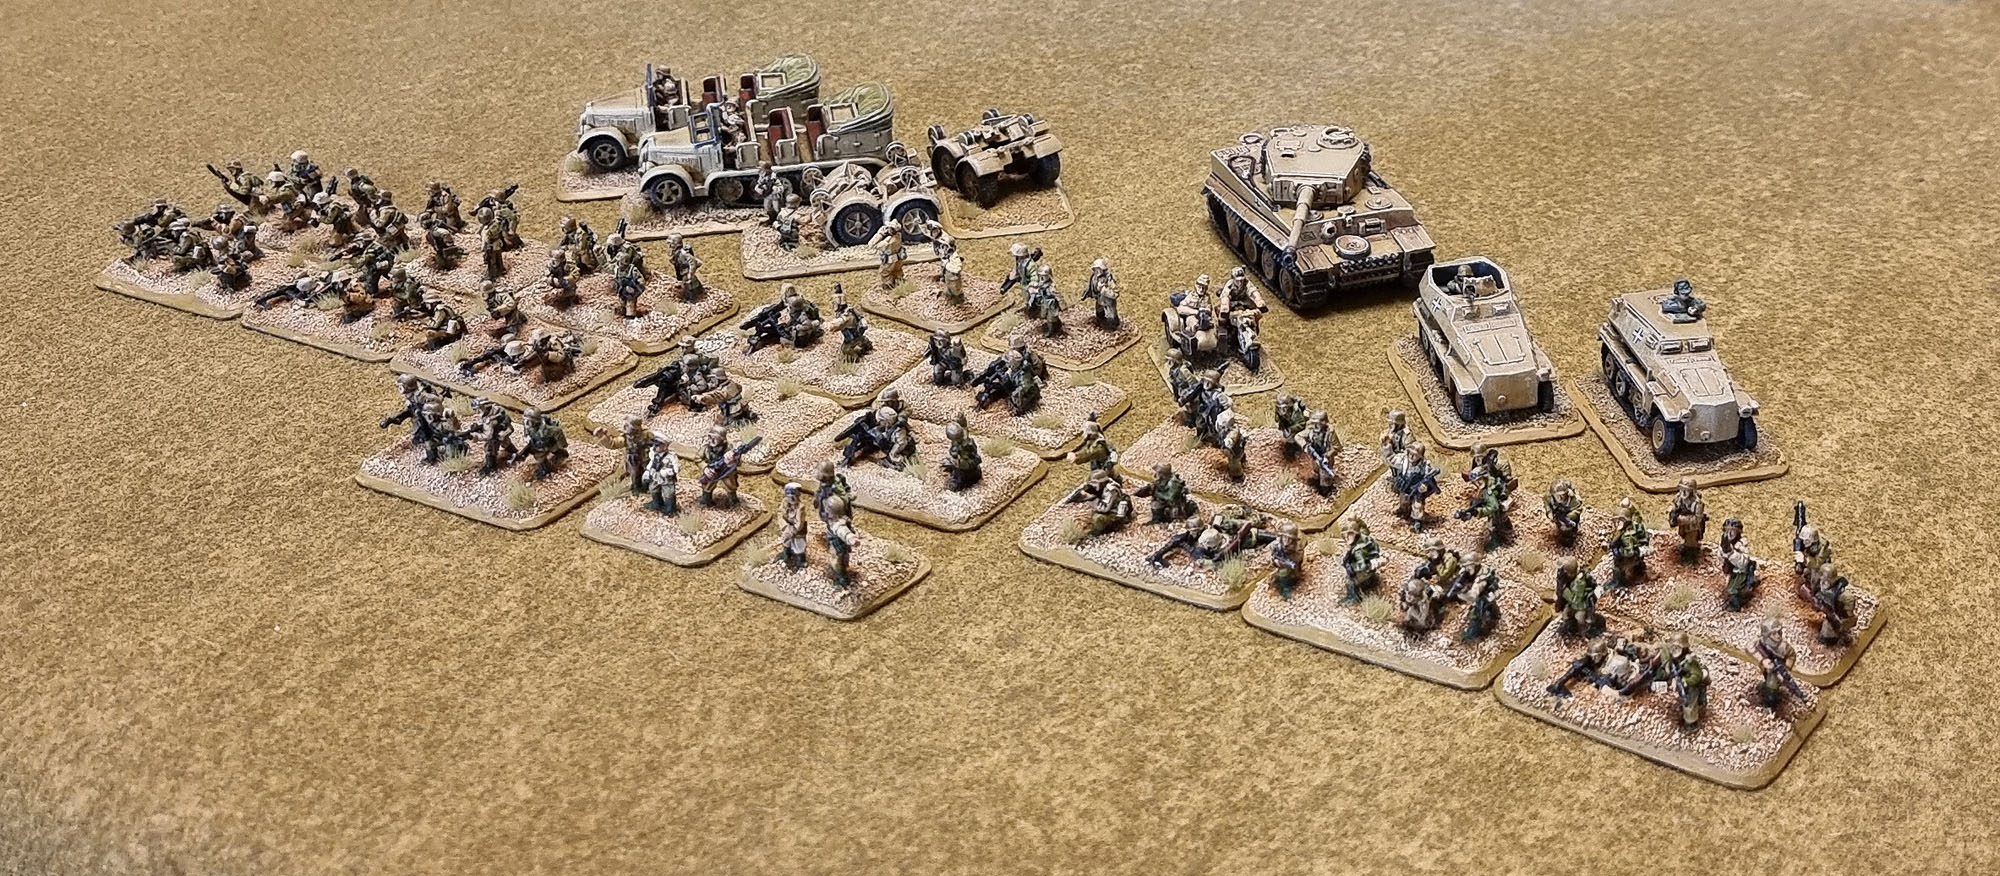
This month’s work on the army. July pic 1/3.

Battlefront Miniatures, Flames of War, DAK, Afrika Korps, Deutsches Afrikakorps Army

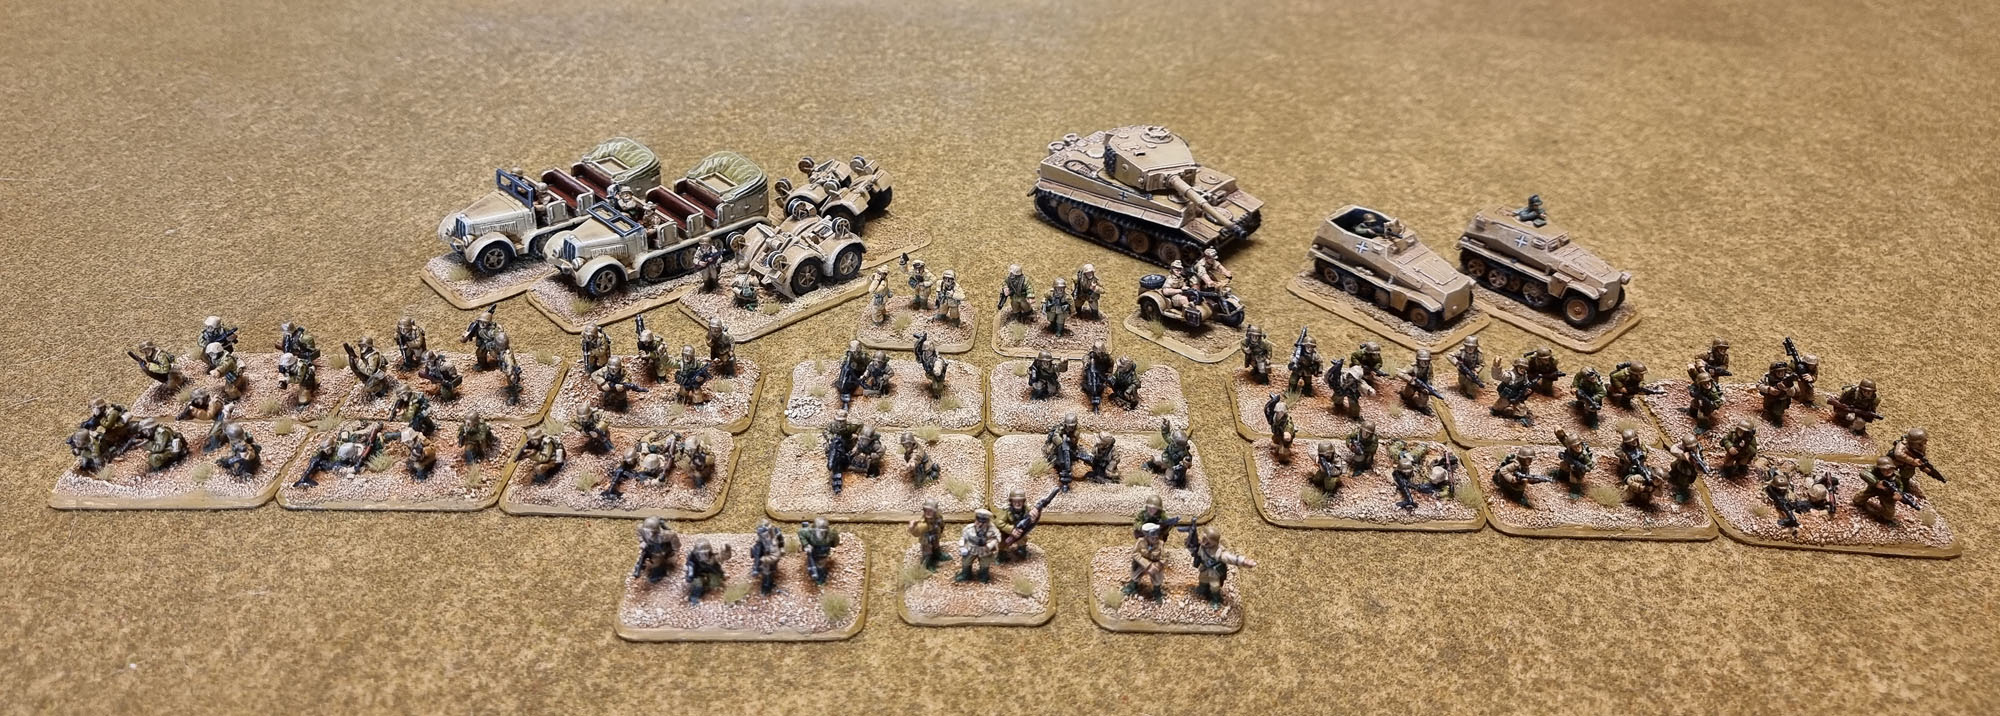
This month’s work on the army. July pic 2/3.

Battlefront Miniatures, Flames of War, DAK, Afrika Korps, Deutsches Afrikakorps Army

This month’s work on the army. July pic 3/3.

The army was built using the Grenadierkompanie army list in the original 1st Edition Flames of War Core Rulebook. I’ve got a few of the books from first, and a big pile of them from 2nd or 3rd, so I think given that level of investment, I’ll probably go with that ruleset for friendly games in the War Room. I’m pretty sure that FoW is good with grandfathering lists from previous editions and sourcebooks, so I should be able to use these in a modern game with someone else, should the opportunity present itself sometime. Anyway, I’ll take you through the models I finished this month…

Battlefront Miniatures, Flames of War, DAK, Afrika Korps, Deutsches Afrikakorps, Sd.Kfz.7 Half Tracks, 15mm, 1/100 scale

Battlefront Miniatures, Flames of War, DAK, Afrika Korps, Deutsches Afrikakorps, Sd.Kfz.7 Half Tracks, 15mm, 1/100 scale

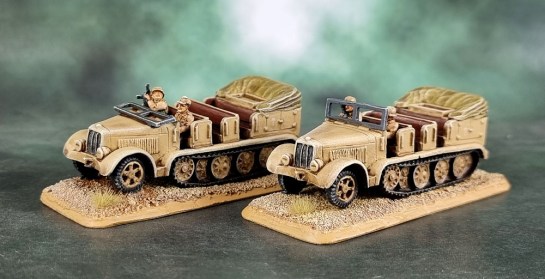
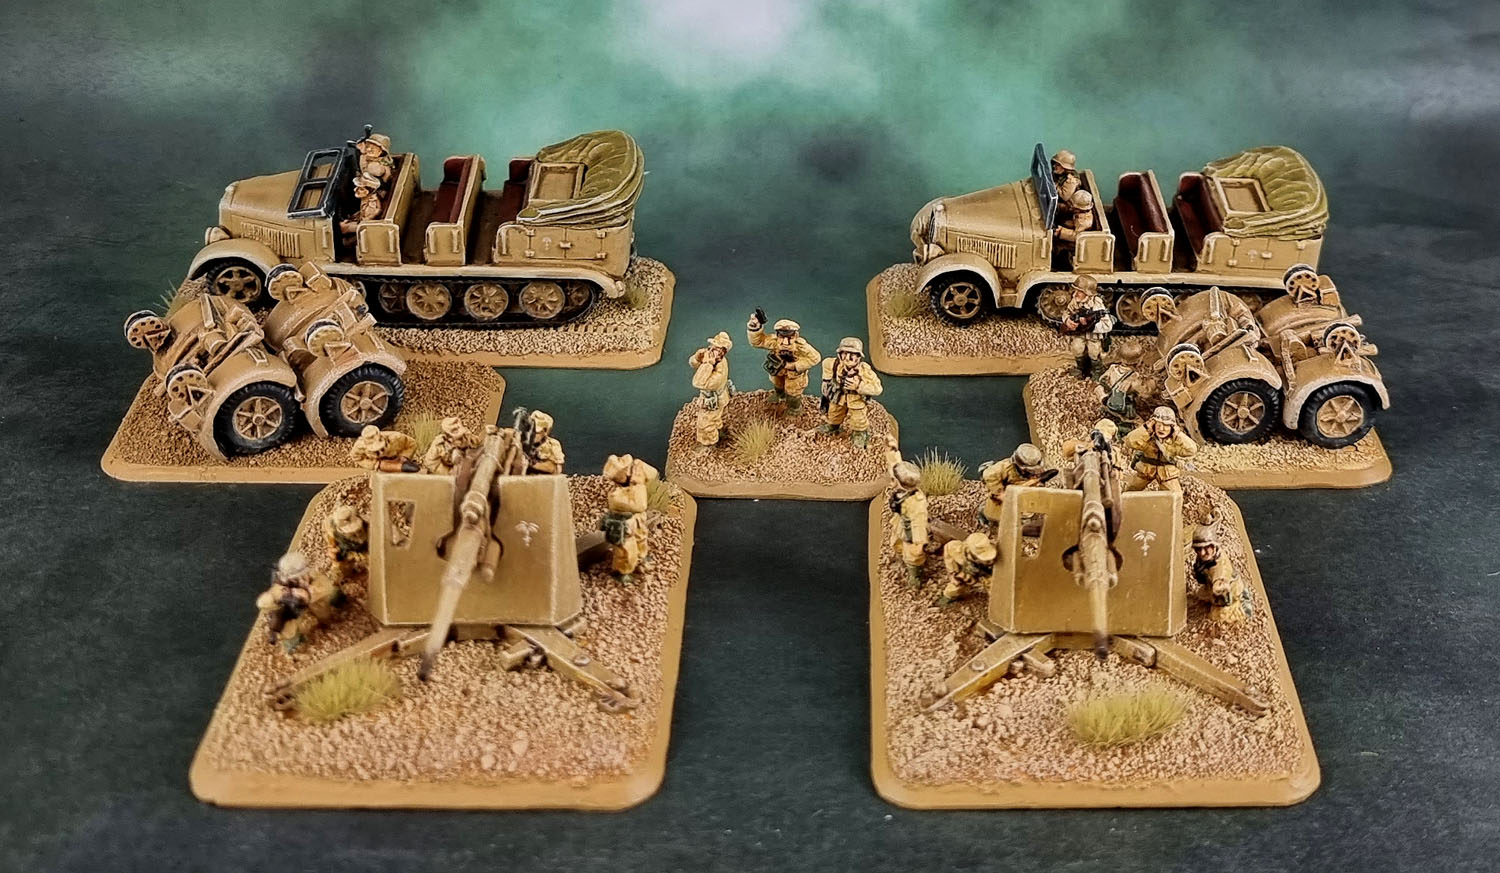
The first pair of models I got back onto were this pair of Sd.Kfz.7 Half Tracks – purchased to go alongside as the haulers for my pair of Flakartillerie 88s I finally completed 2 years ago in 2019 as their transport option. Although I had started them, they were completly repainted, essentially using what was on there originally as a coloured prime coat.

Battlefront Miniatures, Flames of War, DAK, Afrika Korps, Deutsches Afrikakorps, 15mm, 1/100 scale, Grenadier Medium Machinegun Platoon

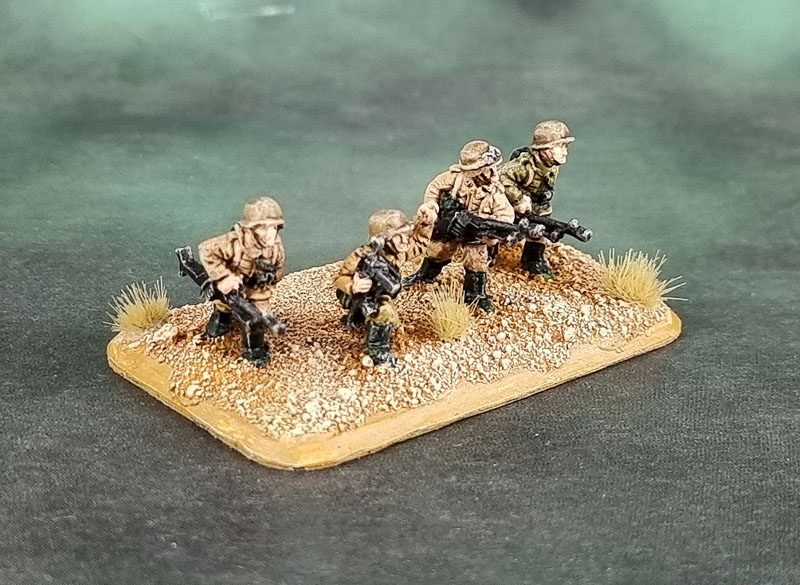
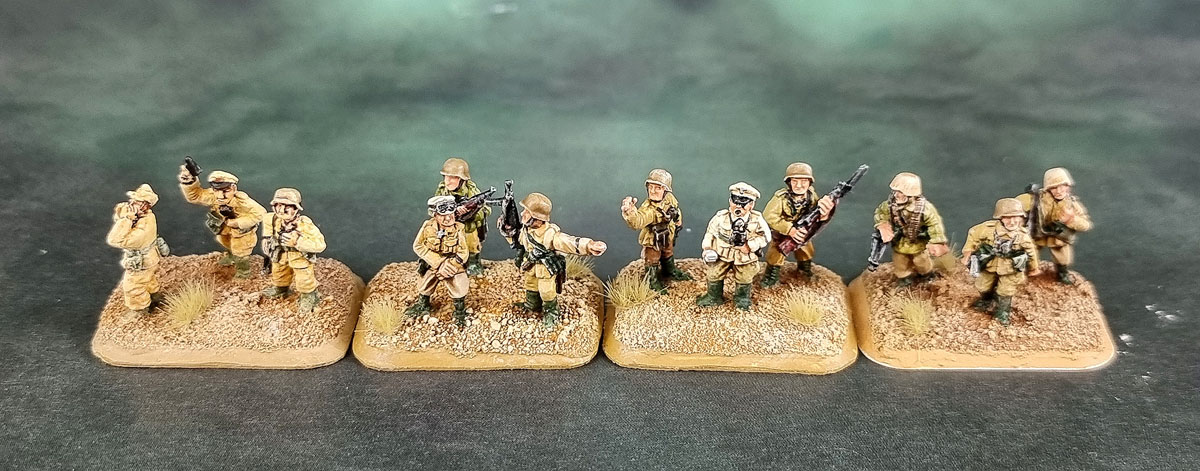
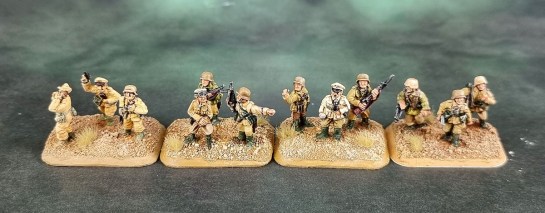
Next up, I decided to keep the momentum going with some infantry bases. I planned to work on the 2nd Grenadier Platoon, but instead ended up with the Medium Machinegun Platoon on the desk, so that’s what got painted instead. They had already been based and had some of the basic uniform colours painted in, so it wasn’t a completely horrible experience, so I pressed on….

Battlefront Miniatures, Flames of War, DAK, Afrika Korps, Deutsches Afrikakorps, 15mm, 1/100 scale, Grenadier Antitank Rifles

…and immediately painted the easy-win, single base model of this Antitank Rifle stand. They look pretty crap in this photo, but kinda cool in hand. I thought this would be a flattering angle…

Battlefront Miniatures, Flames of War, DAK, Afrika Korps, Deutsches Afrikakorps, 15mm, 1/100 scale, Sd.Kfz.250/1 light half track, Sd.Kfz.253 recon vehicle

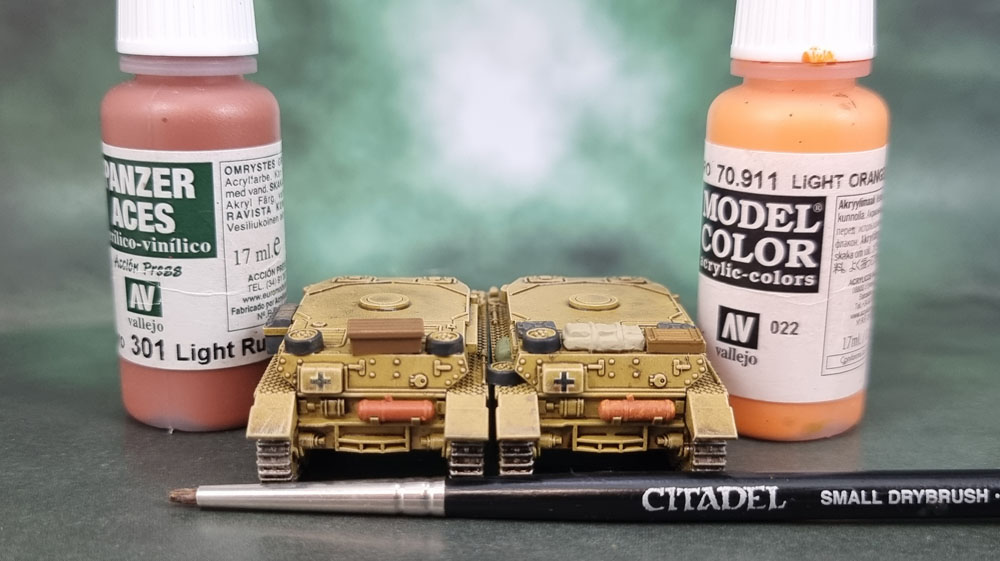
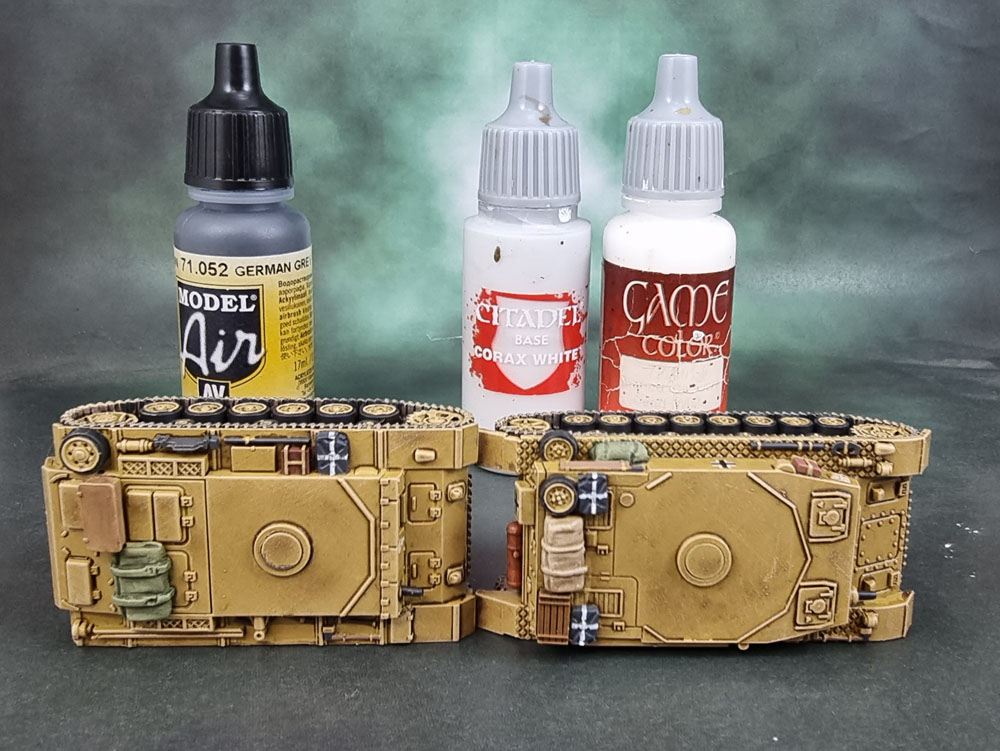
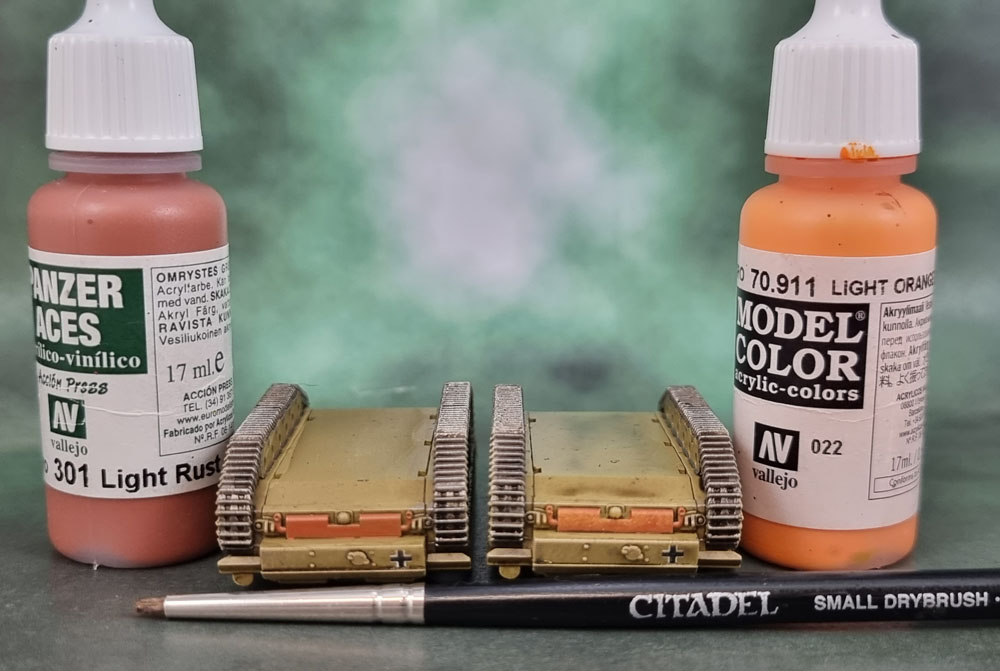
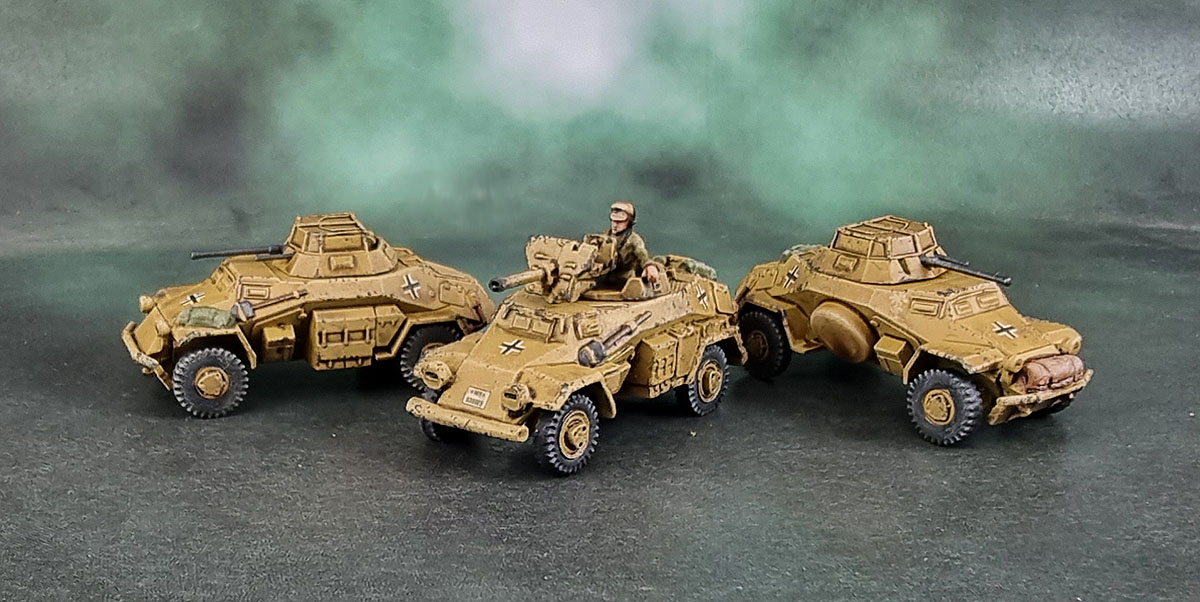
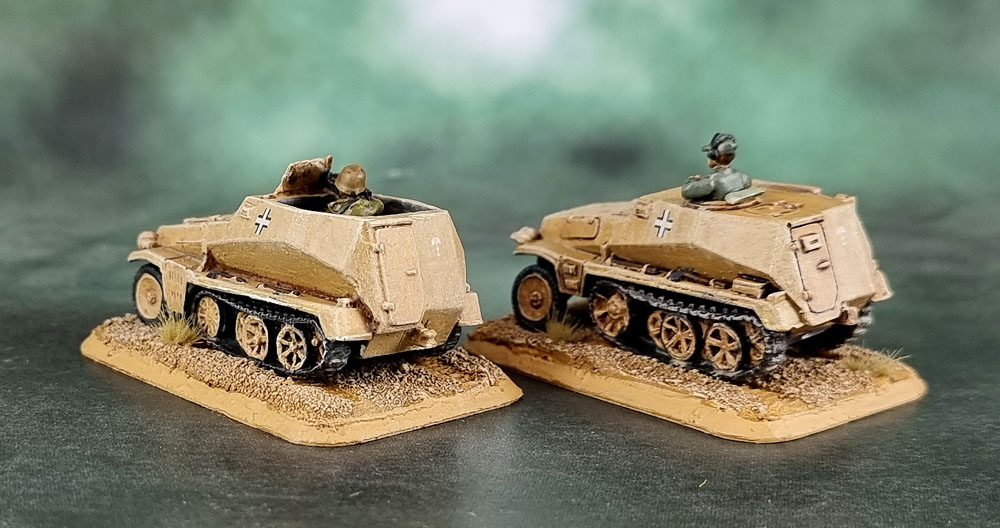
The following pair of models were this pair of scout vehicles, still motivated by Dave’s challenge, I thought I might be able to get motivated enough to also get these two done as well – a Sd.Kfz.250/1 light half track and a Sd.Kfz.253 recon vehicle. I can’t actually recall why I bought these – I do remember that I got them after the rest of the army. I know that the 253 is an artillery spotter, so it might have been to go alongside the pair of StuG III Gs rather than the 88s as my understanding is that they were rewed by artillerymen rather than actual tank crews from the Panzer Divisions.

Battlefront Miniatures, Flames of War, DAK, Afrika Korps, Deutsches Afrikakorps, 15mm, 1/100 scale, Sd.Kfz.250/1 light half track, Sd.Kfz.253 recon vehicle

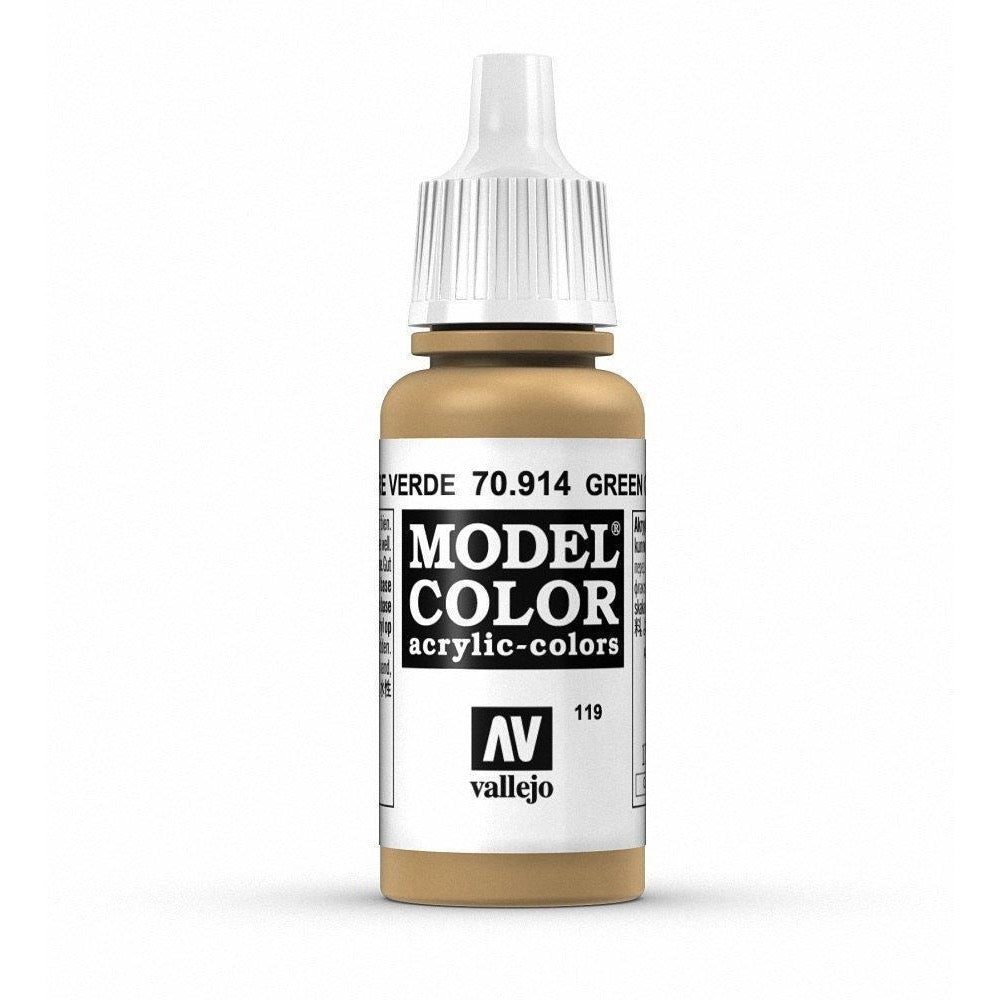
These had been painted in dunkengelb, with a flesh wash over the top. I had to go over most of that since the look of it didn’t appeal in 2021, but it did still work as a basic basecoat to go over. The 250/1’s gunner was a mess, since I couldn’t figure out which model I was supposed to use, where the original gun or gunshield were, and so forth. Going with my recent “just get it done” ethos to these models, I just clipped the gunner off at the knees so he’d fit, and luckily found a gunshield of a vaguely correct size, drilled a hole through the lead and poked his MG through it. Glued my new correctly-heighted amputee into the crew compartment and painted it up. Good enough!

Battlefront Miniatures, Flames of War, DAK, Afrika Korps, Deutsches Afrikakorps, 15mm, 1/100 scale, Sd.Kfz.253 recon vehicle, StuG III G

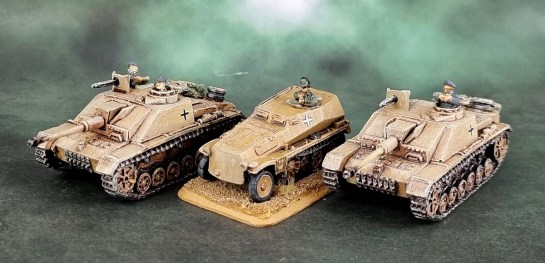
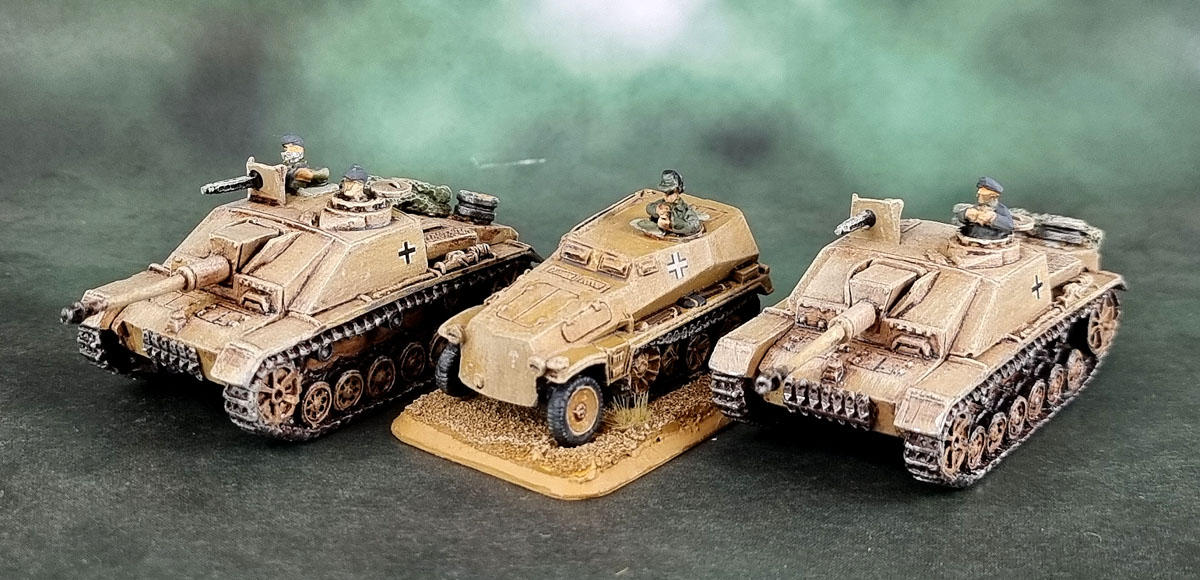
A pair of previously-painted StuG IIIs, sharing a pic with the Sd.Kfz.253.

Apparently the StuG IIIs have not been shown here on the blog before, so here they are as a bonus image, though they’re not being included in the month’s tally since they were completed some years ago now. Looking at them here, I think they might actually need to go back into the queue for a repaint. While they’re not terrible, they’re a lot lighter and …rougher looking than the rest of the vehicles in the force. It shouldn’t take much to get them back shipshape.

Battlefront Miniatures, Flames of War, DAK, Afrika Korps, Deutsches Afrikakorps, 15mm, 1/100 scale, Tiger I

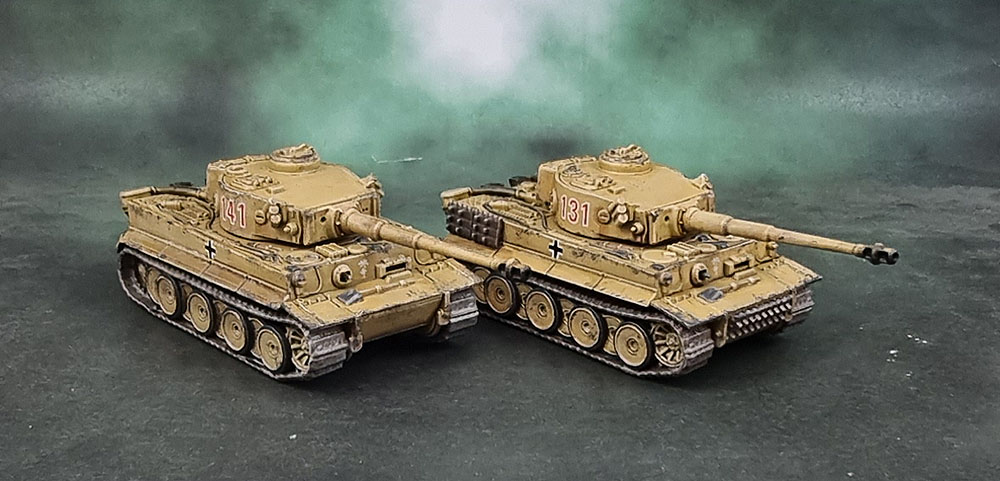
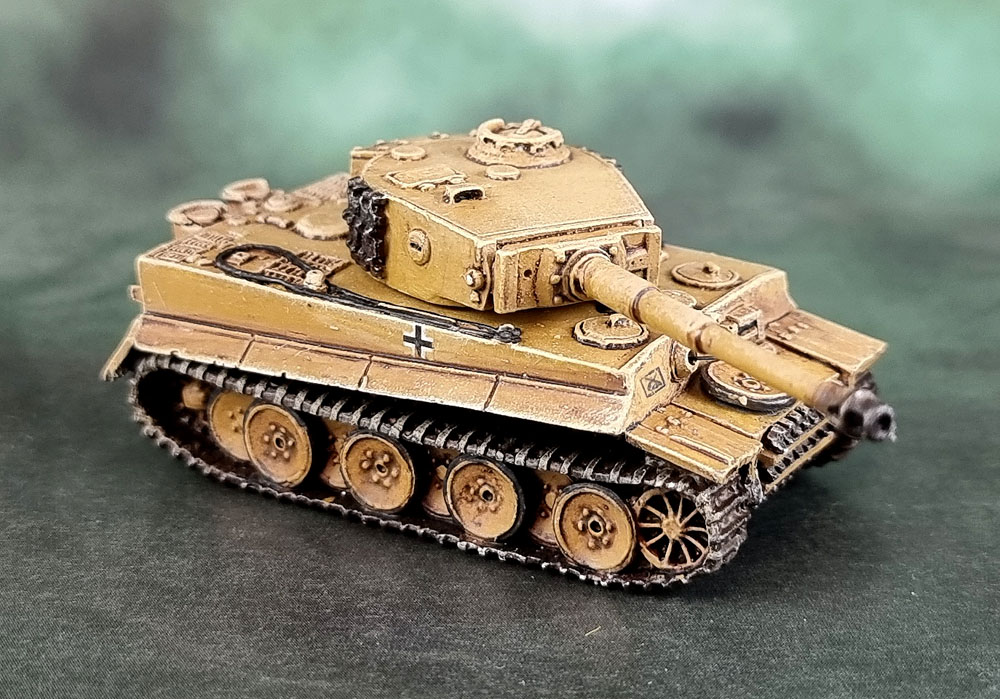
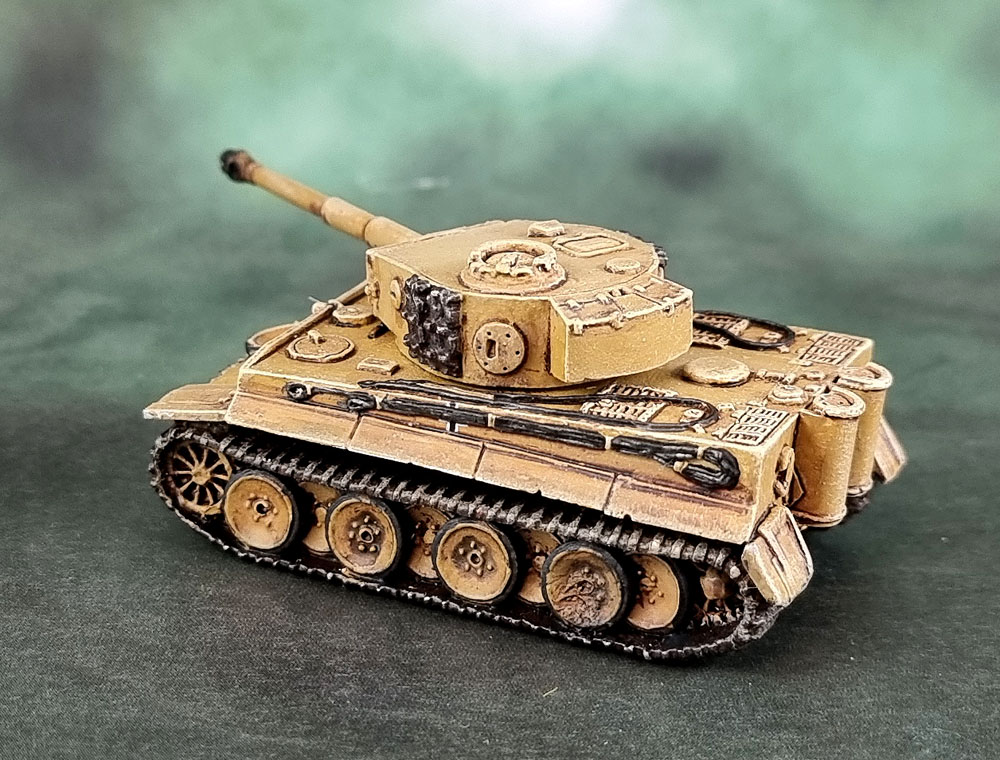
On a very related note, I did some cleanup on this Tiger I as well. I know it’s not the proper version for the Desert War, as it lacks the dust filters on the engine, but given it was purchased during the early days of Flames of War, I was limited to what was available – both in terms of the official range and also in terms of what my FLGS at the time had in stock. So, as I’ve heard recently – good enough for Government work! – and another pick for Dave’s challenge.

Battlefront Miniatures, Flames of War, DAK, Afrika Korps, Deutsches Afrikakorps, 15mm, 1/100 scale, Tiger I

I didn’t use it in every game, but with my overall force being a little on the softer side, due to being mostly infantry – it was nice to have the option to bring out something as fearsome as a Tiger. I guess I could swap it out for the proper version without much hassle these days and repuspose this model for Europe, but I’ll leave that as an option for down the line when I have far more painted 15mm armour.

Battlefront Miniatures, Flames of War, DAK, Afrika Korps, Deutsches Afrikakorps, 15mm, 1/100 scale, Grenadier Zug Platoon

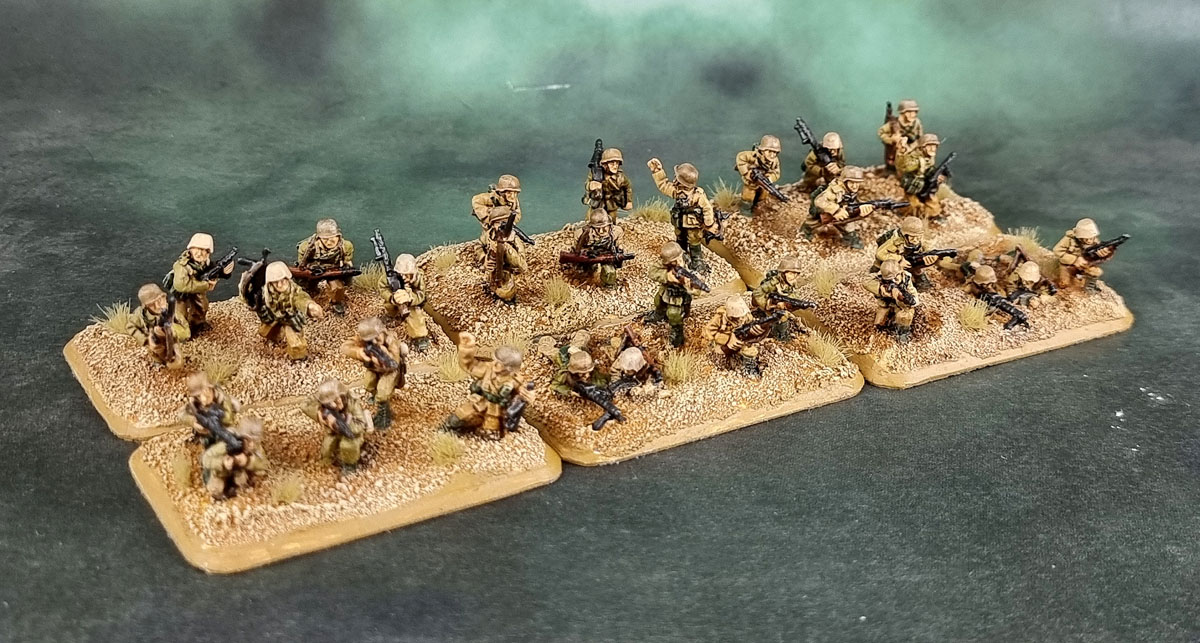
After getting all these done, I got stuck into my second Grenadier Platoon – having completed painting the first one 2 years ago, back in June 2019, which, like the Machinegunners had been based and had some of the basic uniform colours painted in (about 40%?) and some other details such as boots. Getting these done was a much more of a slog, and my enthusiasm for painting 15mm Germans had pretty much completely waned at this point.

Battlefront Miniatures, Flames of War, DAK, Afrika Korps, Deutsches Afrikakorps, 15mm, 1/100 scale, Luftwaffe Flakartillerie 88 Wheel Bogies

Battlefront Miniatures, Flames of War, DAK, Afrika Korps, Deutsches Afrikakorps, 15mm, 1/100 scale, Luftwaffe Flakartillerie 88 Wheel Bogies

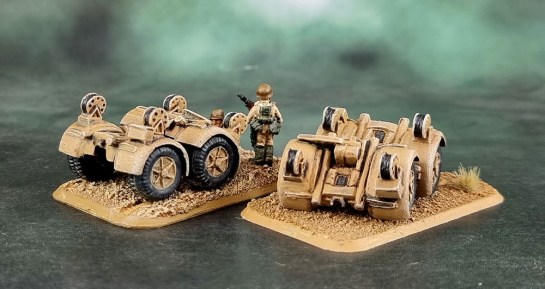
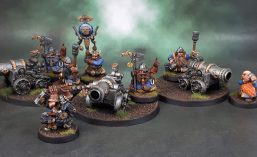
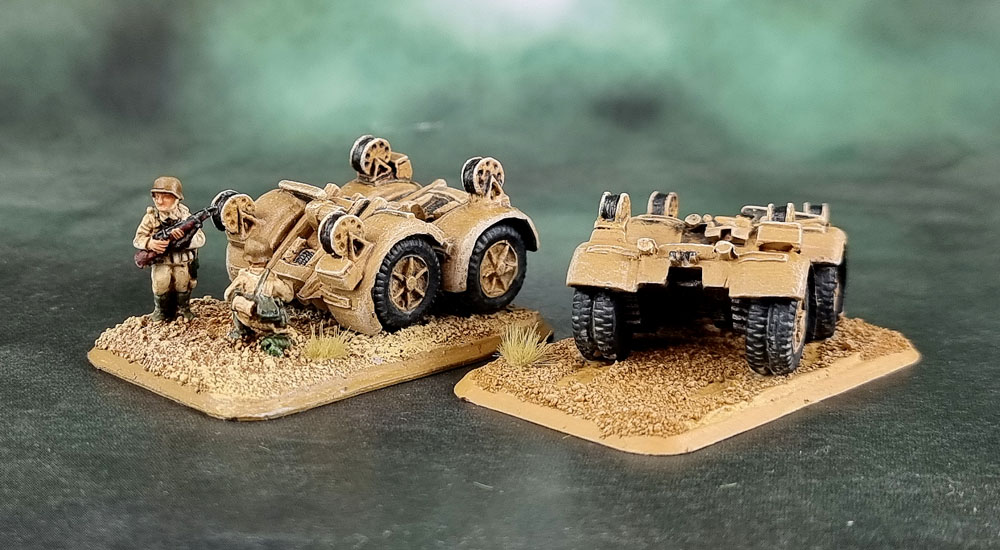
At this point I could see that actually finishing this army was both achievable and in sight, though it was clearly going to be painfully tedious to get through. With this in mind, it was time to pivot again to the wheel bogies that came as part of the metal 88 Flak kits. My plan was always to turn them into little mini-dio-scenery-bits to place next to the actual guns. Simply because I had them anyway, and so why not use them to make a couple of little bases that make the whole thing look a little cooler?

Battlefront Miniatures, Flames of War, DAK, Afrika Korps, Deutsches Afrikakorps, 15mm, 1/100 scale, Luftwaffe Flakartillerie 88 Wheel Bogies

The completed Luftwaffe contingent. Though after taking these photos, they may also have one of the Kübelwagen. I can’t remember the minutia of the original list.

So I finally made them up. The wheels were already basecoated in dunkelgelb again, and I’d based the two Luftwaffe crew, so I needed to finish them – though 2 minis was not that painful to do.

Battlefront Miniatures, Flames of War, DAK, Afrika Korps, Deutsches Afrikakorps, 15mm, 1/100 scale, Grenadier Zug Platoon

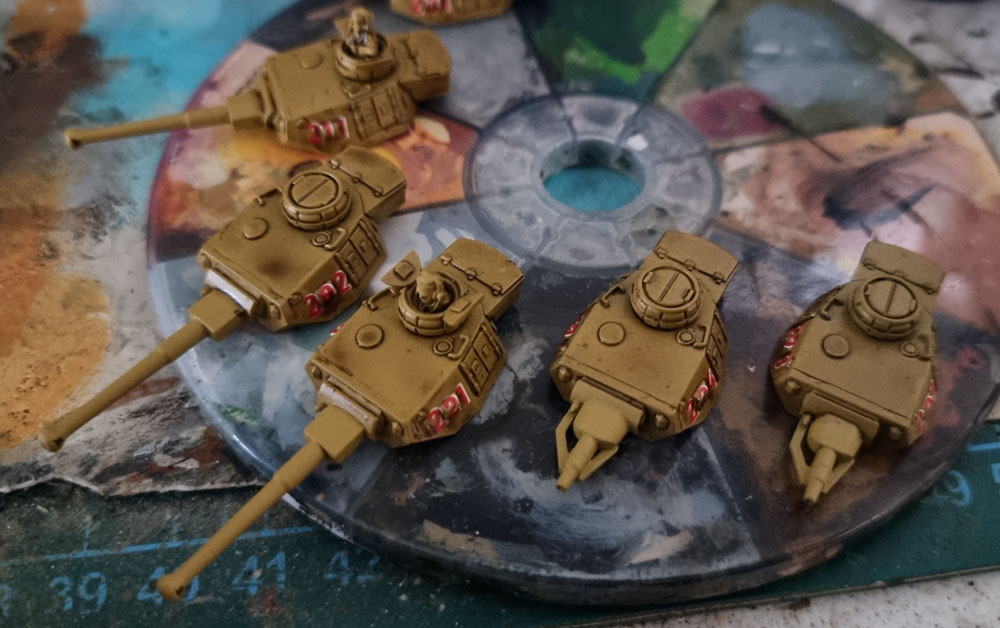
Now it was time for the worst part of the entire project. The third grenadier platoon. Based, but not painted at all. Just primed white. Painting these 30 little mans in the same mish-mash of worn, borrowed and stolen campaign uniforms was just fucking horrible, espoecially given how over painting these infantry I already was at this point. They took me over a week just to get these six bases done. Not fun, and only something I was able to make myself do since I was well aware that they (pretty much) completed the army.

Battlefront Miniatures, Flames of War, DAK, Afrika Korps, Deutsches Afrikakorps, 15mm, 1/100 scale, Grenadier Command, Luftwaffe Command

From L-R: Luftwaffe Command, DAK Grenadier Commander, DAK Grenadier 2IC, Unknown (Zug Leutnant?)

Except, they didn’t quite. Some Command stands were next, including the Company Commander and the 2IC, as well as a couple of others. The 88’s Luftwaffe Command stand needed a bit of touching up, and there’s a final command stand I can’t remember. Perhaps a Leutnant stand for the Grenadierkompanie? I’ll have to check. It’s also possible I built one too many unit leader stands back in the day, but whatever…

Battlefront Miniatures, Flames of War, DAK, Afrika Korps, Deutsches Afrikakorps, 15mm, 1/100 scale, Motorcycle and Sidecar

Battlefront Miniatures, Flames of War, DAK, Afrika Korps, Deutsches Afrikakorps, 15mm, 1/100 scale, Motorcycle and Sidecar

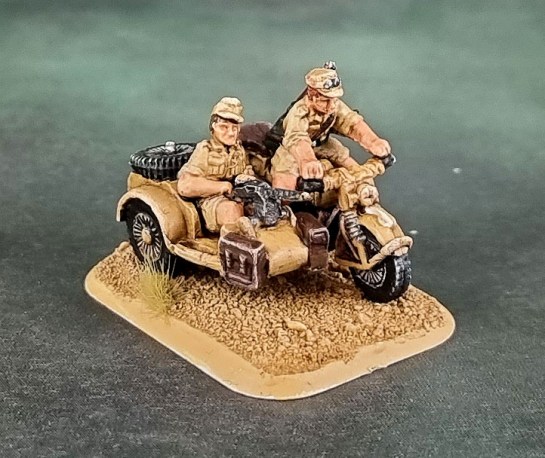
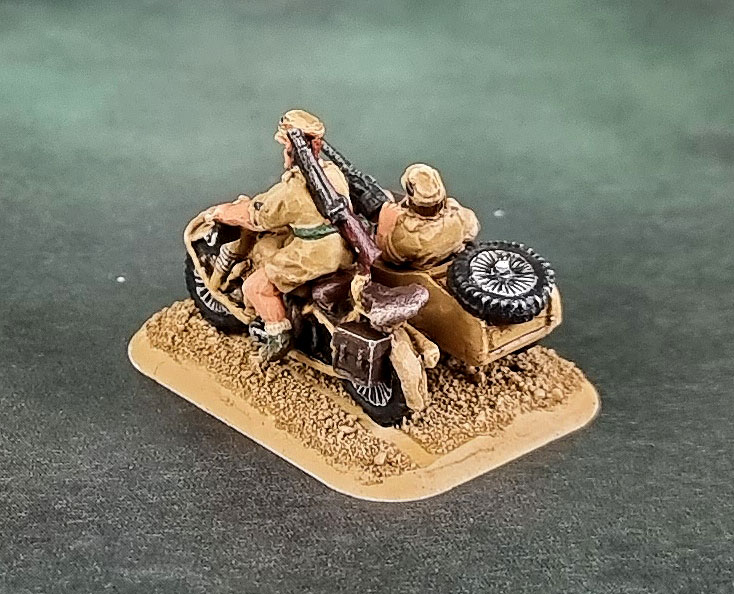
With those all done, it just left one final model – this Motorcycle Sidecar that is part of the Command unit. Like a lot of the models, it was built and partly basecoated, though the rider had to be located, cleaned up, primed and then painted entirely. And then it was done. It meaning both the sidecar as well as the actual entire army!

Battlefront Miniatures, Flames of War, DAK, Afrika Korps, Deutsches Afrikakorps Army

Completed Army pic 2/4.

Then all I needed to do was sit down for an age and type out this post, and I still need to go outside and photograph all of these little models. Then photoedit them, upload, caption, tag, edit and finish off the post, and write a conclusion…

Battlefront Miniatures, Flames of War, DAK, Afrika Korps, Deutsches Afrikakorps Army

Completed Army pic 3/4.

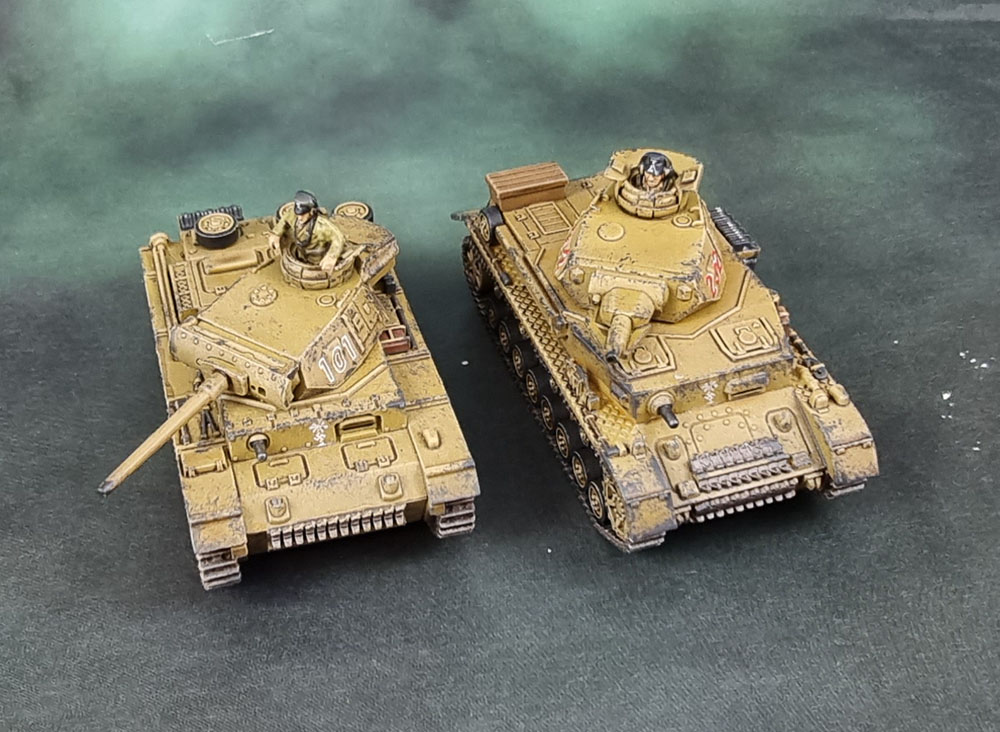
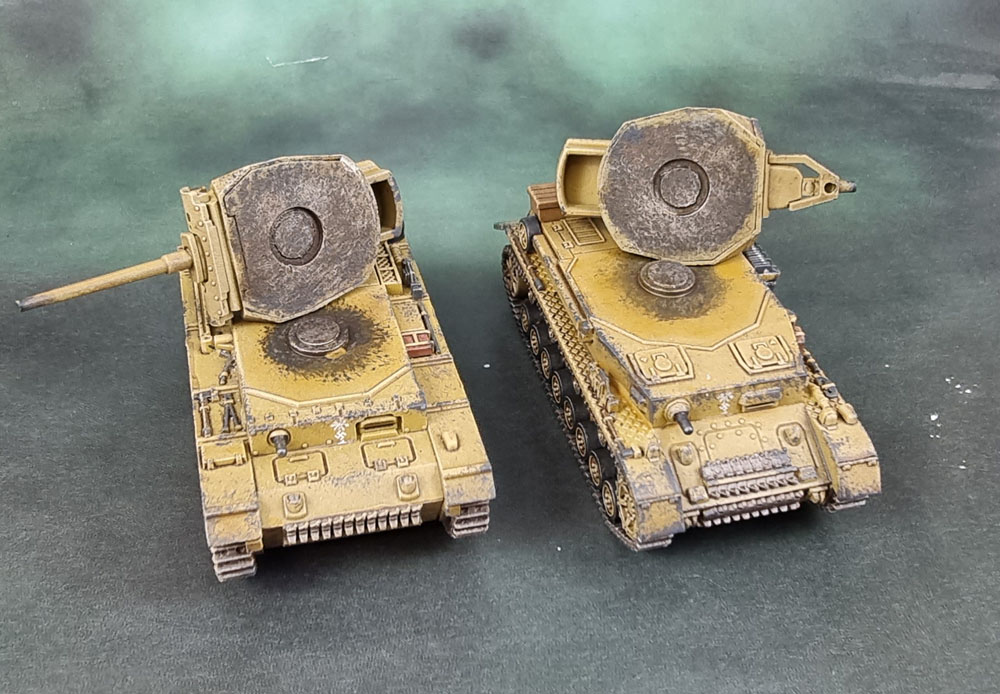
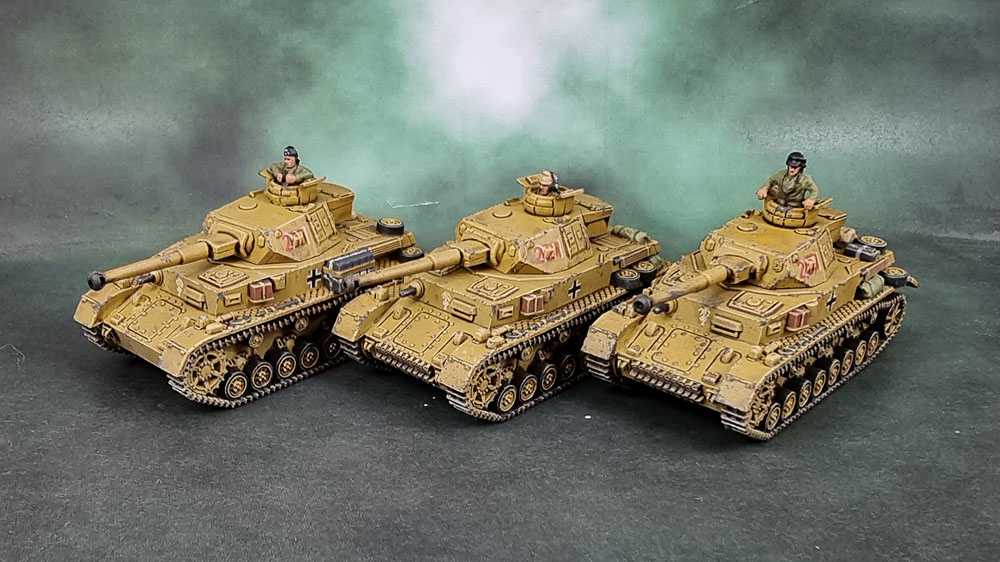
Of course, an army is never completely completed, as we wargamers all know. Looking forward, I’m now going to repaint those StuGs, and at some stage I’ll likely add a Zug of Panzer IIIs with perhaps a single IV to go with them. To make the army legal for post-rulebook versions of the list, I’ll have to get some trucks for the infantry, unless I change the entire force to a Panzergrenadier one and get a bunch of halftracks instead.

Battlefront Miniatures, Flames of War, DAK, Afrika Korps, Deutsches Afrikakorps Army

Completed Army pic 4/4.

Sadly, while I’ve been looking, I’ve been unable to locate models of the Sd.Kfz.251/1 Ausf A or B so I can have the correct version for the time period, with only the later versions being even vaguely readily available. I’m also not John from Just Needs Varnish who can just magically MacGyver commercial-quality WWII wargames models out of bits of plastic and cardboard and toenail clippings, so I can either put the idea onto the backburner for later or just buy a box of Ausf Ds and hope nobody notices and/or cares.

Anyway, an army is finished. Not something that happens every day, and even though it’s made of teeny-tiny army mans, I’m pretty chuffed about it – and a big thanks to Dave for running this month’s challenge, as well as to all the others who run similar mini painting challenges. Extra painting motivation is great, it can often get stuff that wouldn’t normally be touched onto the painting table and out of the backlog – and occasionally, as in this month – has a surprisingly positive result!