Sci-Fi Quonset-style Bunker for Necromunda/Shadow War/40k

Today I have a blast from the past. A quonset-style sci-fi bunker that dates from the 1990’s. I assume that it originated from either Amorcast or Epicast, though I can’t find it in Armorcast’s current online catalogue and it’s not made from the weird, expanded foam-like material that a bunch of my other Epicast buildings are made from, so…. dunno? I know if I could find it available again, I might be tempted to pick another one or two up.

With the recent release of Shadow War: Armageddon (aka Necromunda: Redux), my copy of the hardcover finally winging it’s way over to me, and the impending release of 40k 8th Edition, I thought it appropriate to share some of my older scenery pieces that perfectly fit both games.

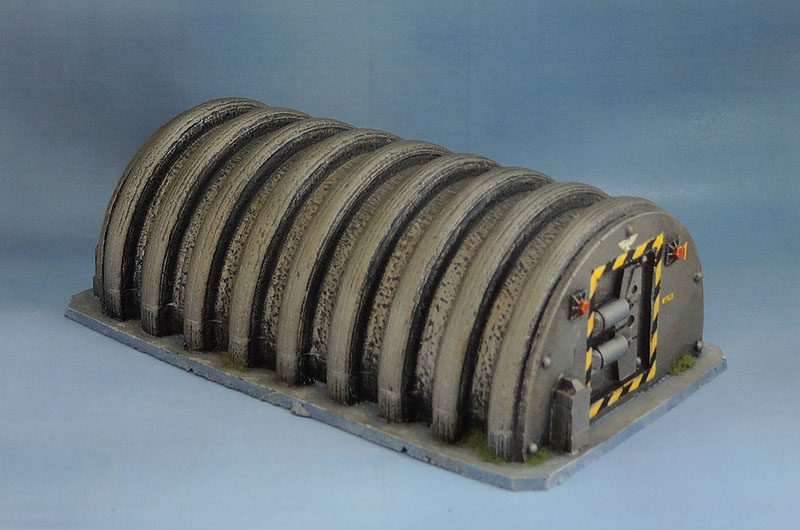
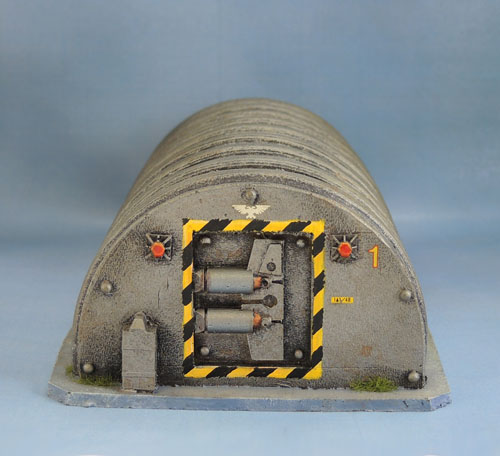
I actually painted this thing back in the day when I got it, which means it’s also been used in any number of games through the years. I picked it up and painted it during the days of Necromunda, which explains the blue-grey of the base, and the hazard stripes around the door. Which to be fair, does look like it’d cut you in half pretty easily. At least it’s got some warning lights!

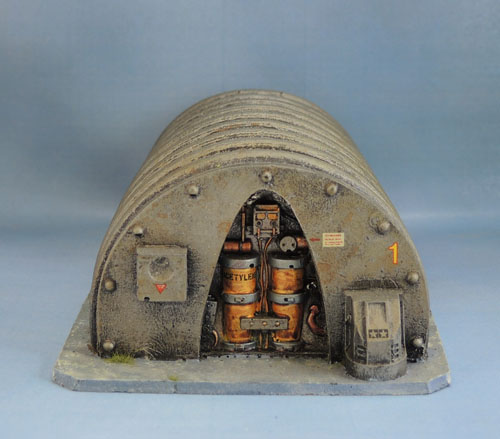
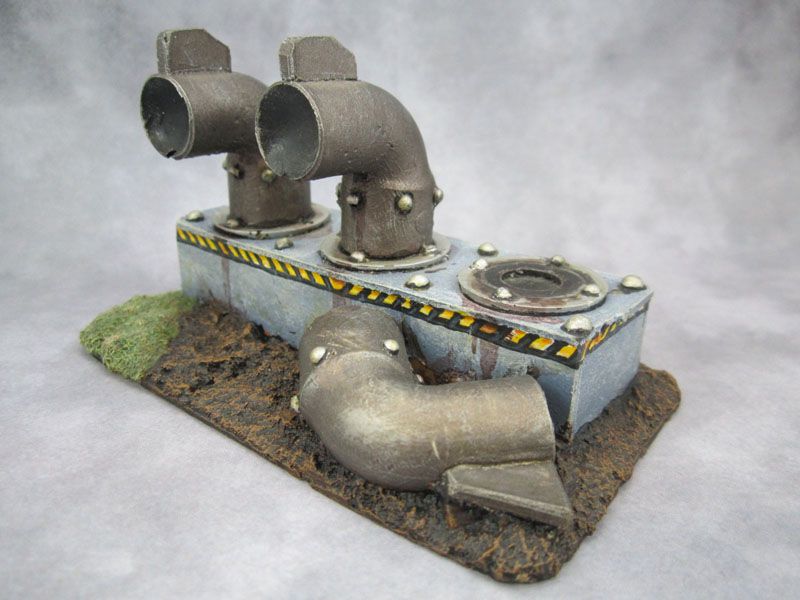
The rear view shows the sloppiness of what was considered good enough by many terrain makers of the day, especially for larger pieces like this. Not to mention my own indifference to filling small bubble holes. It looks like a Tamiya product lid of some description was added in by the original “sculptor” for some detail.

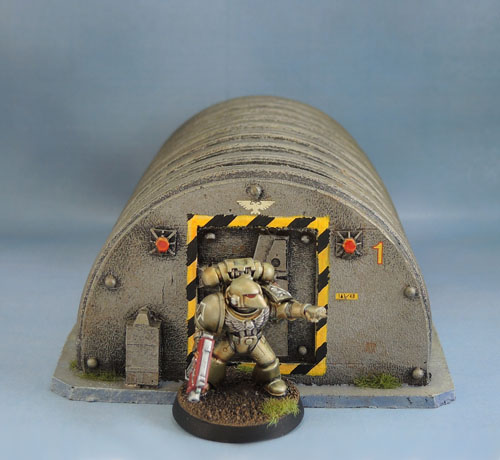
A Minotaur Space Marine provides us with scale for the terrain piece. Looks like it’d be a little crowded in there. Perfectly in keeping with Warhammer 40,000, then!

Sci-Fi Pipes and Generator

Another smallish update today. Basically, I haven’t been painting much at all over the last few weeks, and so I’m sharing some more “back-catalogue” scenery pieces. As usual for this stuff, these are at least 10 years old, yadda yadda. They were painted during the heyday of Necromunda, and have been used in many an underhive battle and on 40k tabletops since then. I’m also sure they’d fit in just fine for Warpath, DeadZone, and pretty much any other sci-fi tabletop or RPG games.

Armorcast (I think) pipes. OLD!


A view from higher up of the Armorcast pipes.

Rear view of the Armorcast pipes.

This piece, despite looking like the sort of thing that you could easily assemble from a few bits from your local hardware store is actually a purchased resin piece. Probably cost between AU$10-15 back in the day. It’s a slightly rough cast, and I think it’s an old piece from Armorcast – or possibly Forge World – not the current GW-subsidiary, but the US-based company that produced 40k-scaled Epic stuff back in the 1990’s. It’s a slightly rough paintjob on a rough cast of a rough terrain piece, but it’s good enough for most tables. I went with blue-grey because Necromunda, and as you can see, I wasn’t quite sure on what happens to the orientation of hazard stripes on certain things. Not sure what the iron sights on the pipes are in aid of, either.

Once I get past the batches of fantasy figures and terrain I’m working on right now, I may well wander down to the local hardware store and pick up some plumbing fittings to create some new and better-quality variations on this theme. Maybe some more exhaust ports like the above?  The traditional outflow pipe into a small pond of toxic sludge? There’s an endless supply of clichés to mine, after all…


Kit-bashed Generator

Kit-bashed Generator – Rear View

This generator is made of an old broken toy part that many of you have probably already recognised – yes, the Hoth Generator from Empire Strikes Back. It’s from an old, old Micro-playset that was a bit broken and busted up from many play hours as a kid (and was second-hand and incomplete when I got it) The main body is made of two audiocassette cases glued together, the box on the side is a random part from a model kit, and the control panel on the front is a thumb switch from a kids’ flashlight. Some flyscreen mesh and a rectangle of card over the top to finish up. Mounted the whole thing on some MDF, then add paint and a couple of decals to finish.